👋 Welcome to your pre-pickup walkthrough. Browse at your own pace — every system is documented across the tabs above. The Pre-pickup quiz at the end is required before your scheduled pickup time. Multiple attempts are OK; we'll be notified when you pass.
Two AirTags are installed in this RV
They exist only to help us locate and recover the RV in case of theft or loss — never to track you, your phone, or your trip.
If you have an iPhone, you may receive a notification along the lines of "AirTag Found Moving With You". That alert is expected — it's our AirTags doing exactly what they're designed to do. You can safely dismiss it.
Questions? Get in touch before you drive off.
Know before you drive
Height11'6" / 3.50 m
Length30'0" / 9.15 m (slides in)
Width8'6" / 2.59 m (slides in)
Weight19,500 lb / 7,845 kg
Before you drive — every time
Run the full Leaving your campsite checklist before moving the RV. Don't shortcut it — that's where most damage starts.
Every window closed. Even a cracked window can rip off at highway speed.
Never drive in a rush. Most damage to this RV happens when someone is hurrying. Build in extra time.
It drives easily — but it is 11'6" tall, 8'6" wide, and 19,500 lb. Bigger and heavier than anything most renters have driven. Stay alert the whole trip, not just the first hour.
It takes WIDE turns. Don't cut corners — swing further out than feels natural.
Rear overhang: the RV body extends ~4–5 ft behind the rear wheels. When you turn, the rear swings WIDE in the OPPOSITE direction:
· Turning LEFT → rear swings RIGHT. Watch for cars, posts, curbs on your right rear.
· Turning RIGHT → rear swings LEFT. Watch your left rear.
Outside walkthrough
1 — Front Right Corner & Fresh Water
We start at the outside front right corner and walk around the RV. First stop: filling the fresh water tank.
Starting point — front right corner review
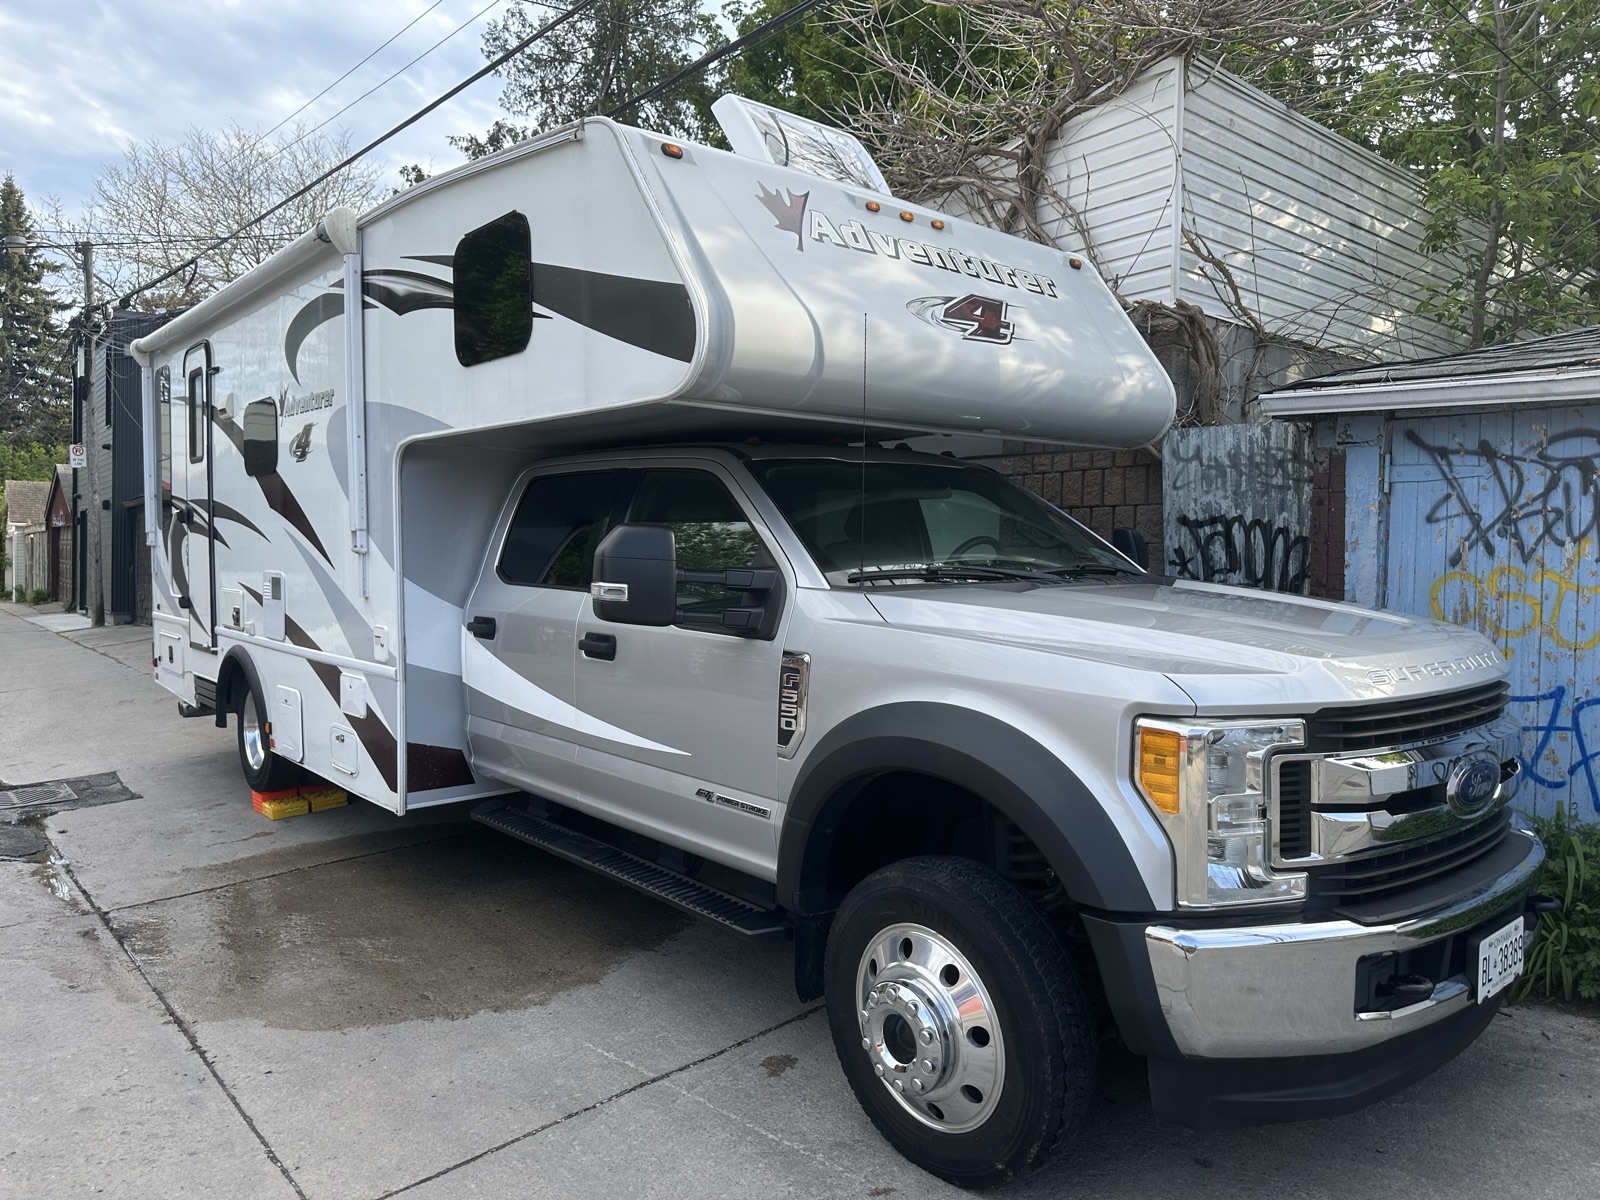
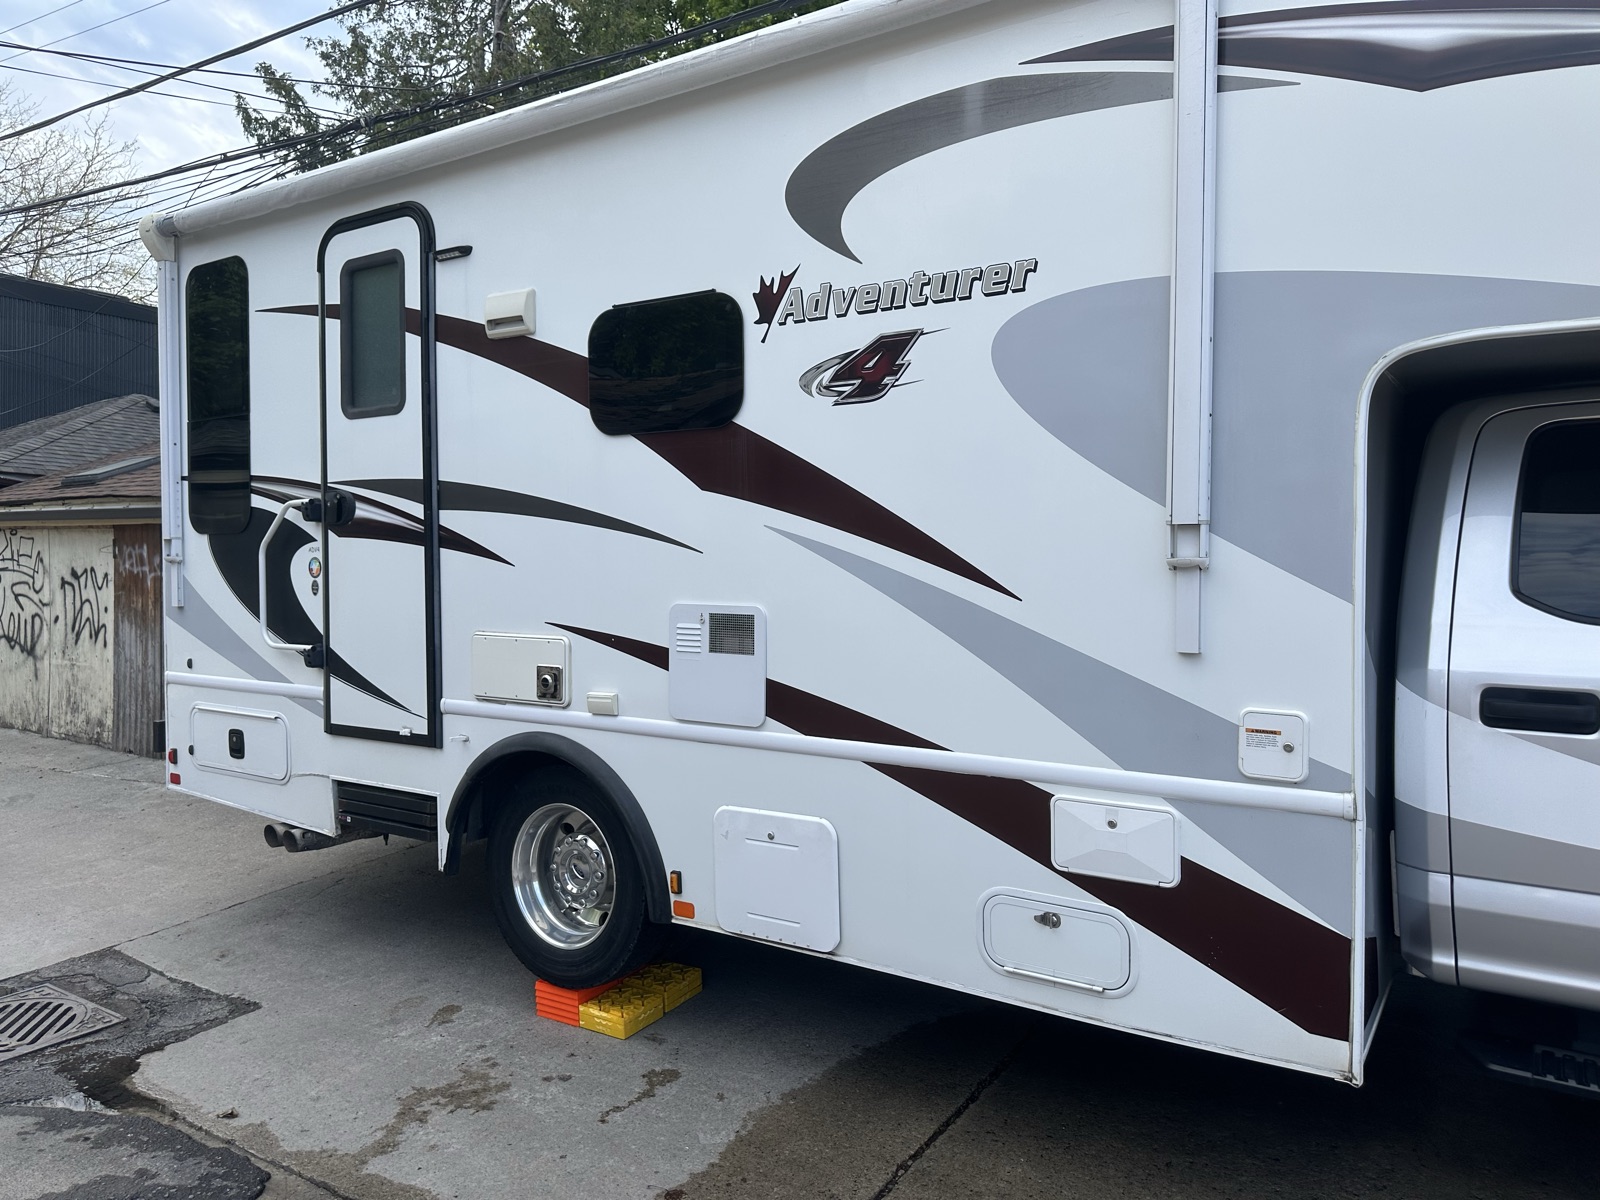
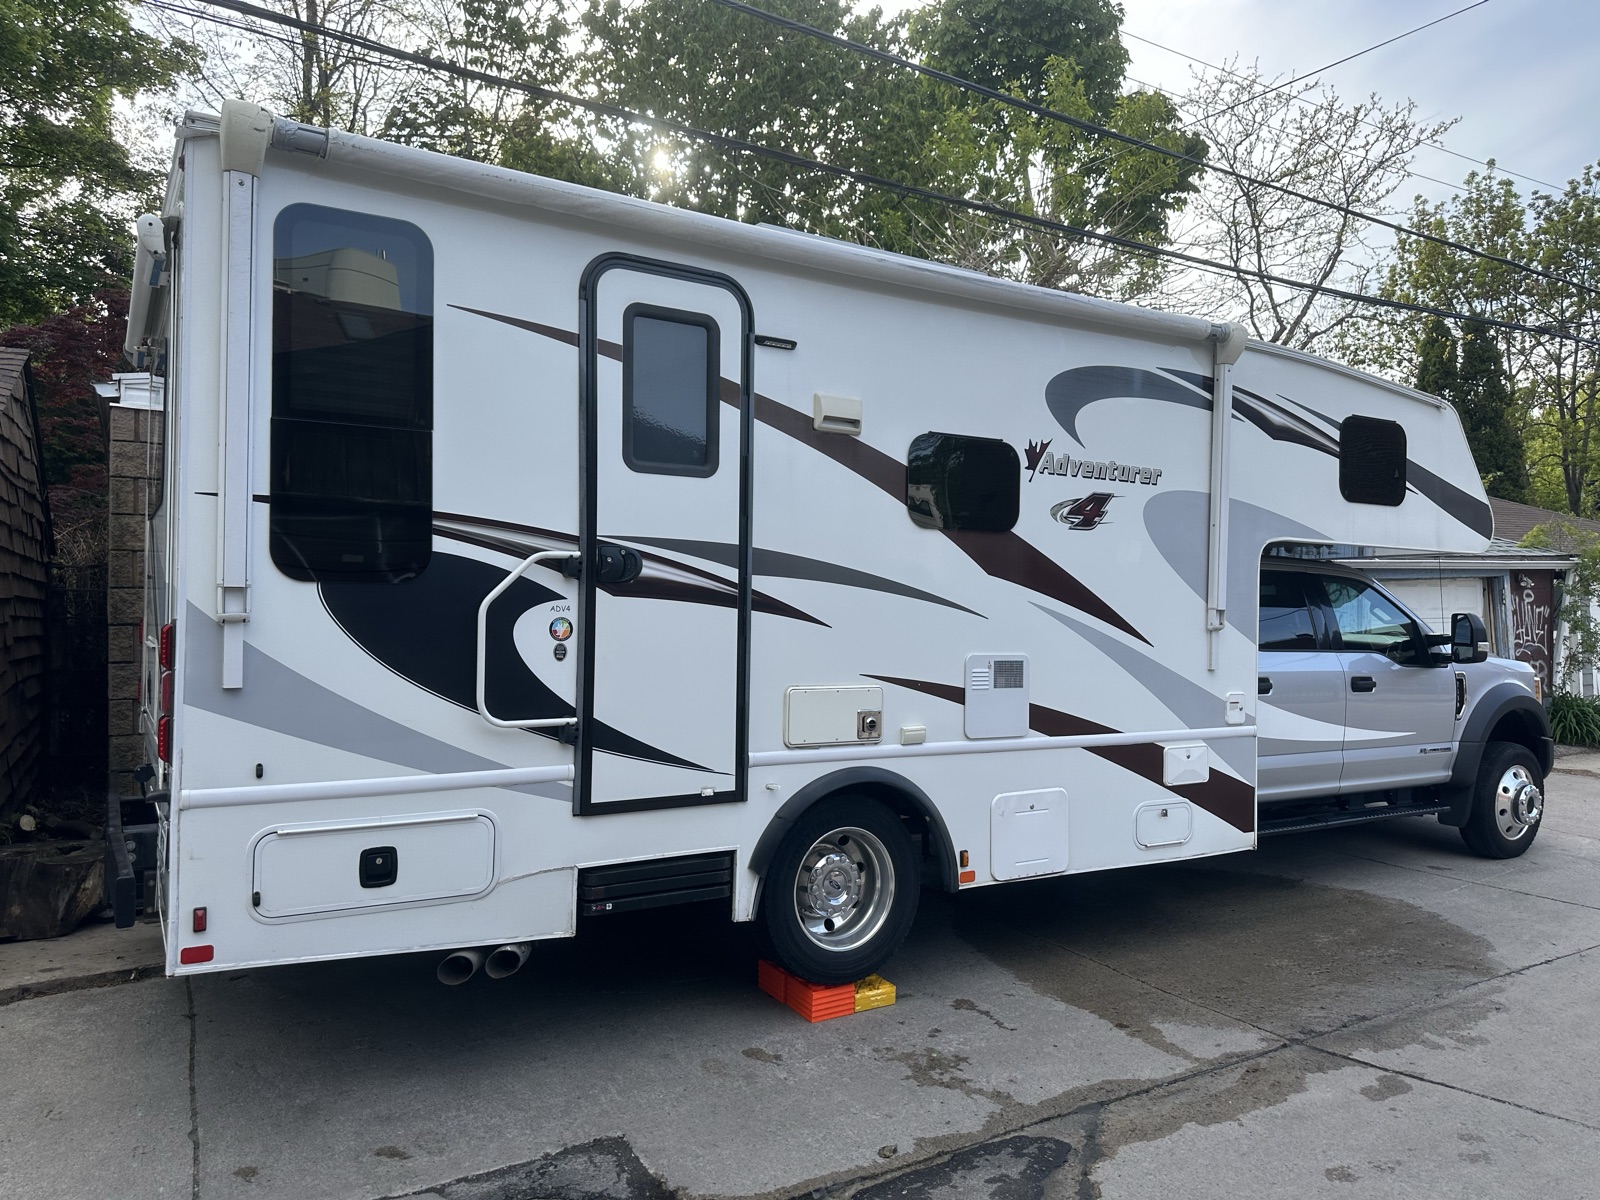
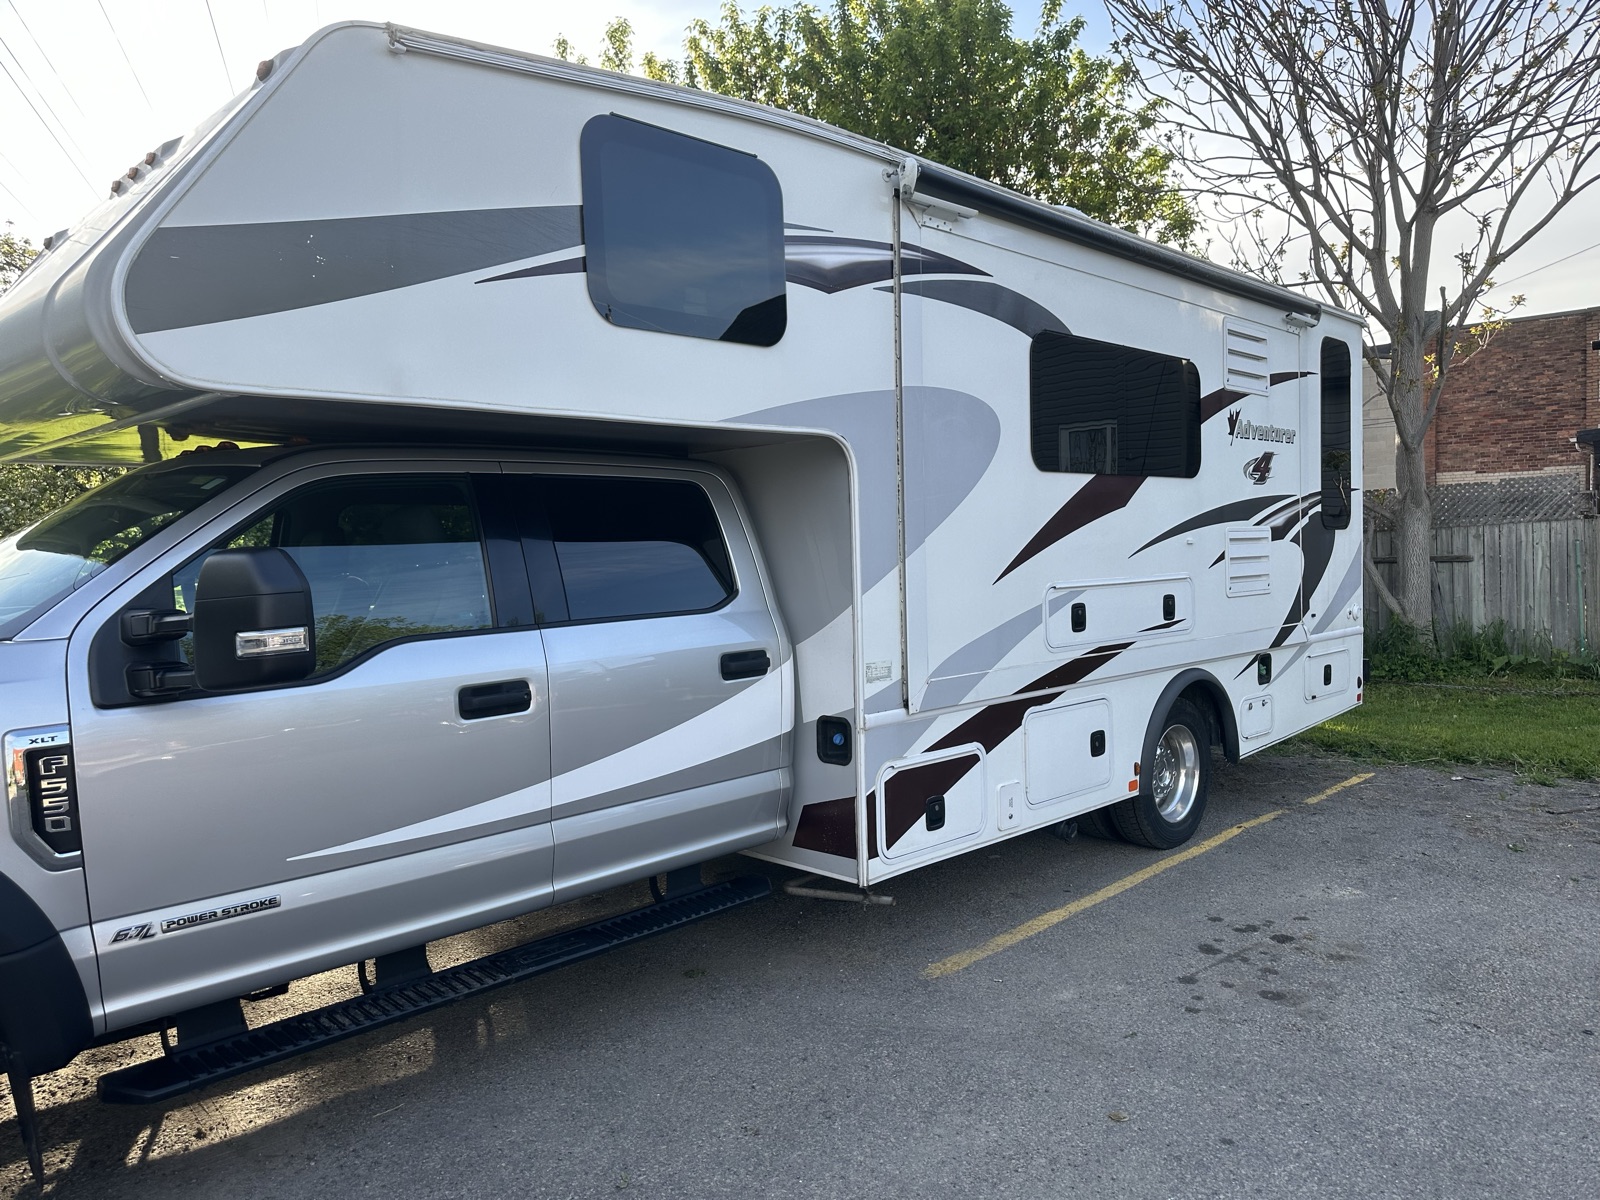
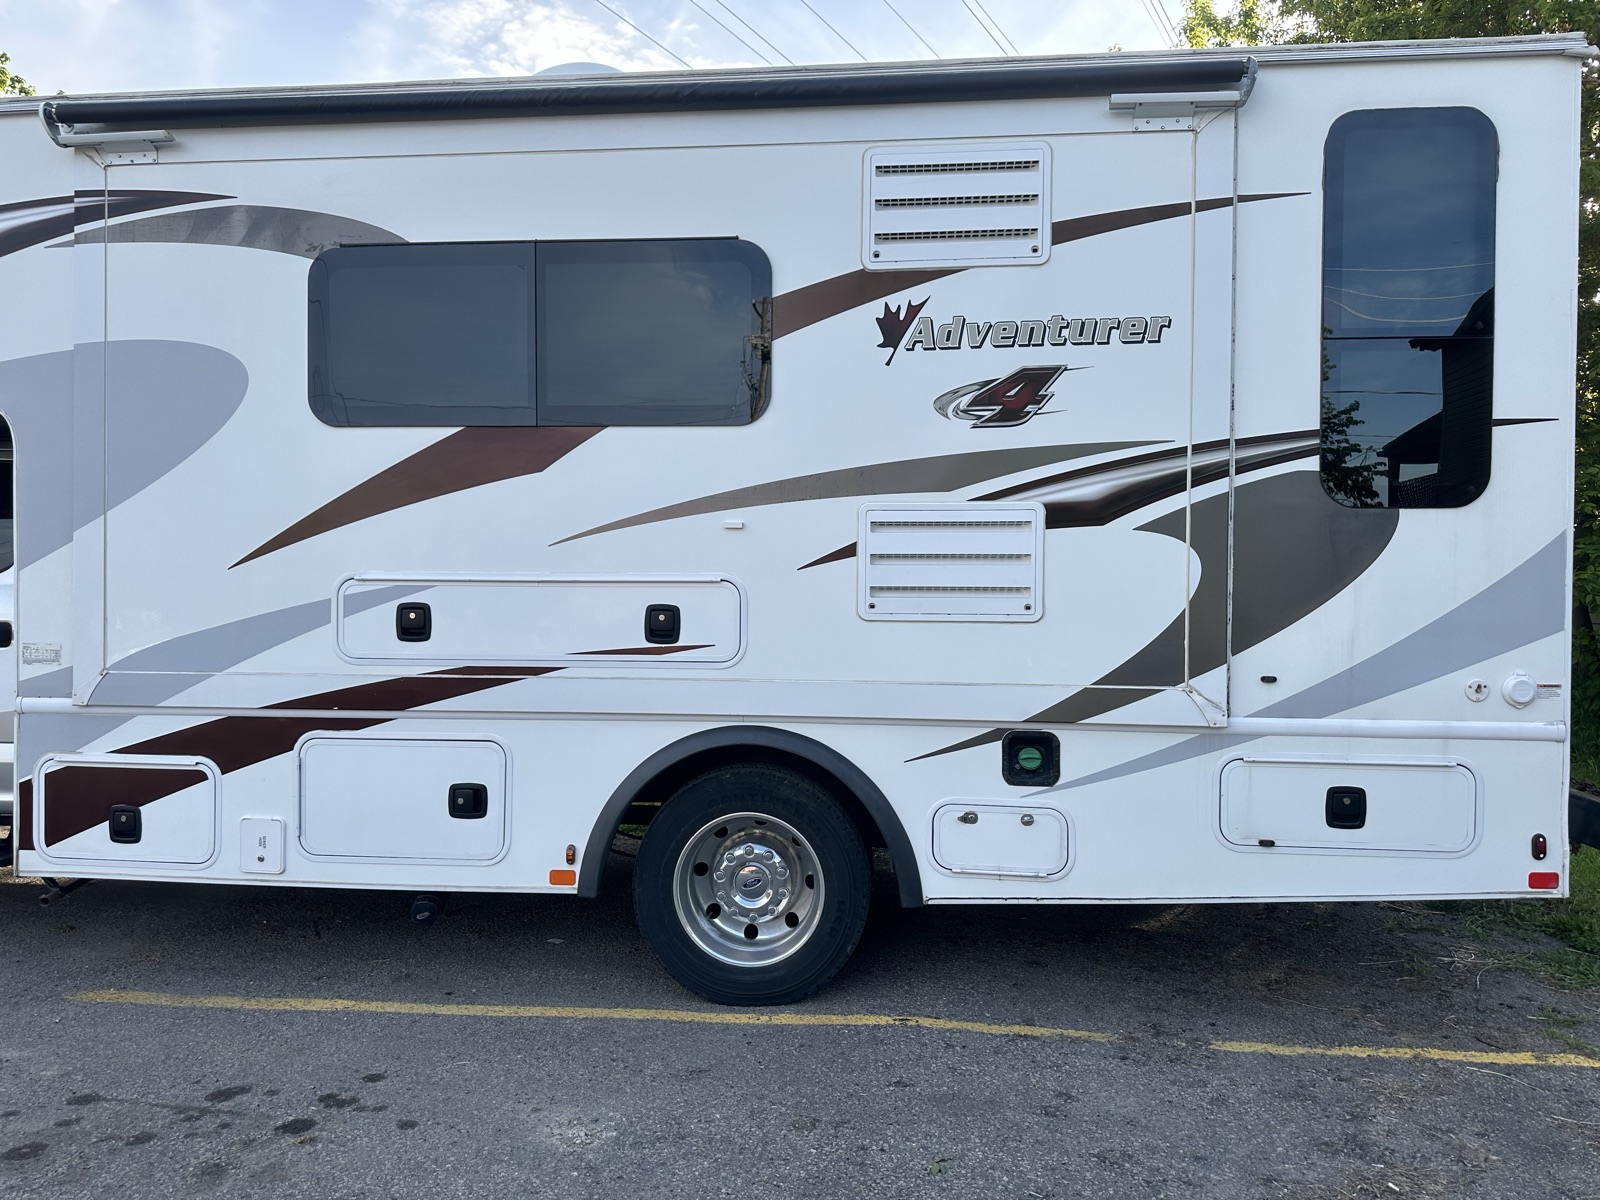
IMG_8005 Front right — RV from the front-right three-quarter angleIMG_8004 Right side of the RV — entry door visibleIMG_8003 Back right of the RV
We begin the walkthrough here, at the outside front right corner of the RV. From this point we'll walk around the whole vehicle before stepping inside.
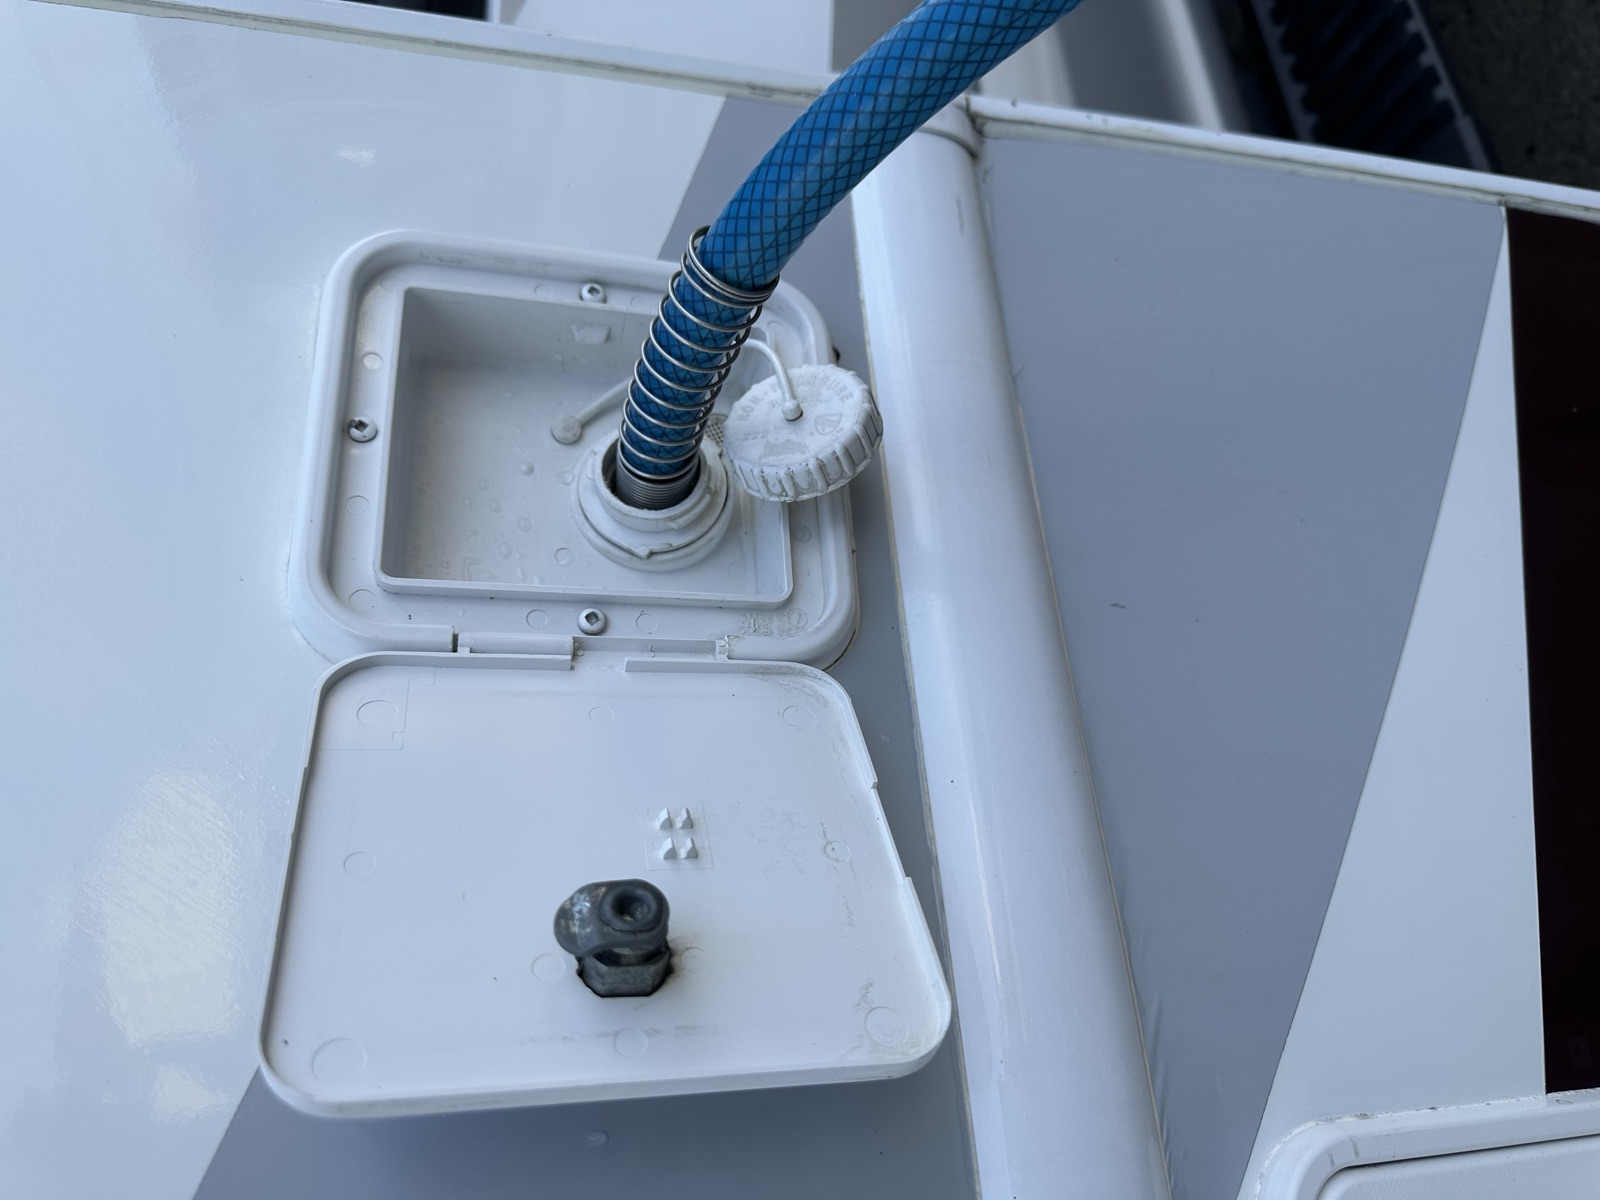
Fresh water tank — filler inlet review★ quick-ref
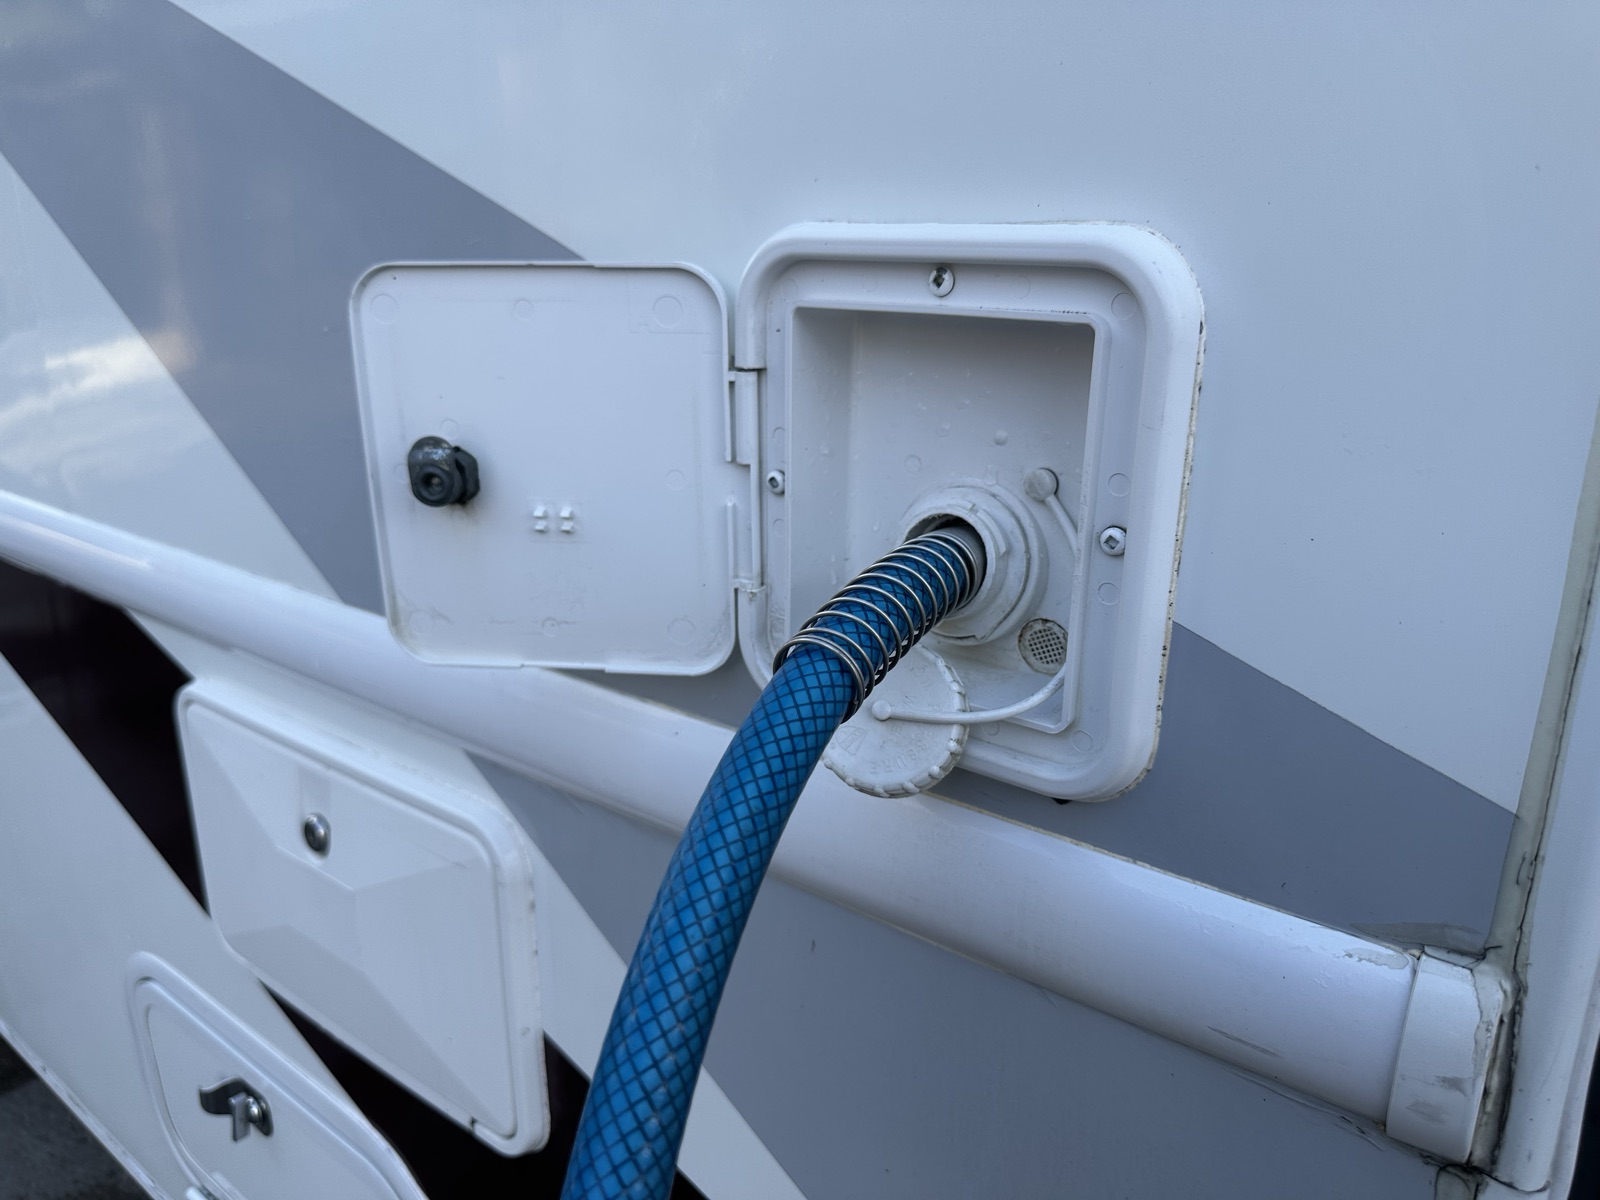
IMG_7938 Fresh water filler — locationIMG_7939 Fresh water filler — close-up
This is the fresh water tank inlet. Tank capacity is 60 US gal (225 L). Use it when there is no city-water hookup on your site, or when you want water available away from the campground.
Do
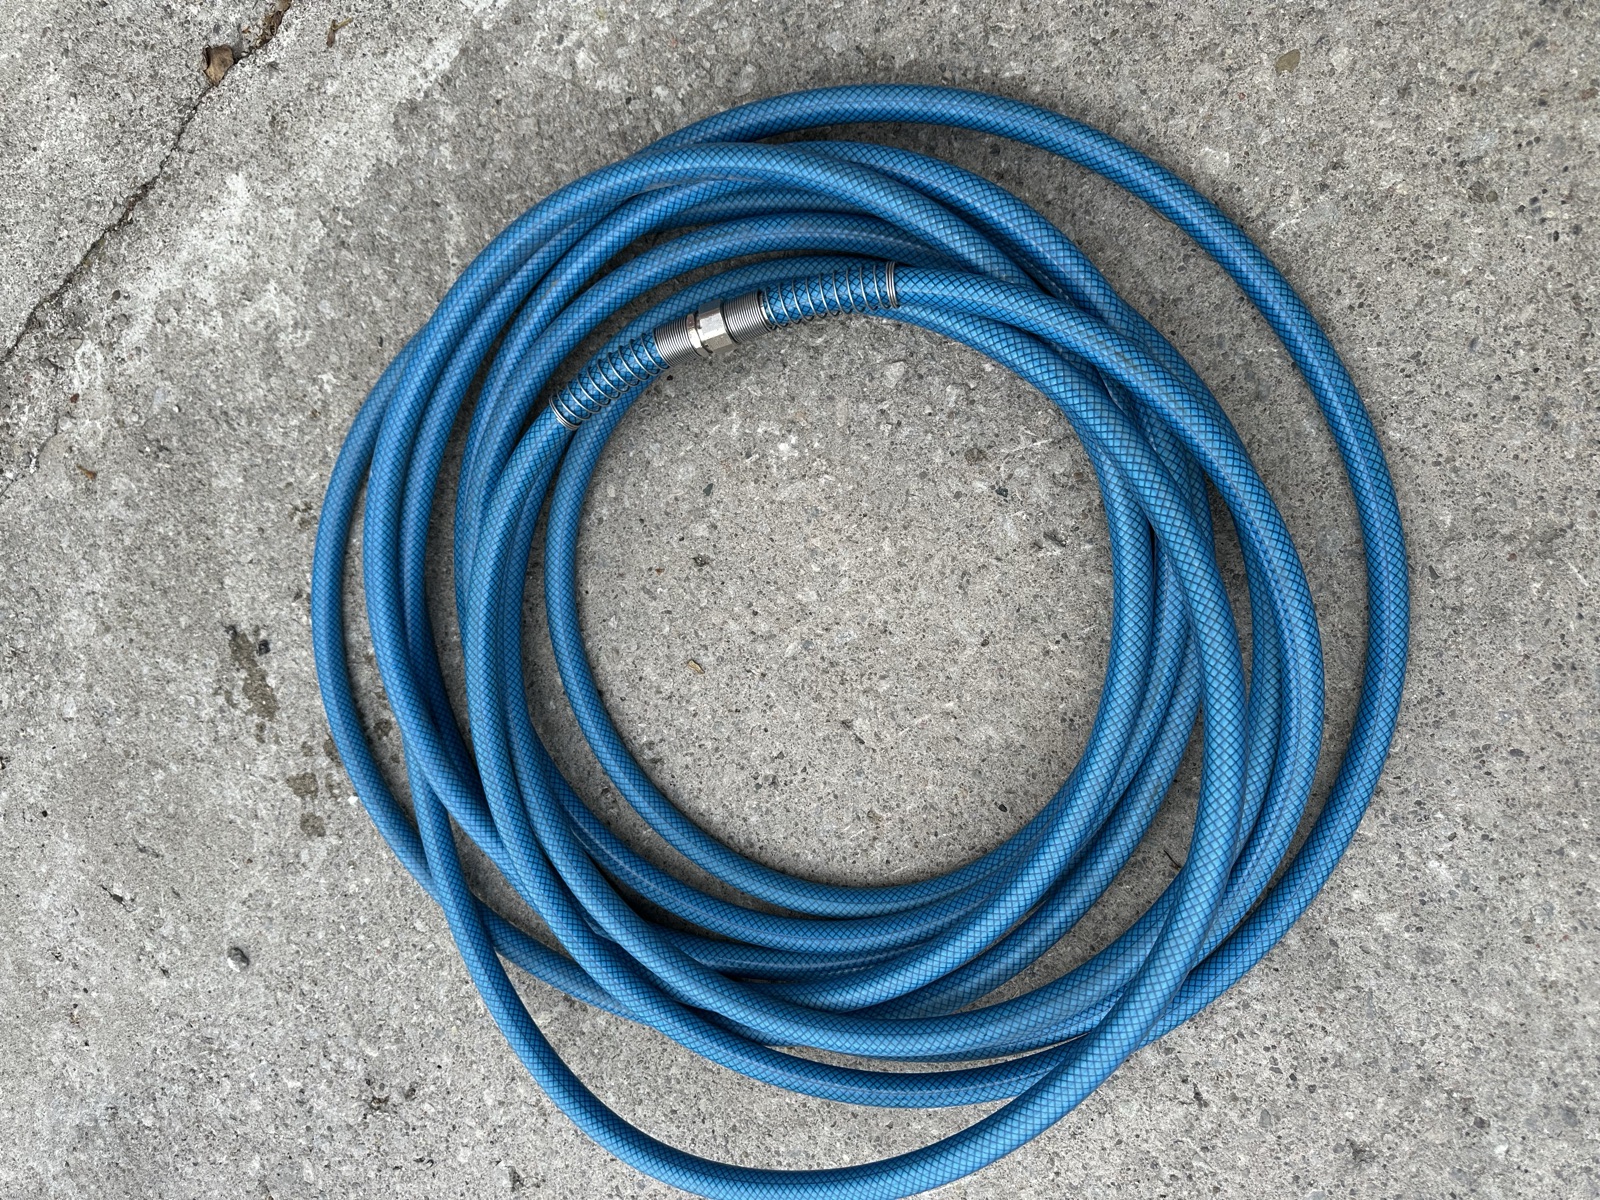
Use the blue potable-water hose in the left storage bay to fill.
Only top up to what you'll need on the road — driving with a full tank wastes diesel.
Close the white cap and the access door when done.
Caution
Don't drive with a full fresh water tank unless you have to — 225 L is ~225 kg of extra weight.
Only use potable water sources. Never use the grey/black sewer hose to fill — keep them strictly separate.
2 — Right Side, Walking Toward the Rear
Walking along the right side of the RV from front to back. Each compartment door has a different purpose — most you don't need to touch, but you need to know what's behind them.
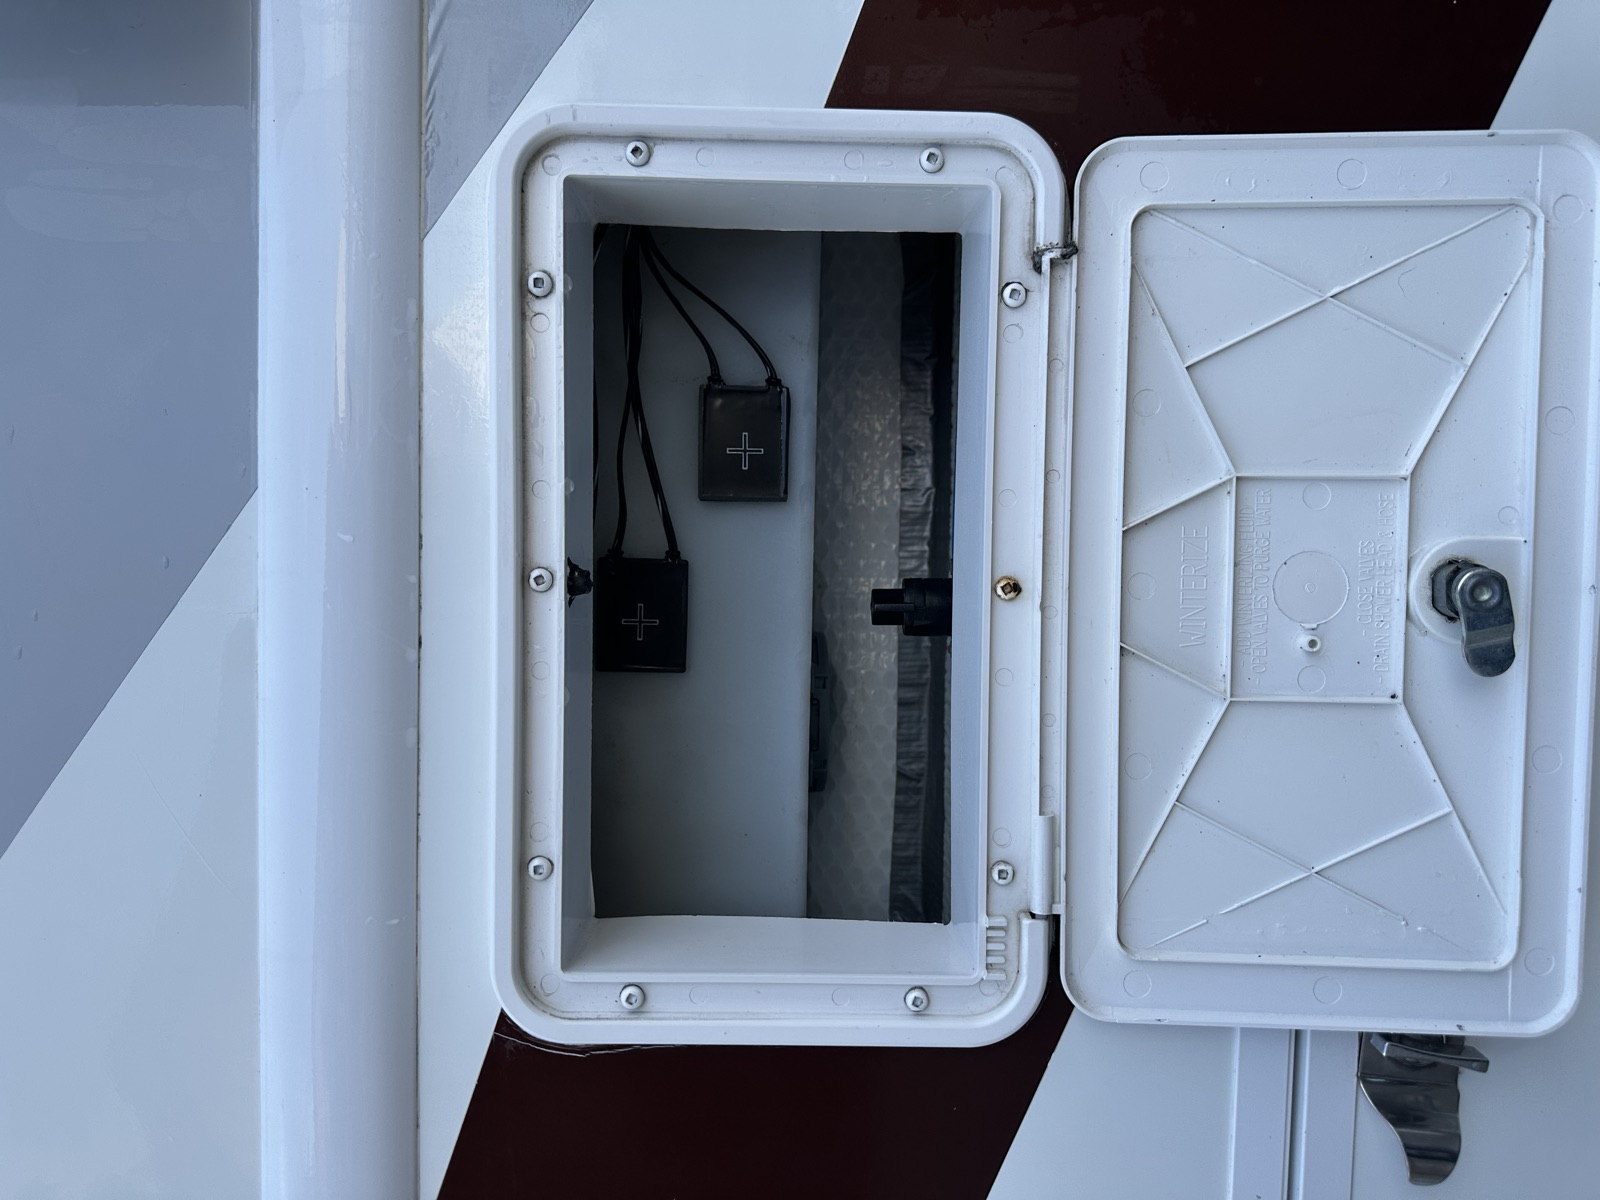
Fresh water tank compartment draft
IMG_7940 Fresh water tank compartment (nothing to operate here)
This door covers the actual fresh water tank. Nothing to do here — just so you know what's behind it.
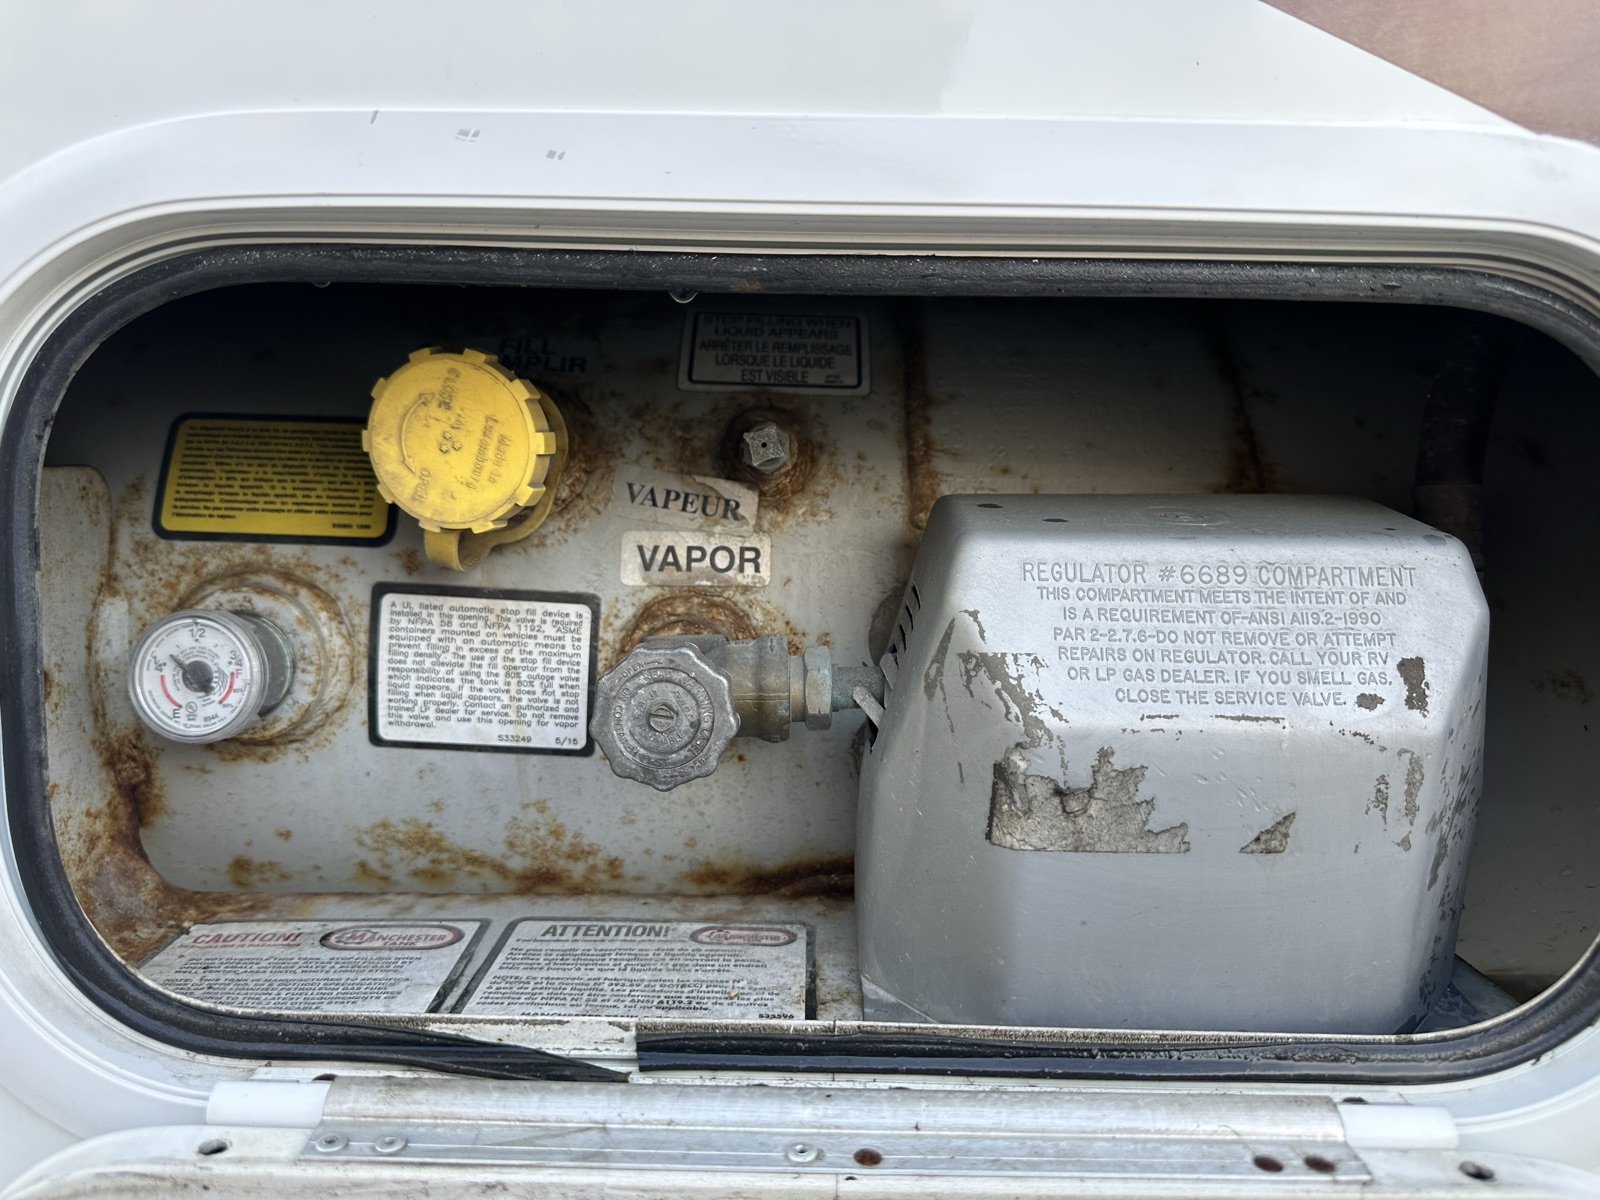
Propane tank & valve review★ quick-ref
IMG_7941 Propane gauge + shutoff valve
The propane tank lives here. Capacity is 22 US gal (83 L). On top: a level gauge and a shutoff valve. A full tank lasts a long time — roughly 1/8 of a tank per week for fridge + stove only. In cold weather the furnace becomes the main propane consumer.
This is the only outside door without a key lock — use it to identify the propane compartment quickly.
Do
Check the gauge before each trip. Don't wait until empty to refill.
Refills available at most gas stations and Canadian Tire stores — a clerk will handle the whole process.
Before a refill: turn off the furnace, water heater, fridge, and stove, then close this valve.
Caution
Close the valve before refuelling at the gas pump.
We hand you the RV with enough propane for a typical trip. Any refills during your trip are at your own expense.
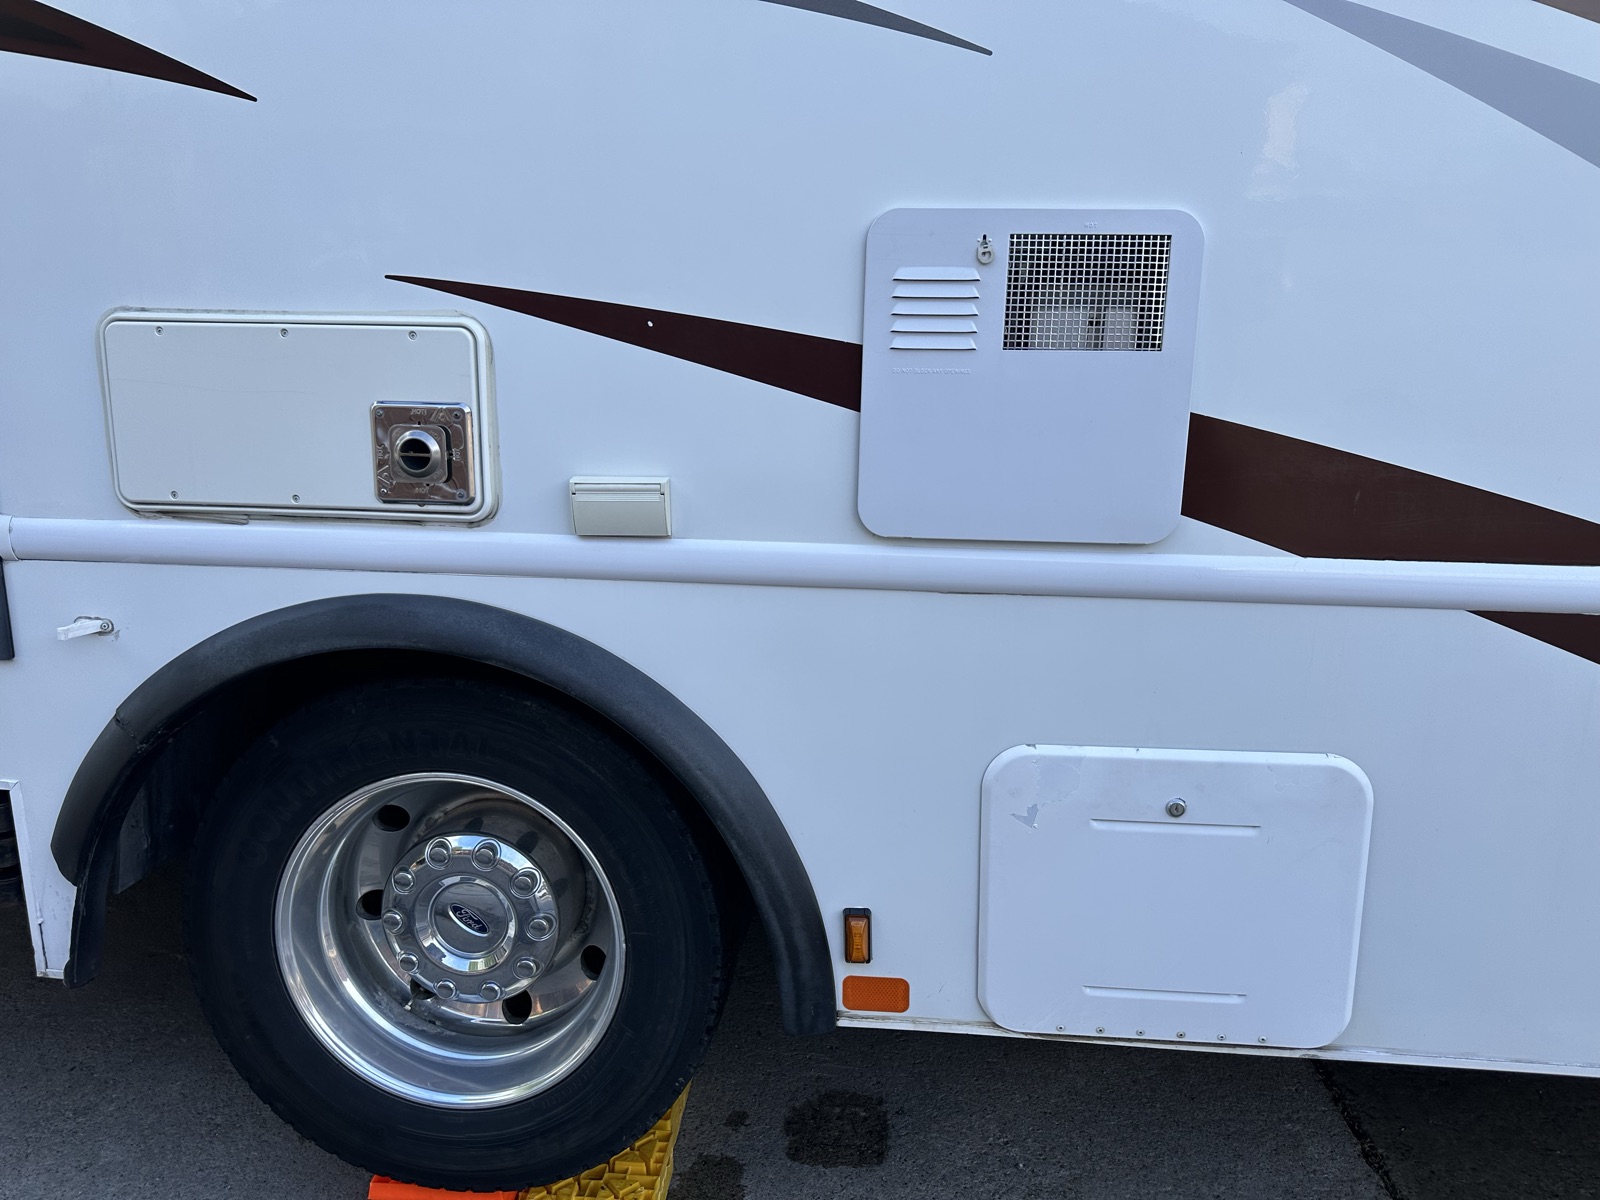
House battery compartment review
IMG_7942 Three compartments shown — batteries are bottom right look: bottom right
The house batteries live here (bottom-right door in the photo). Nothing to operate from outside — just so you know what's inside.
Water heater access review
IMG_7942 Water heater access is top right look: top right
The water heater is behind the top-right panel in this photo. Don't open while operating — the unit can be very hot.
Caution
Hot surface when in use — do not touch.
Furnace access review
IMG_7942 Furnace access is top left look: top left
Furnace access is behind the top-left panel in this photo. Same caution as the water heater.
Caution
Hot surface when in use — do not touch.
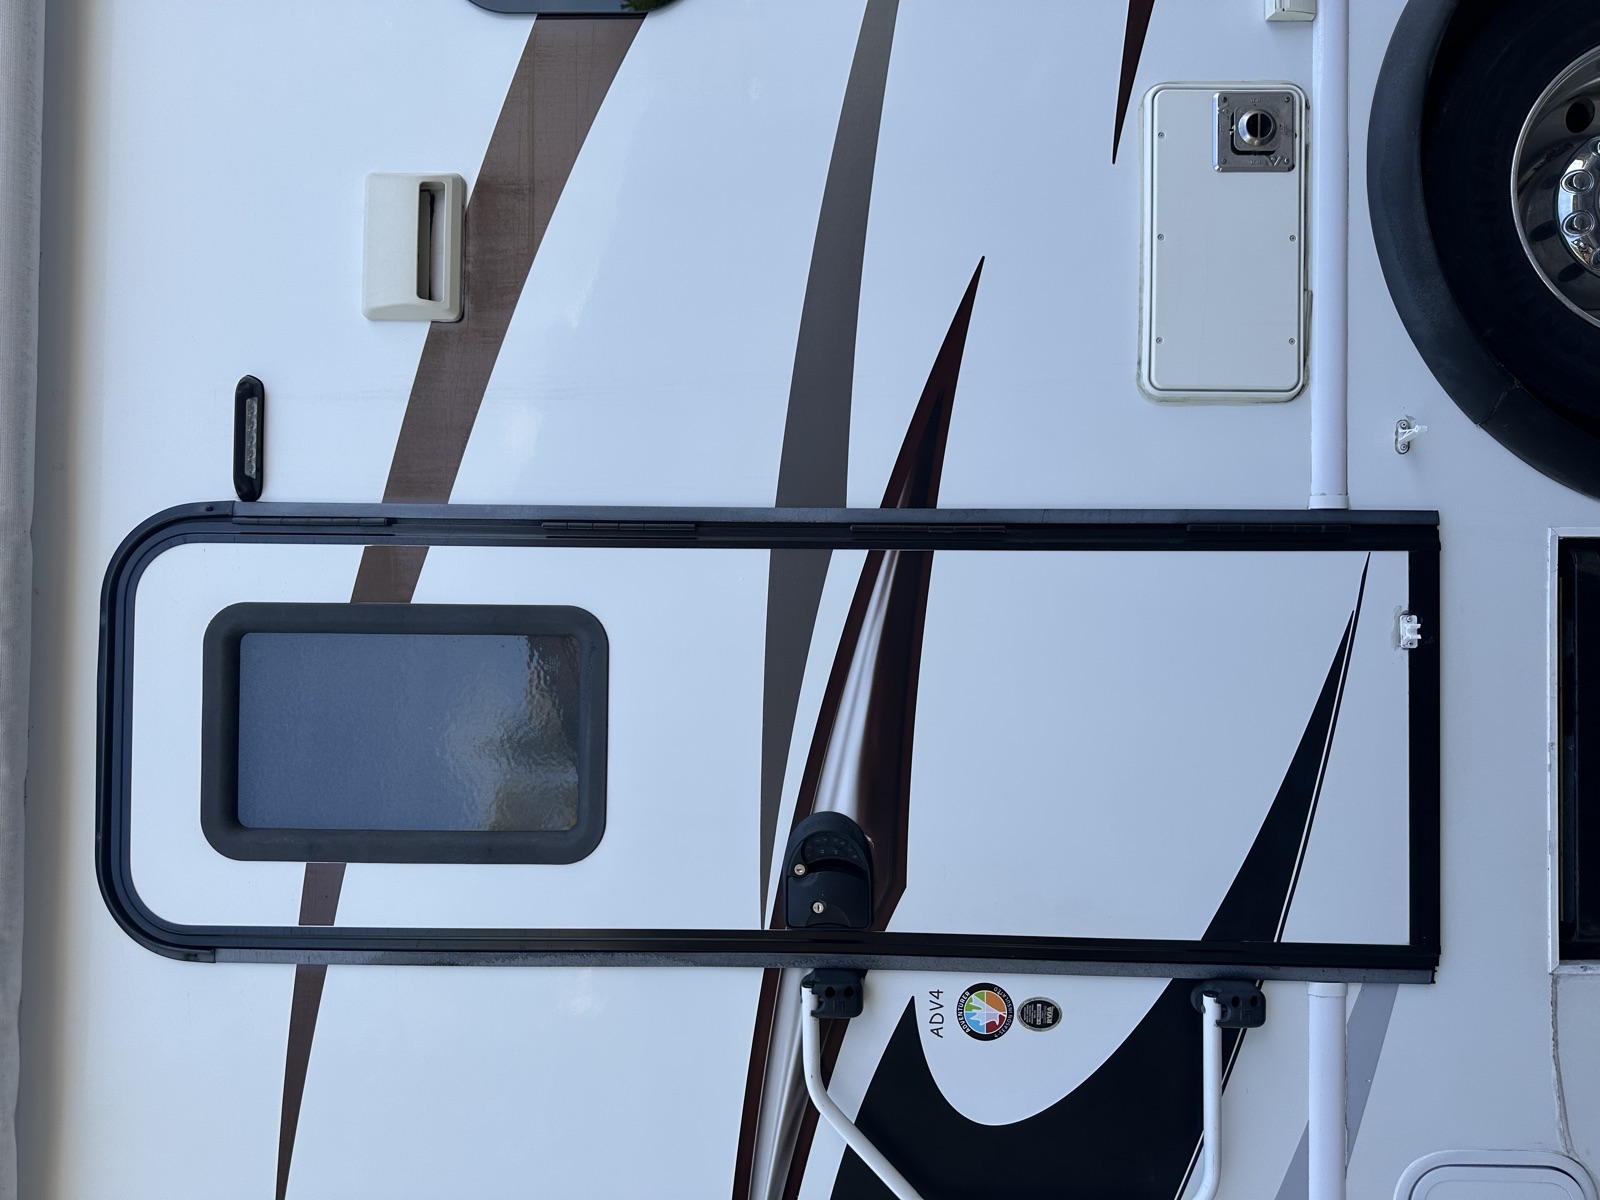
Main entry door draft★ quick-ref
IMG_7943 Main entry door from outside
This is the main door you'll use to get in and out. We'll come back here once the outside tour is done.
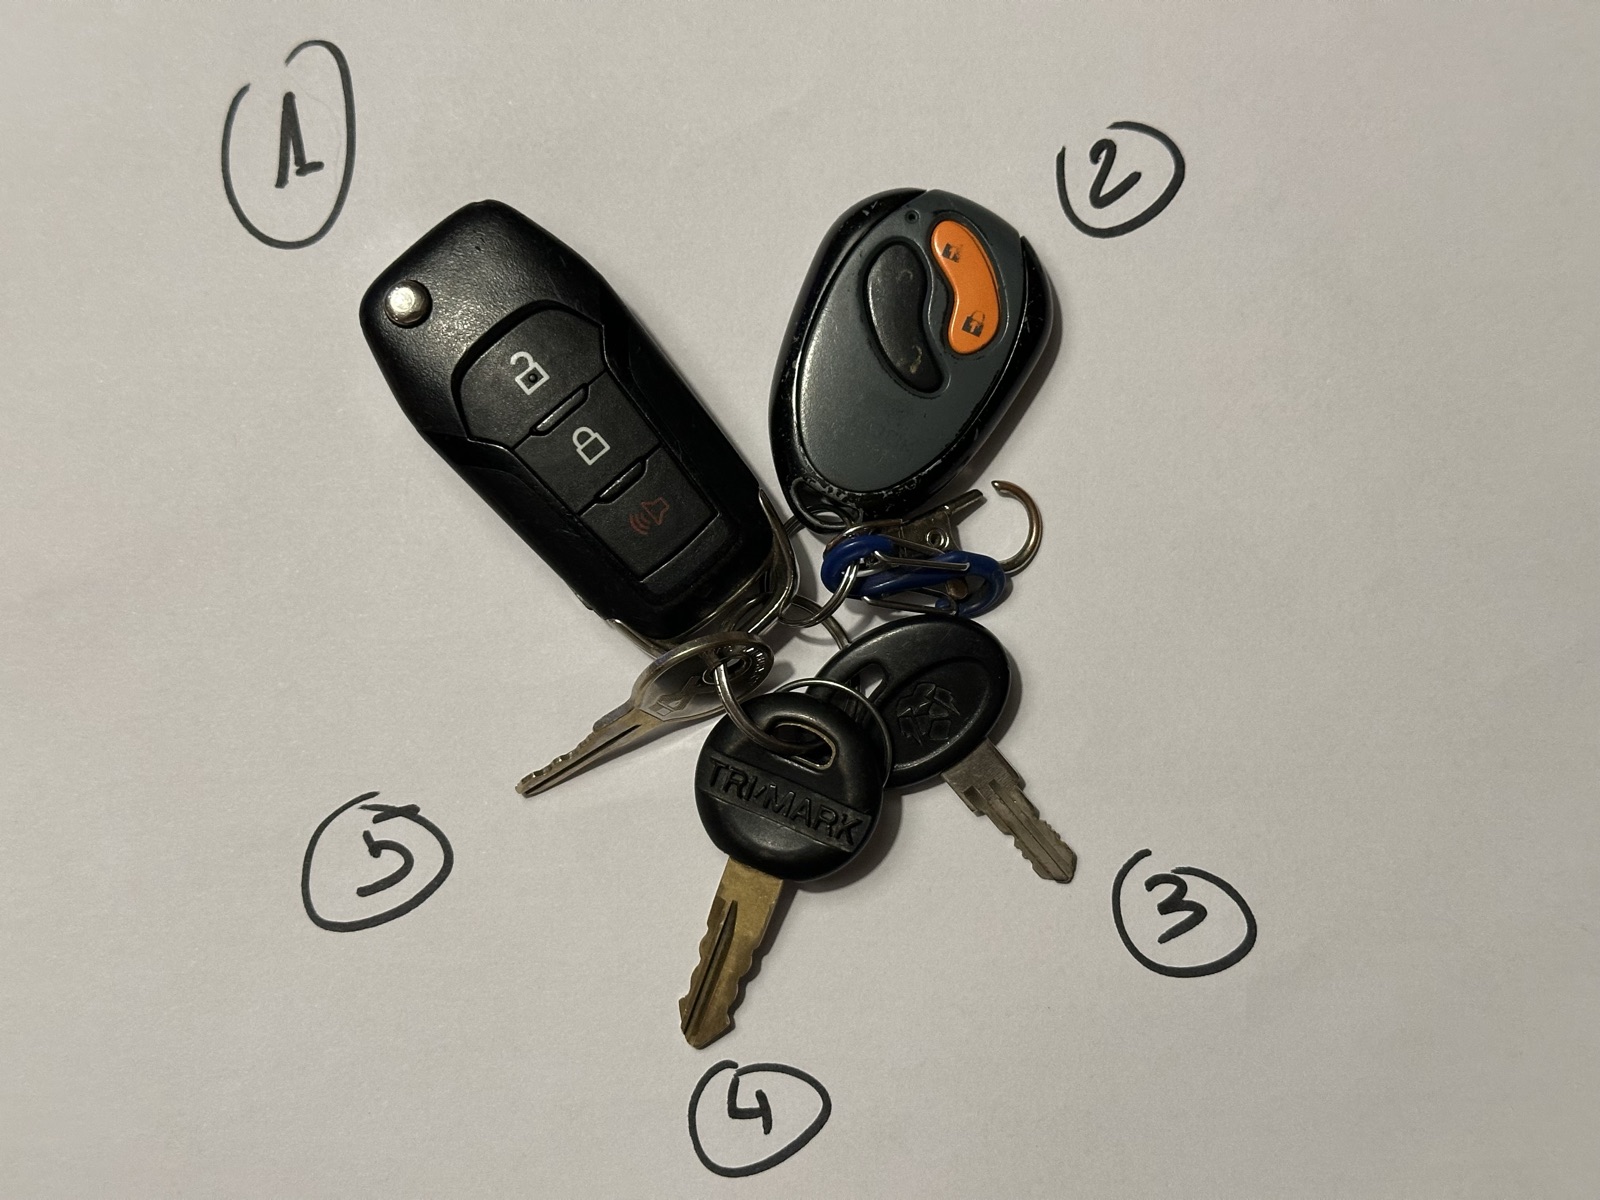
Key set — what each key opens review★ quick-ref
IMG_8027 Full key set — numbered 1–5 (image is intentionally blurred for security)
Five keys/fobs on the set. Numbered in the photo:
Truck key — Ford flip key (ignition + truck doors).
RV main door remote — wireless lock/unlock for the entry door.
RV main door key — physical key for the entry door.
Trunks key — opens all storage compartments with black handles.
Utility doors key — opens compartments with a grey keyhole (fresh water inlet, water systems bay, etc.).
Do
Walk through all five before leaving the lot. Identify each — it's much harder to figure out at a dark campsite at 10pm.
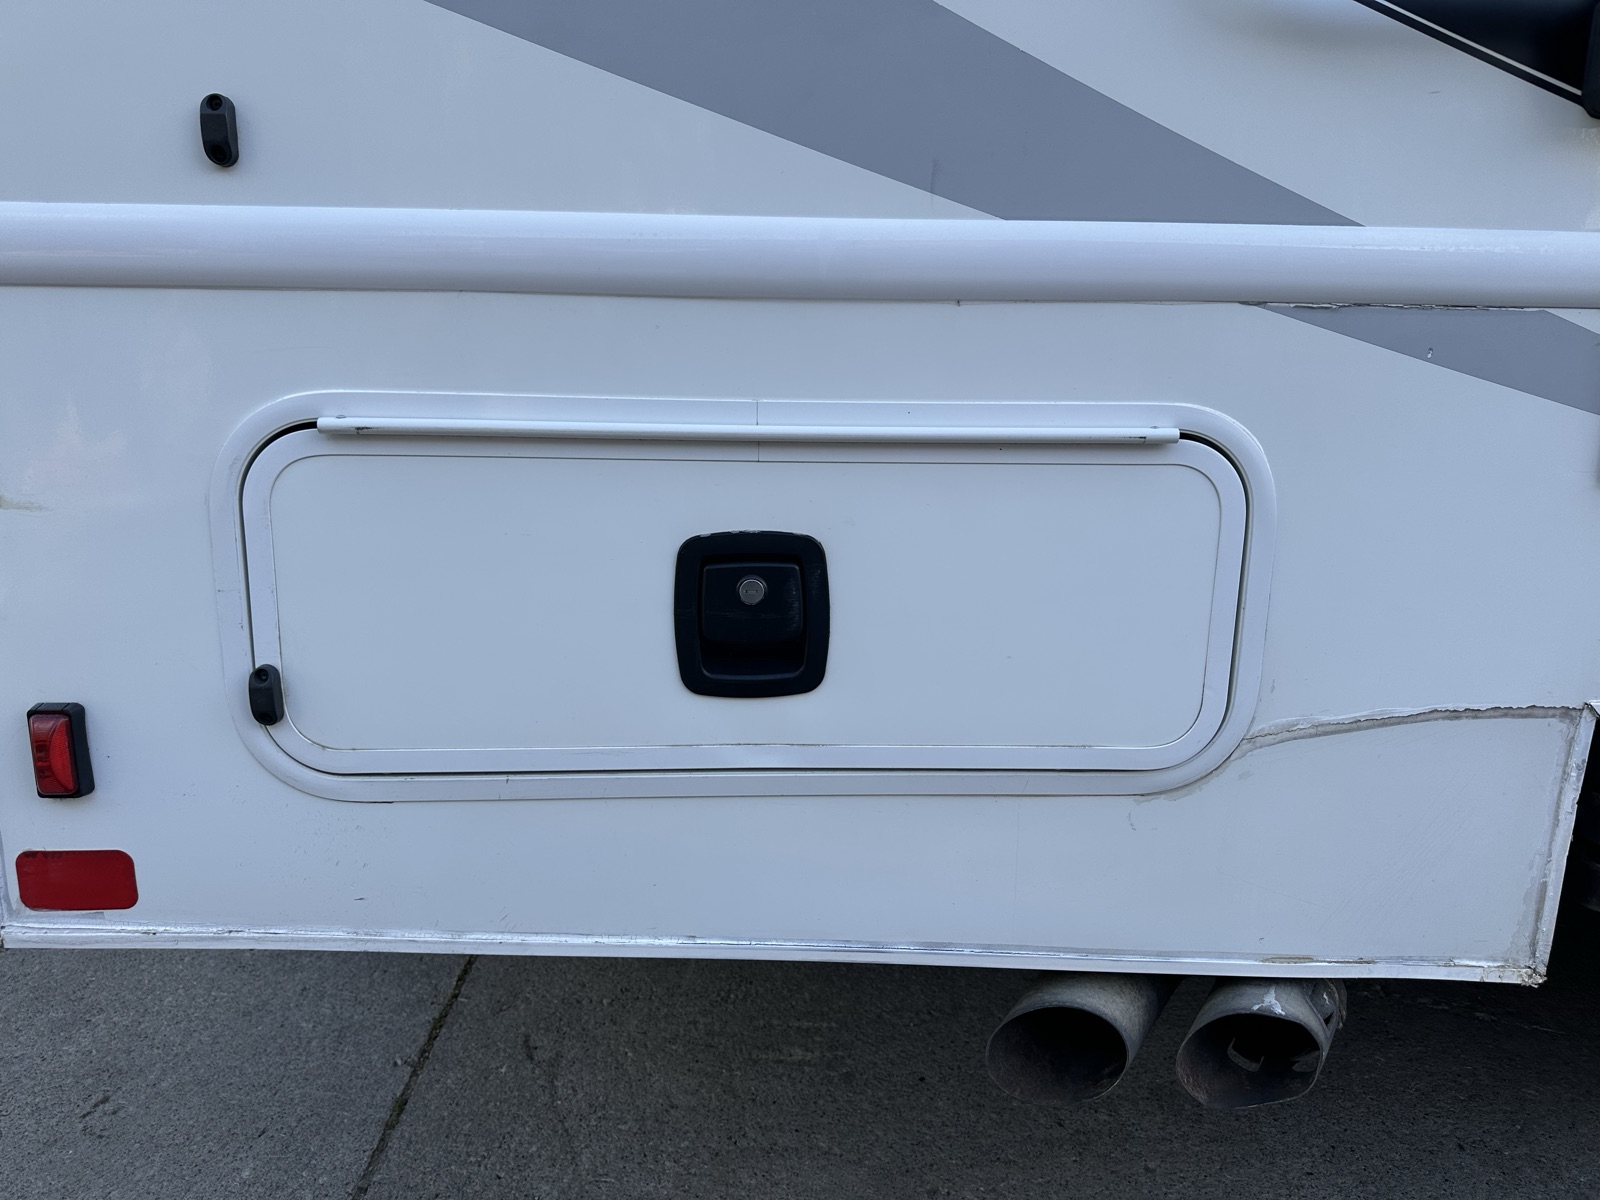
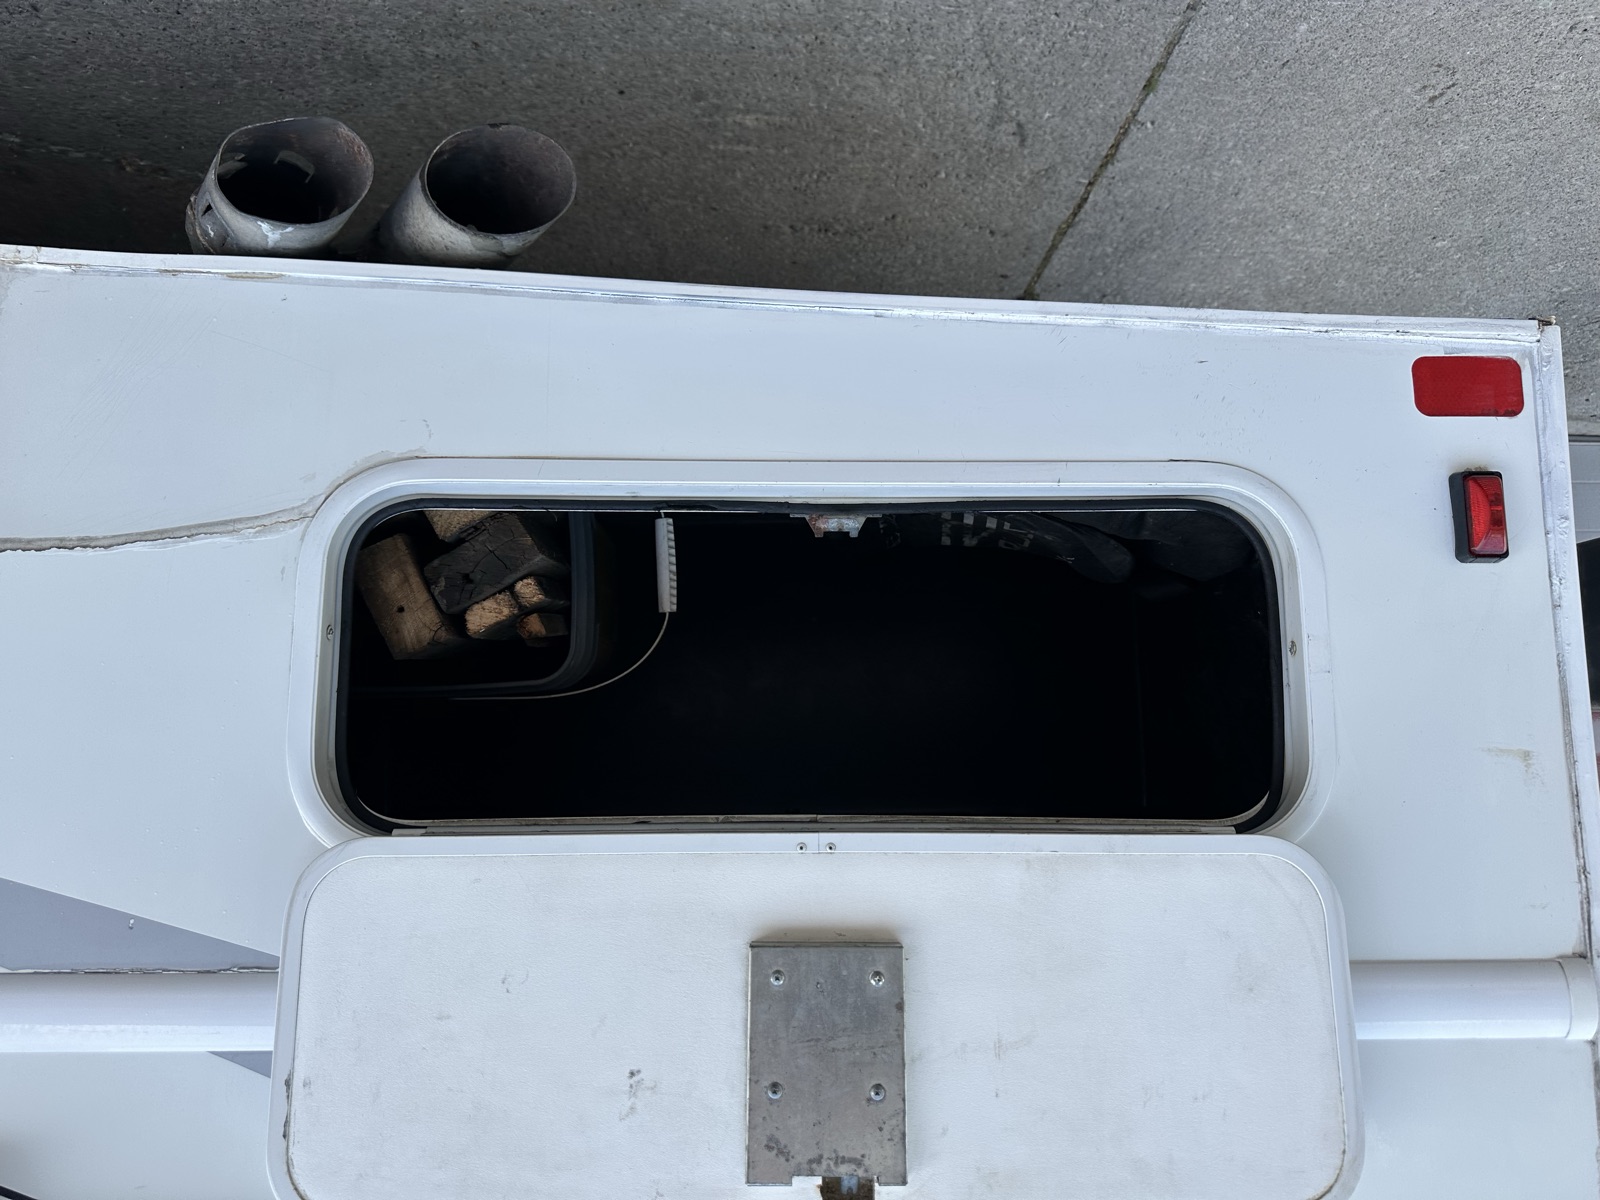
Rear-most right storage compartment draft
IMG_7945 Rear-right storage — door closedIMG_7946 Rear-right storage — door open
Last door on the right side: general storage.
3 — Rear of the RV
At the back: where the rear slide-out extends, plus a small storage door with the folding outdoor table and stools.
Rear of the RV review
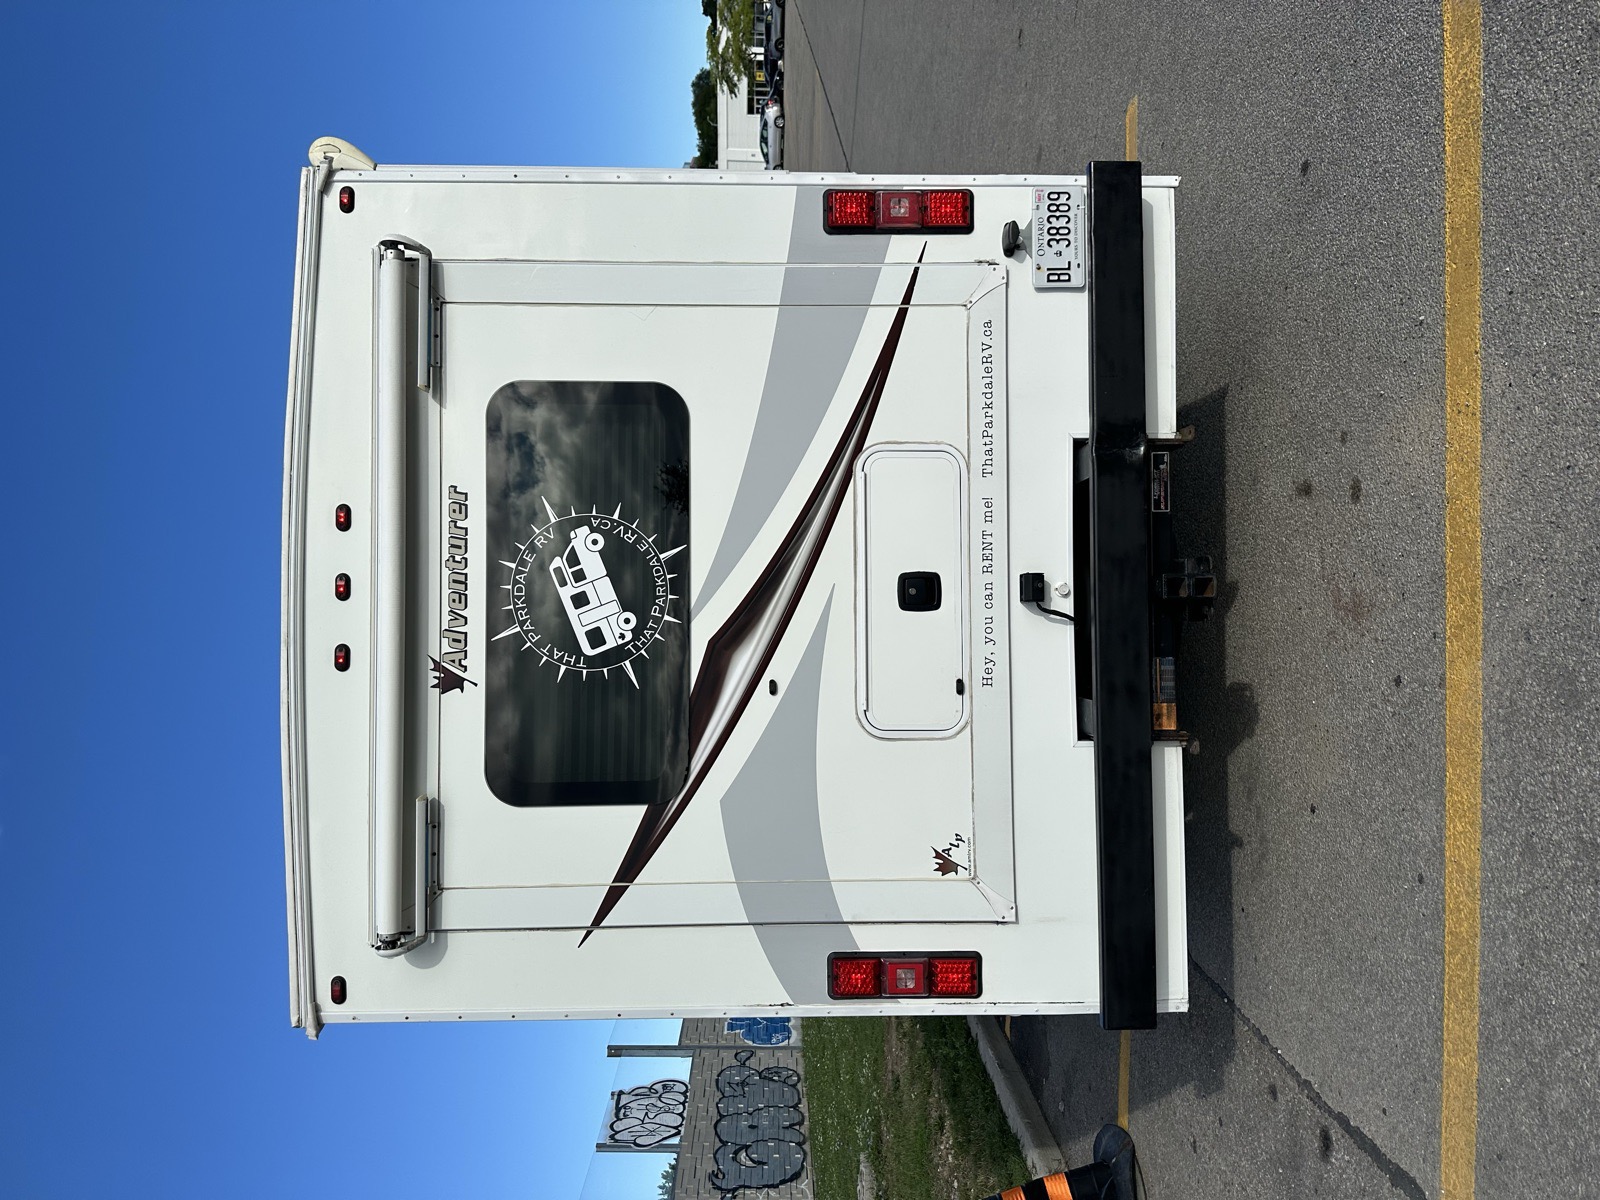
IMG_5102 Rear of the RV — full view (license plate, spare tire holder, brand decals)
The back of the RV. The rear slide-out extends out from this wall when the slide is deployed — keep this area clear when setting up camp.
Folding table & stools storage review★ quick-ref
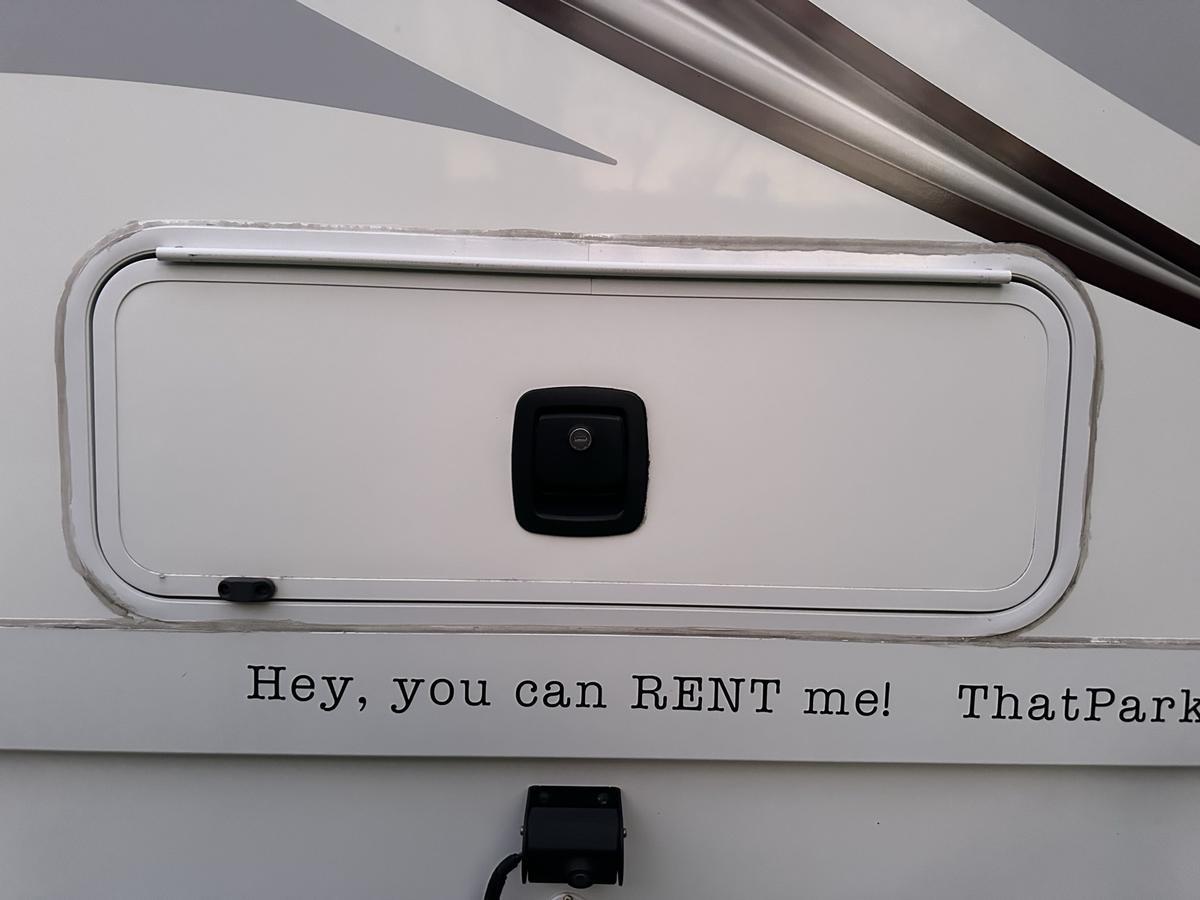
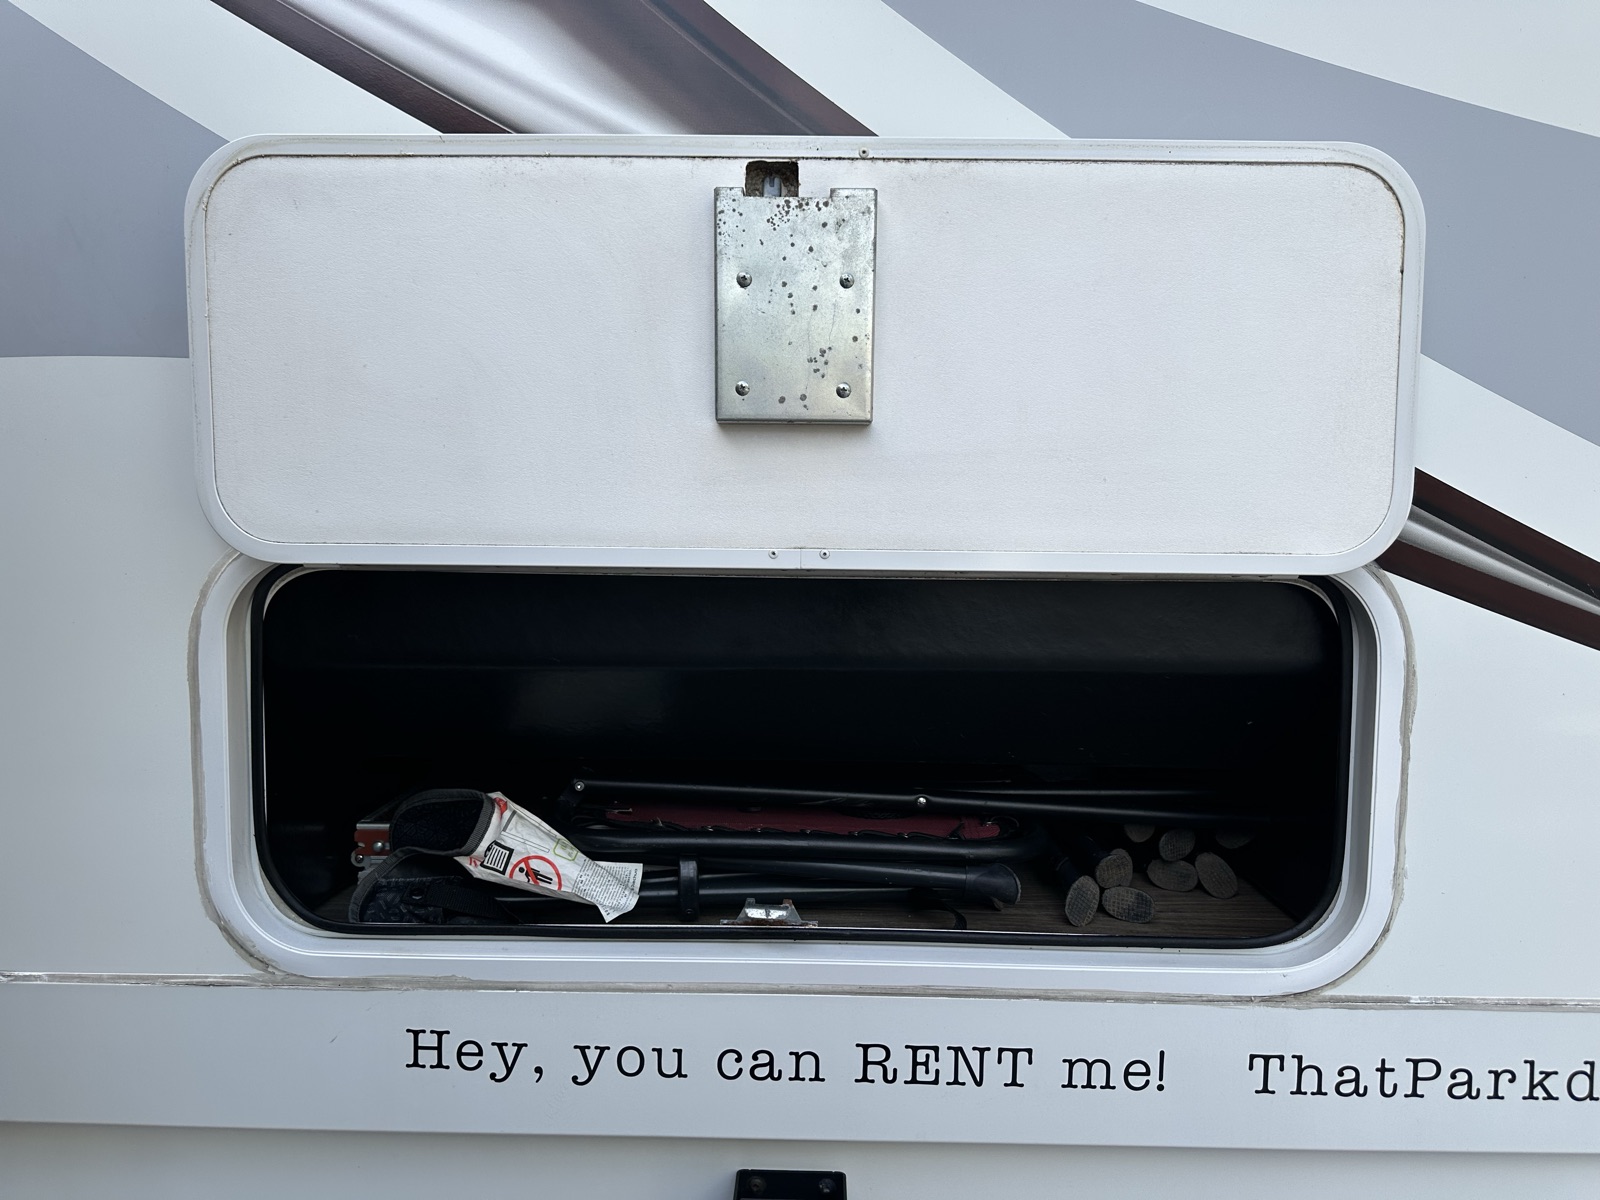
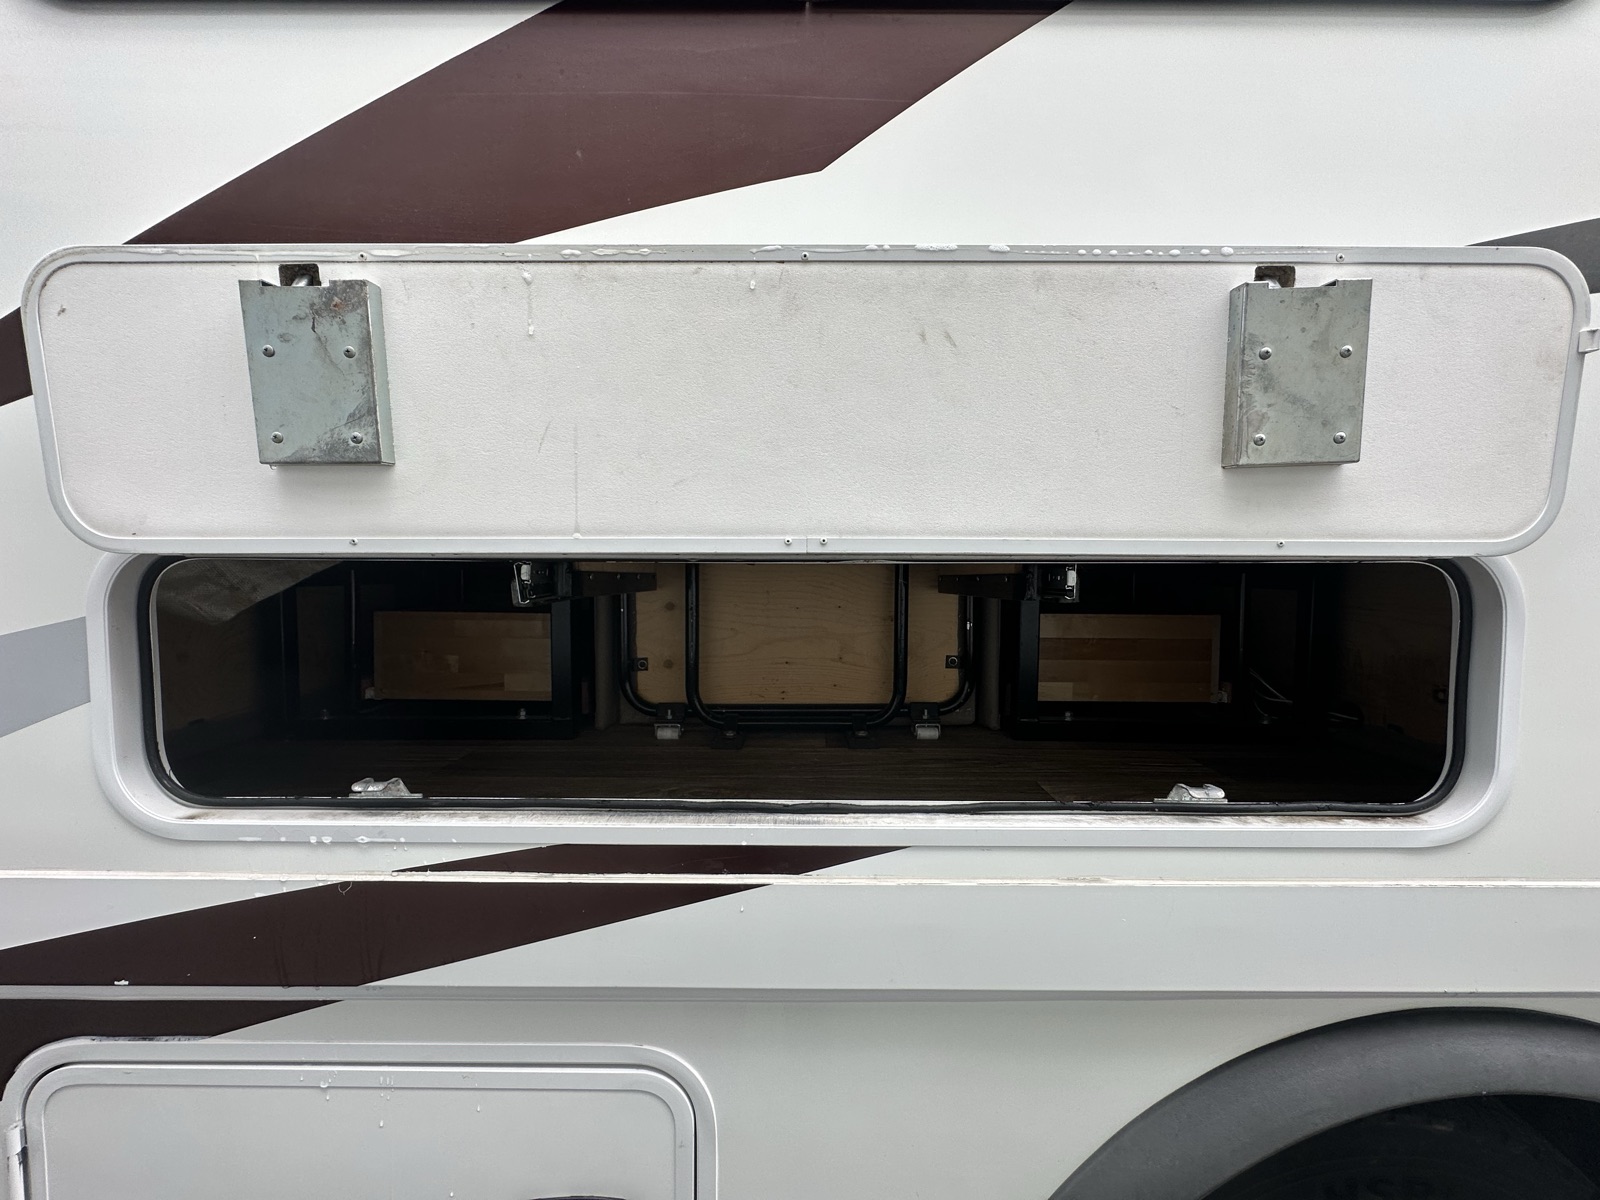
IMG_8053 Rear storage door — closedIMG_7948 Same door open — folding table legs + stools inside
A small storage door at the back of the RV holds a folding outdoor table and four stools. Use them for setup at your site.
Do
Restow flat: table folded, stools laid next to it. Door latches firmly when closed.
4 — Left Side, Walking Rear to Front
The left side is where the heavy mechanical action lives — power, water, sewer, generator. This is the most important part of the outside tour.
Left side overview review
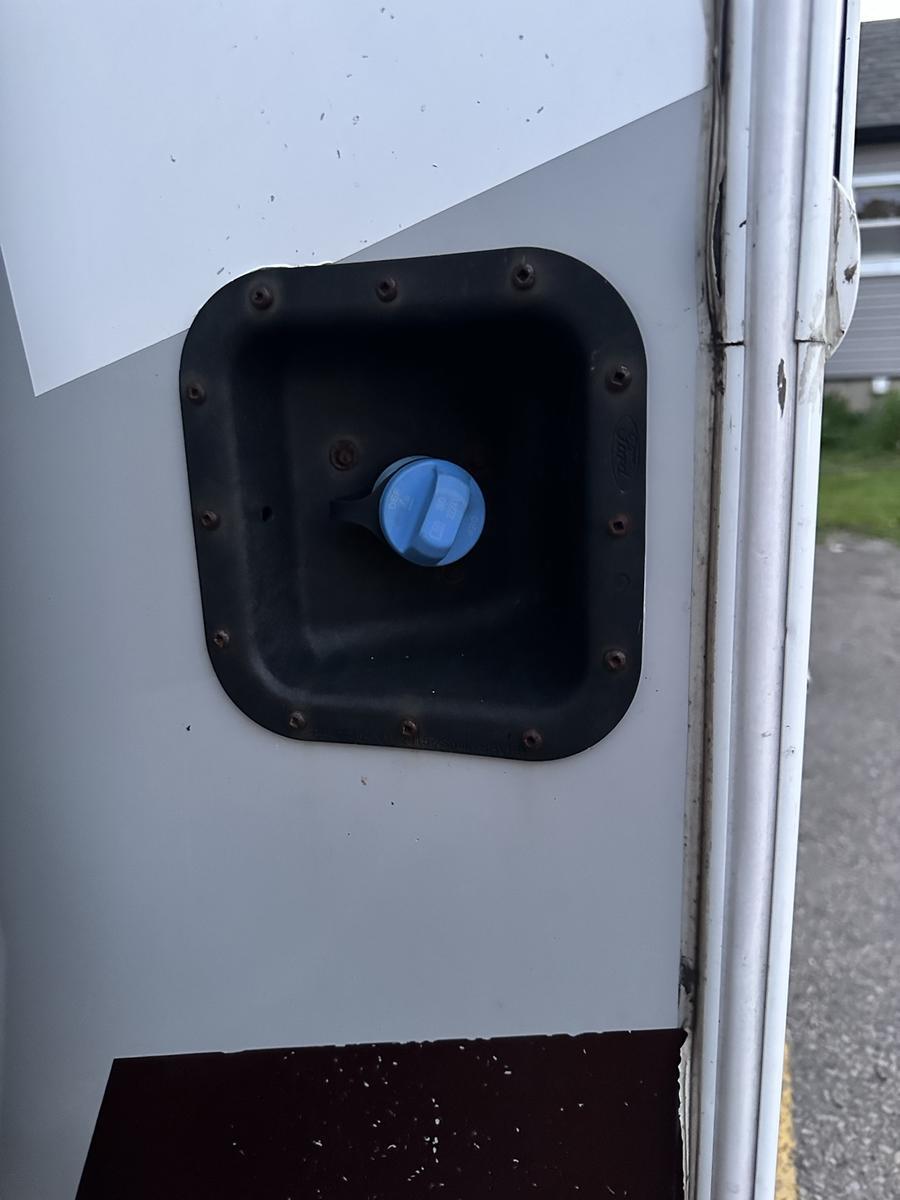
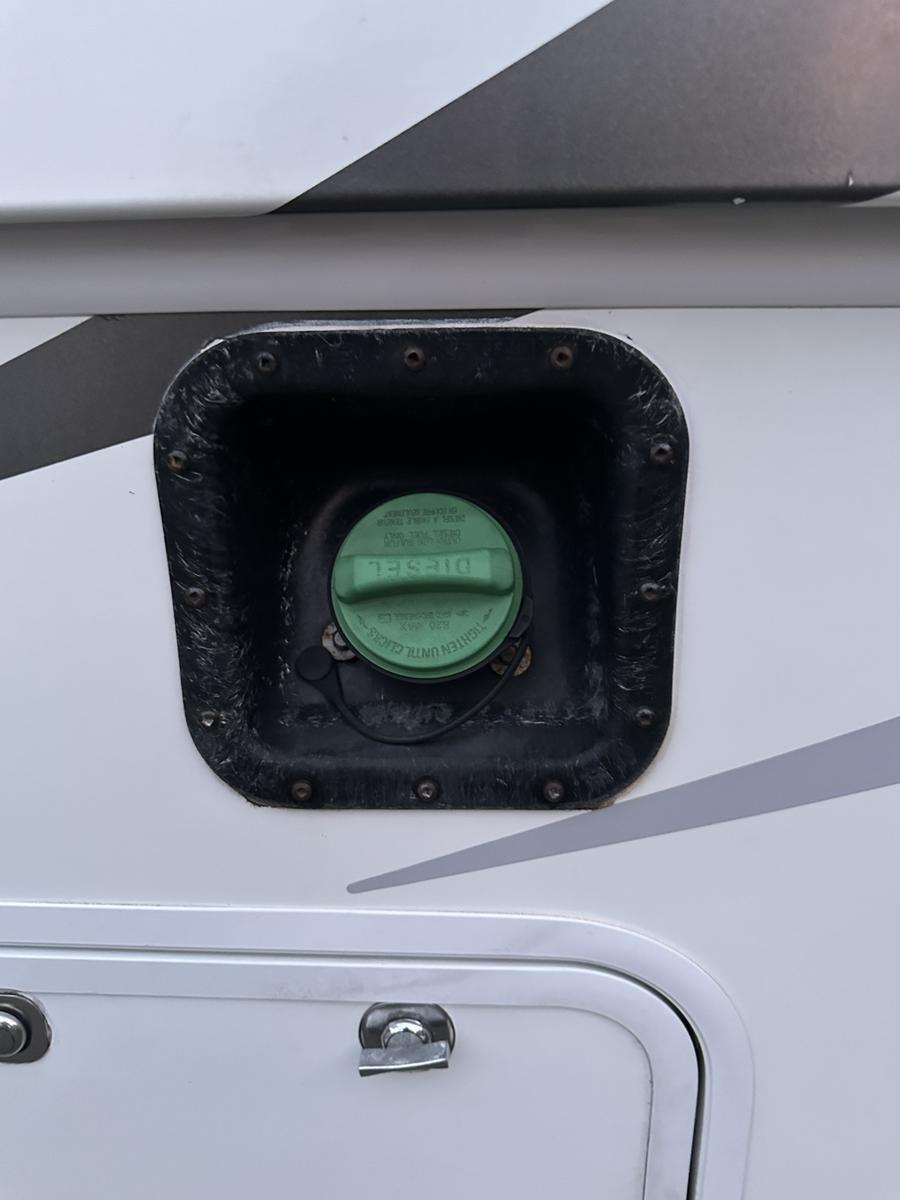
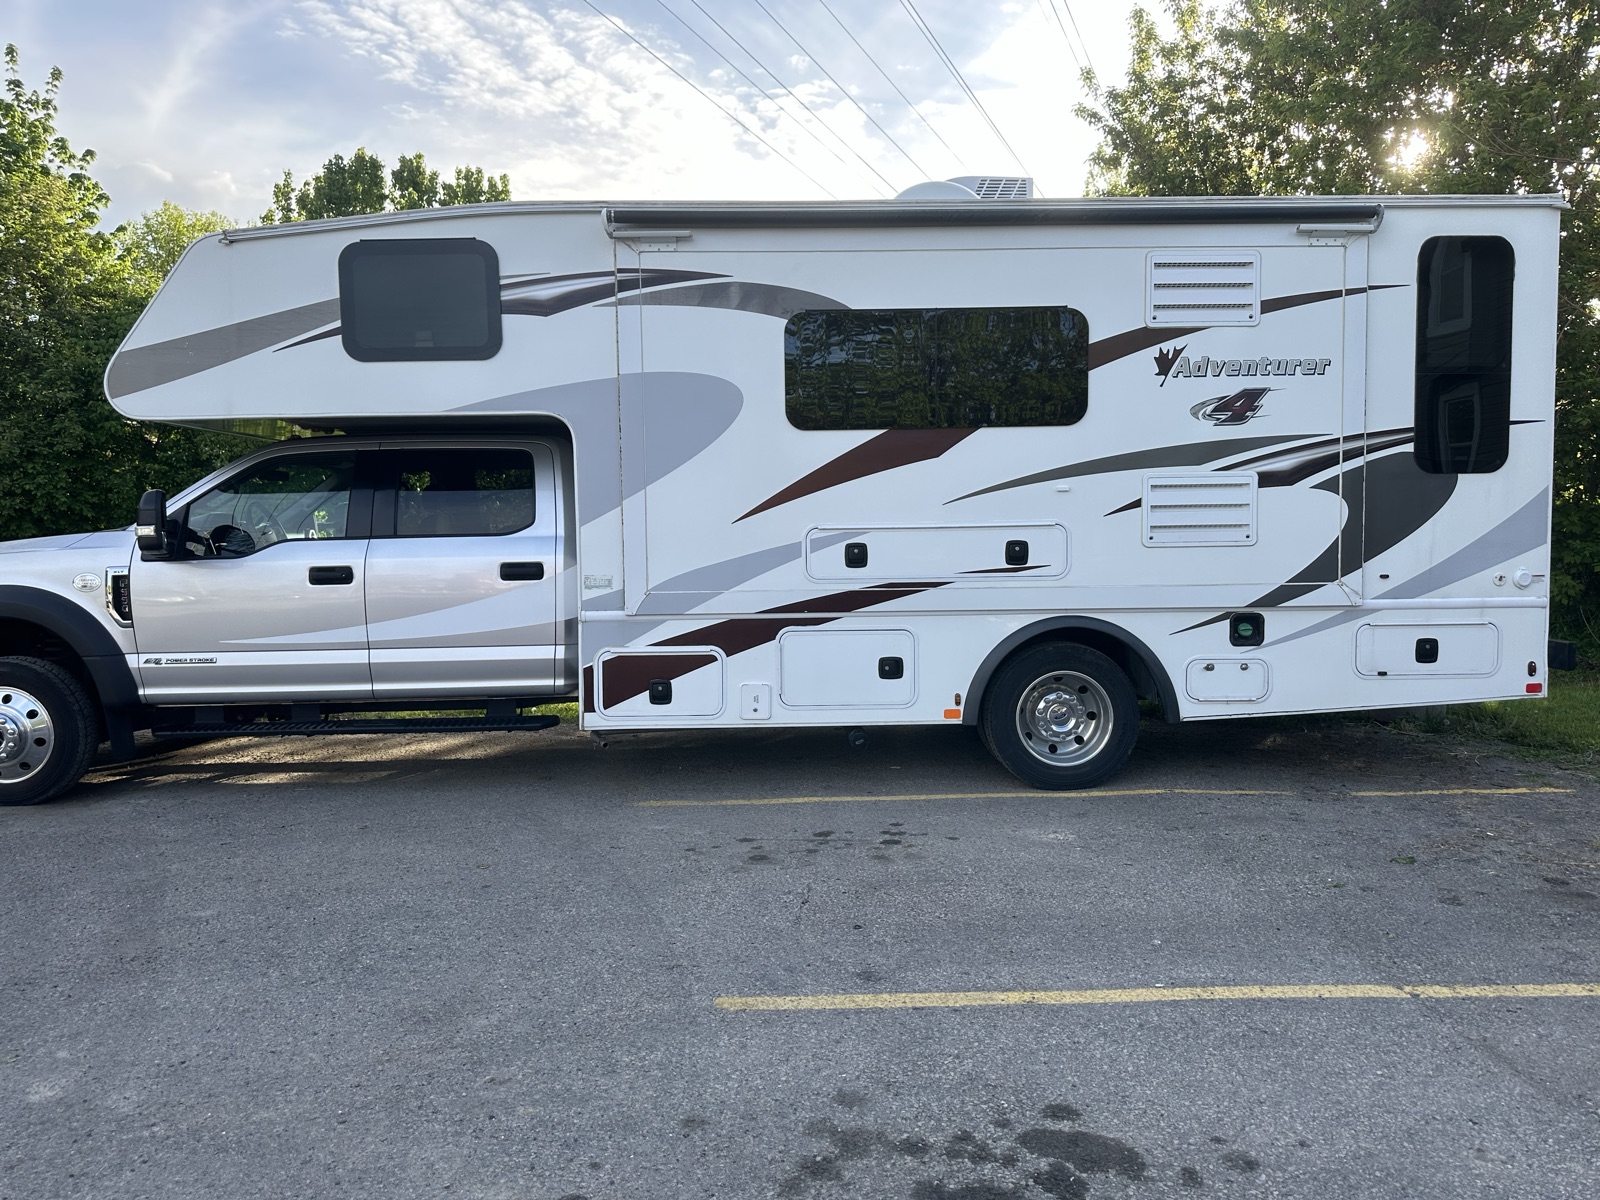
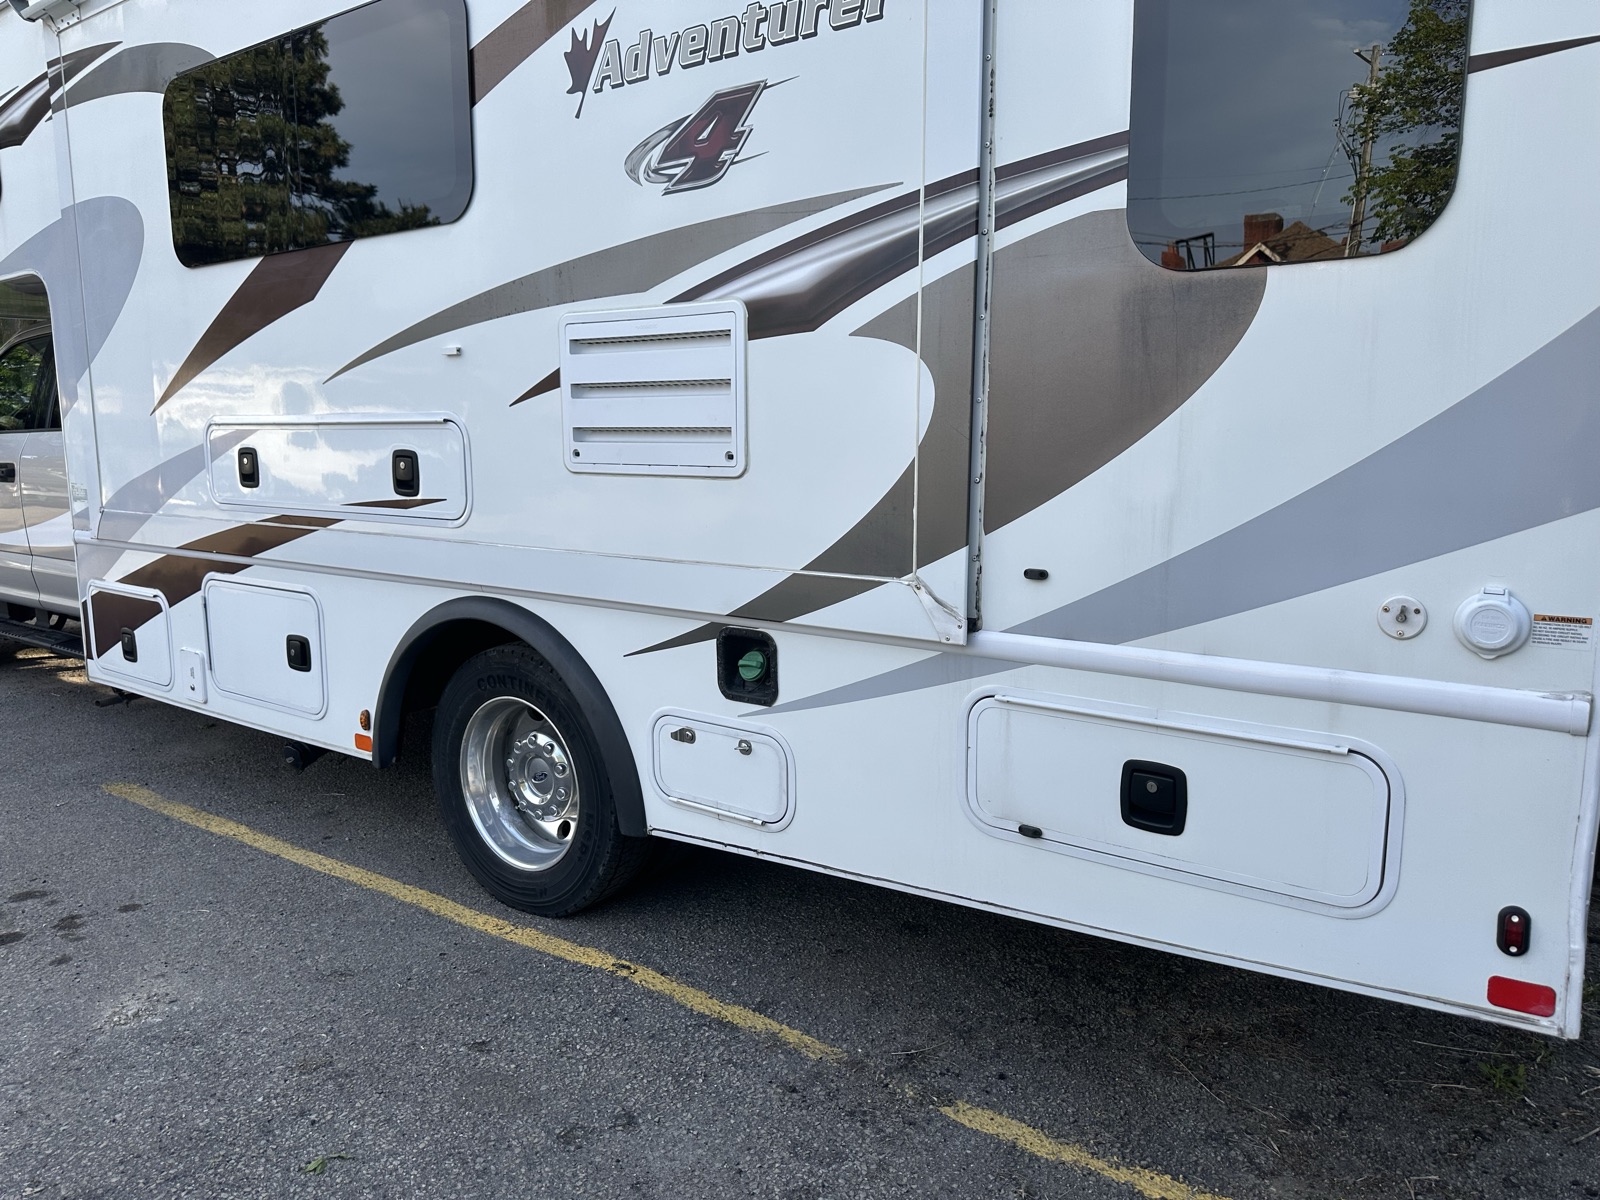
IMG_8009 Left side — blue DEF cap sits on the front face of the RV body, next to the rear cab door look: front-left of RV body, where it meets the cabIMG_8051 DEF (blue) cap — close-upIMG_8052 Diesel fuel cap — close-up (further back on the same side)IMG_8010 Left side — overview, rear to frontIMG_8011 Left side — angle 2IMG_8012 Left side — angle 3
Walking the left side from rear to front. We'll open each compartment in turn.
For refueling, two important caps live on this side:
Diesel fuel cap — further back along the RV body (much further back than on a regular car — locate it before pulling up to a pump).
DEF (blue) cap — on the front face of the RV body, left side, right where the body meets the back of the truck cab. Sits next to the rear driver-side cab door.
Large left storage compartment review★ quick-ref
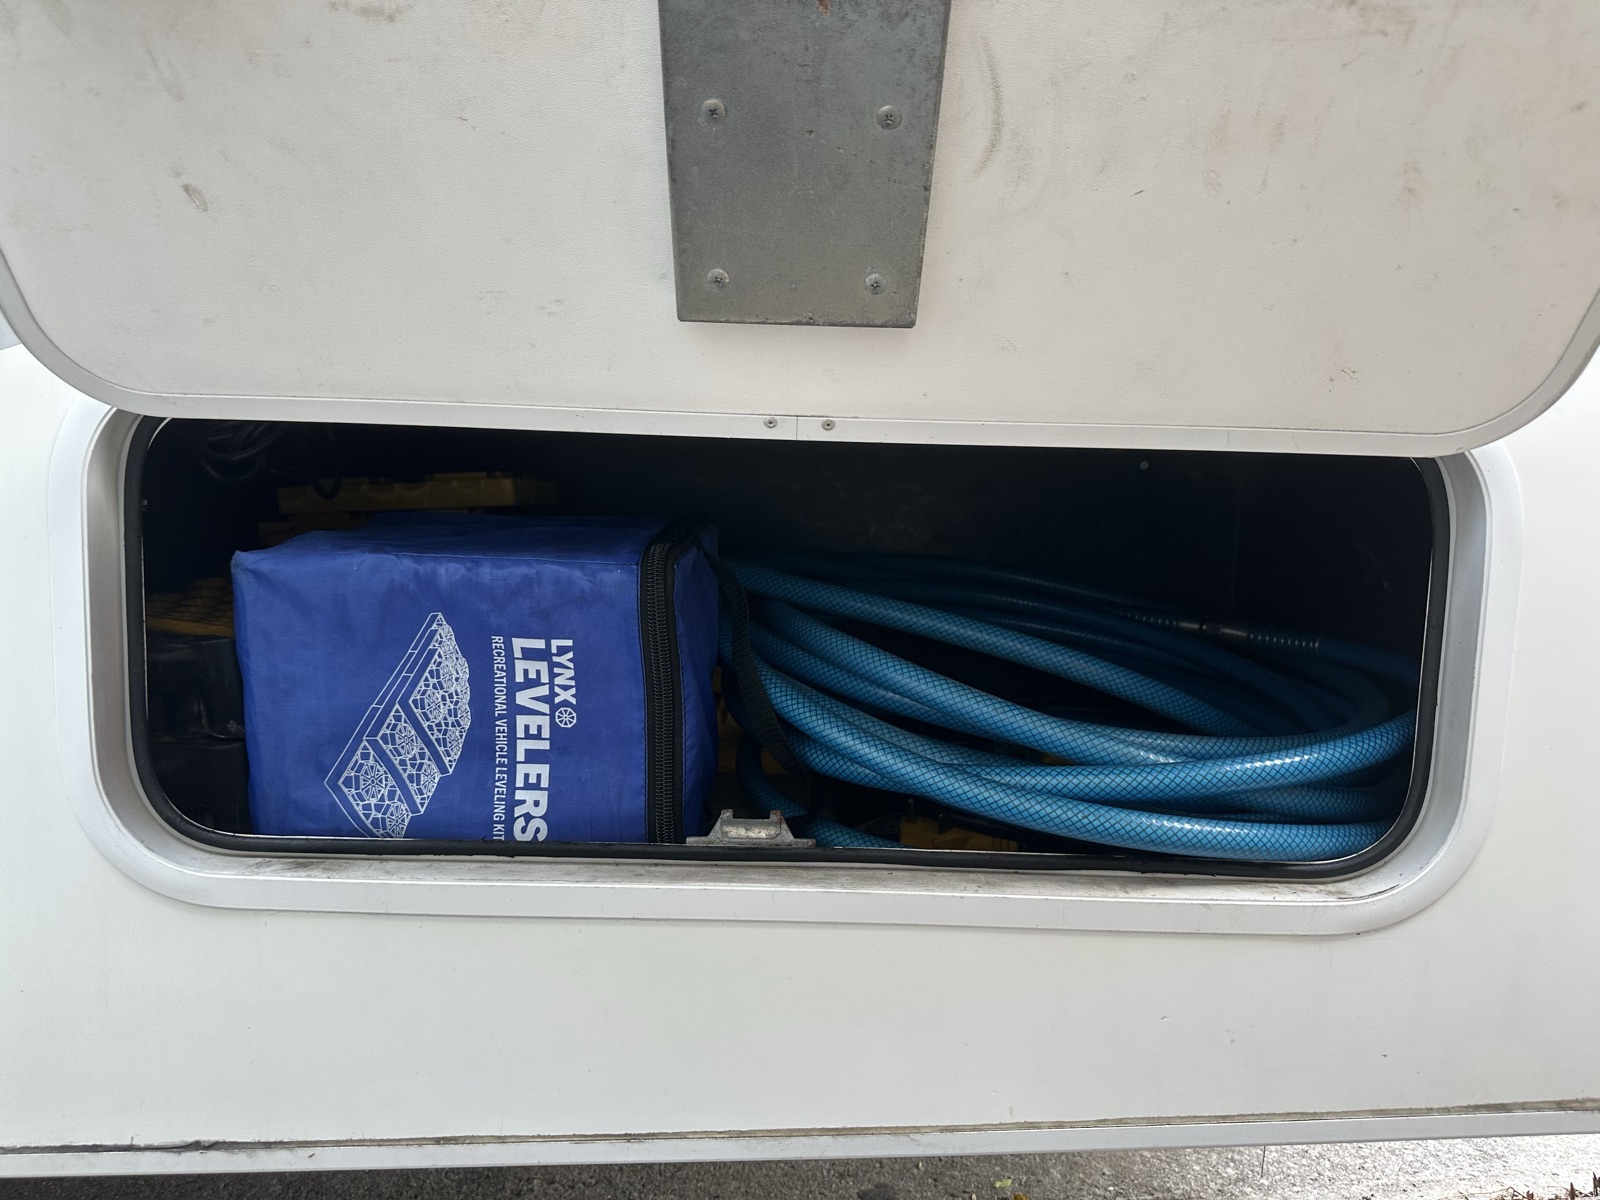
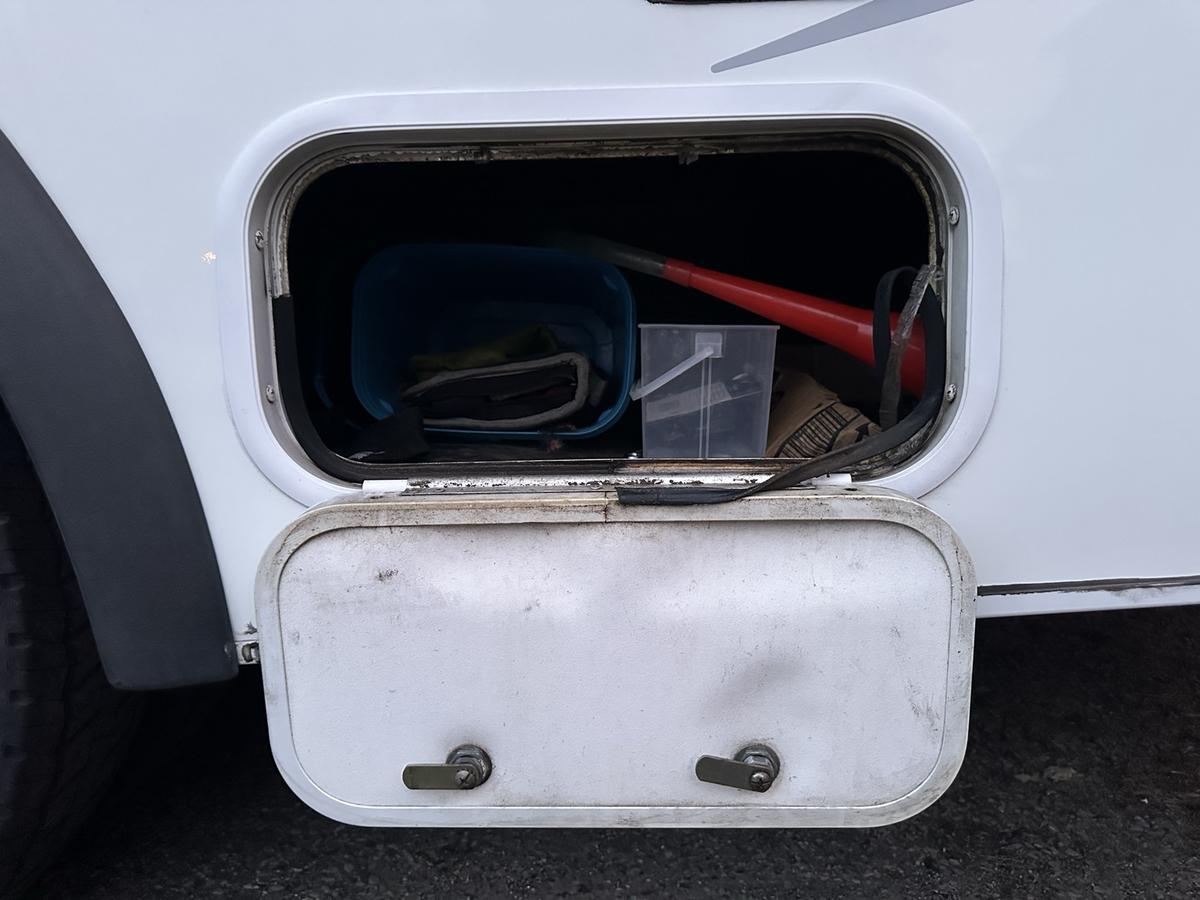
IMG_8008 Large left storage — loaded with gear
This big compartment holds most of the gear you'll use at the campsite: leveling blocks, electrical cables, potable water hose, and tools.
Caution
🛑 Never operate the LEFT SLIDE while this trunk door is open. Its door swings up into the slide's travel path — opening or retracting the slide while the trunk is open crushes the door AND damages the slide. Trunk closed before slide switch, every time, both directions.
Leveling pads / blocks review★ quick-ref
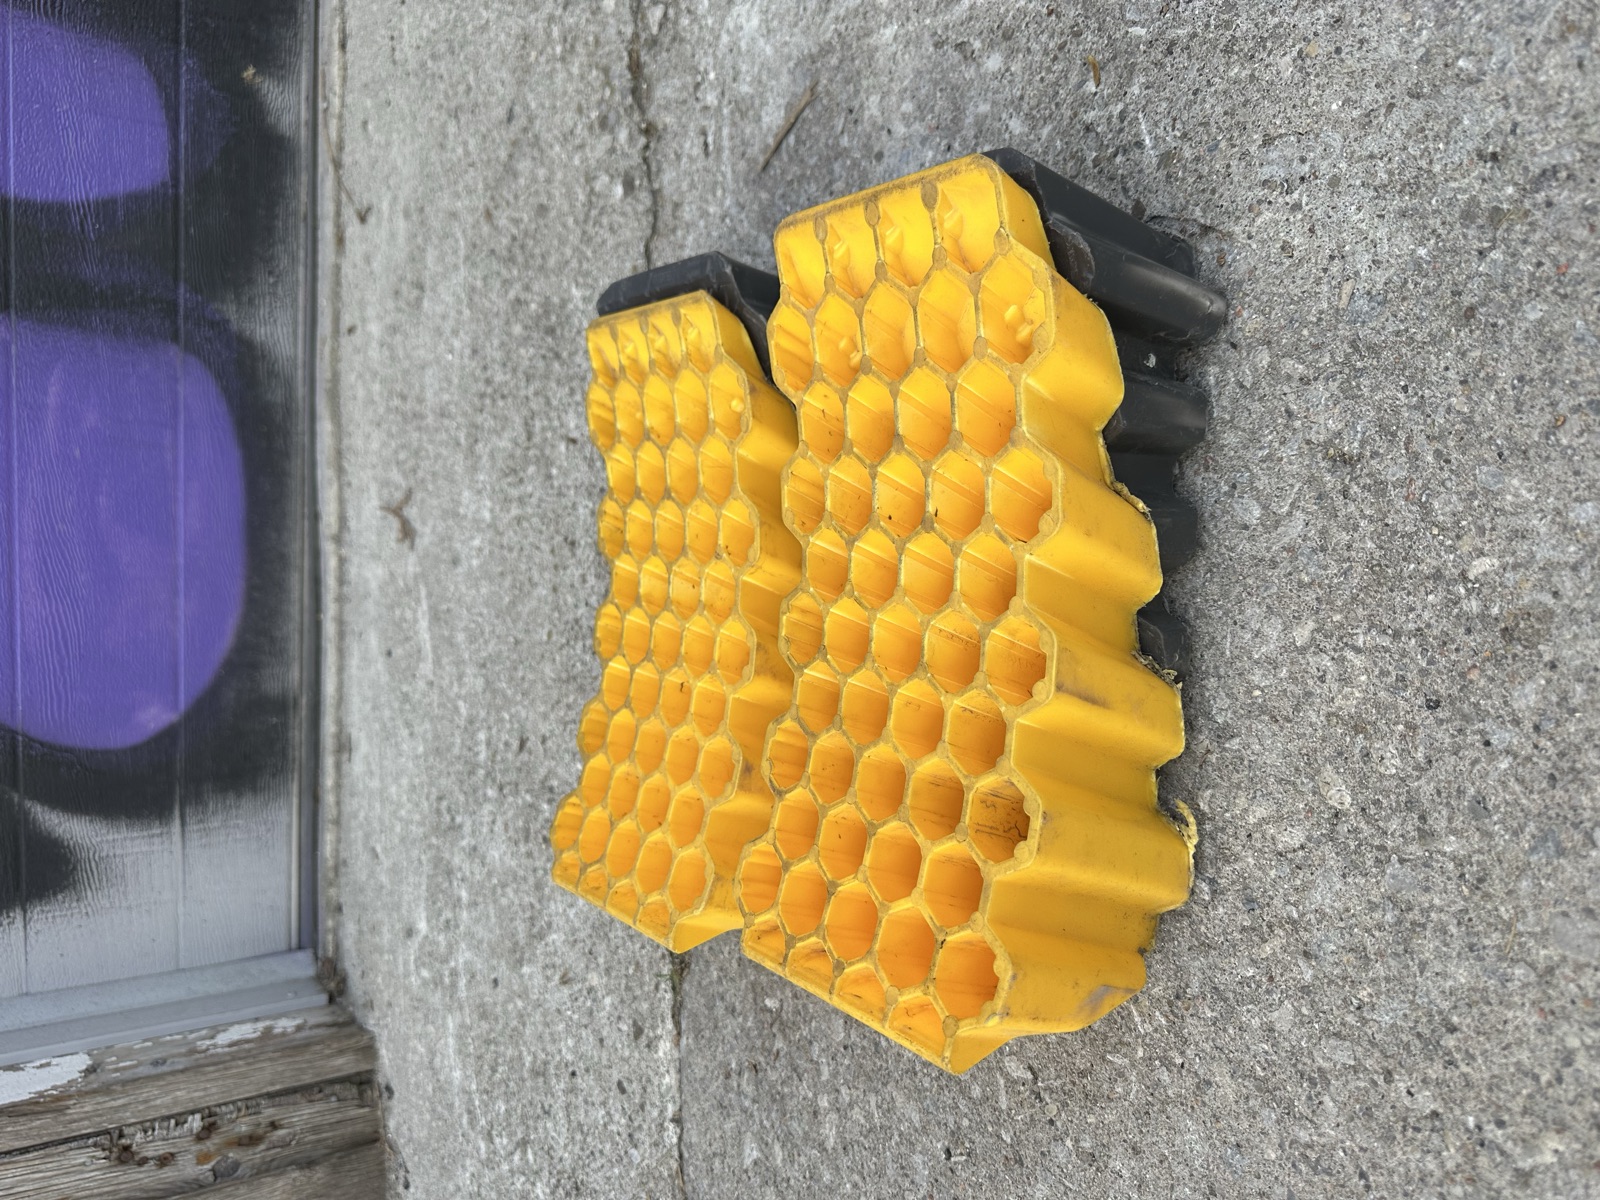
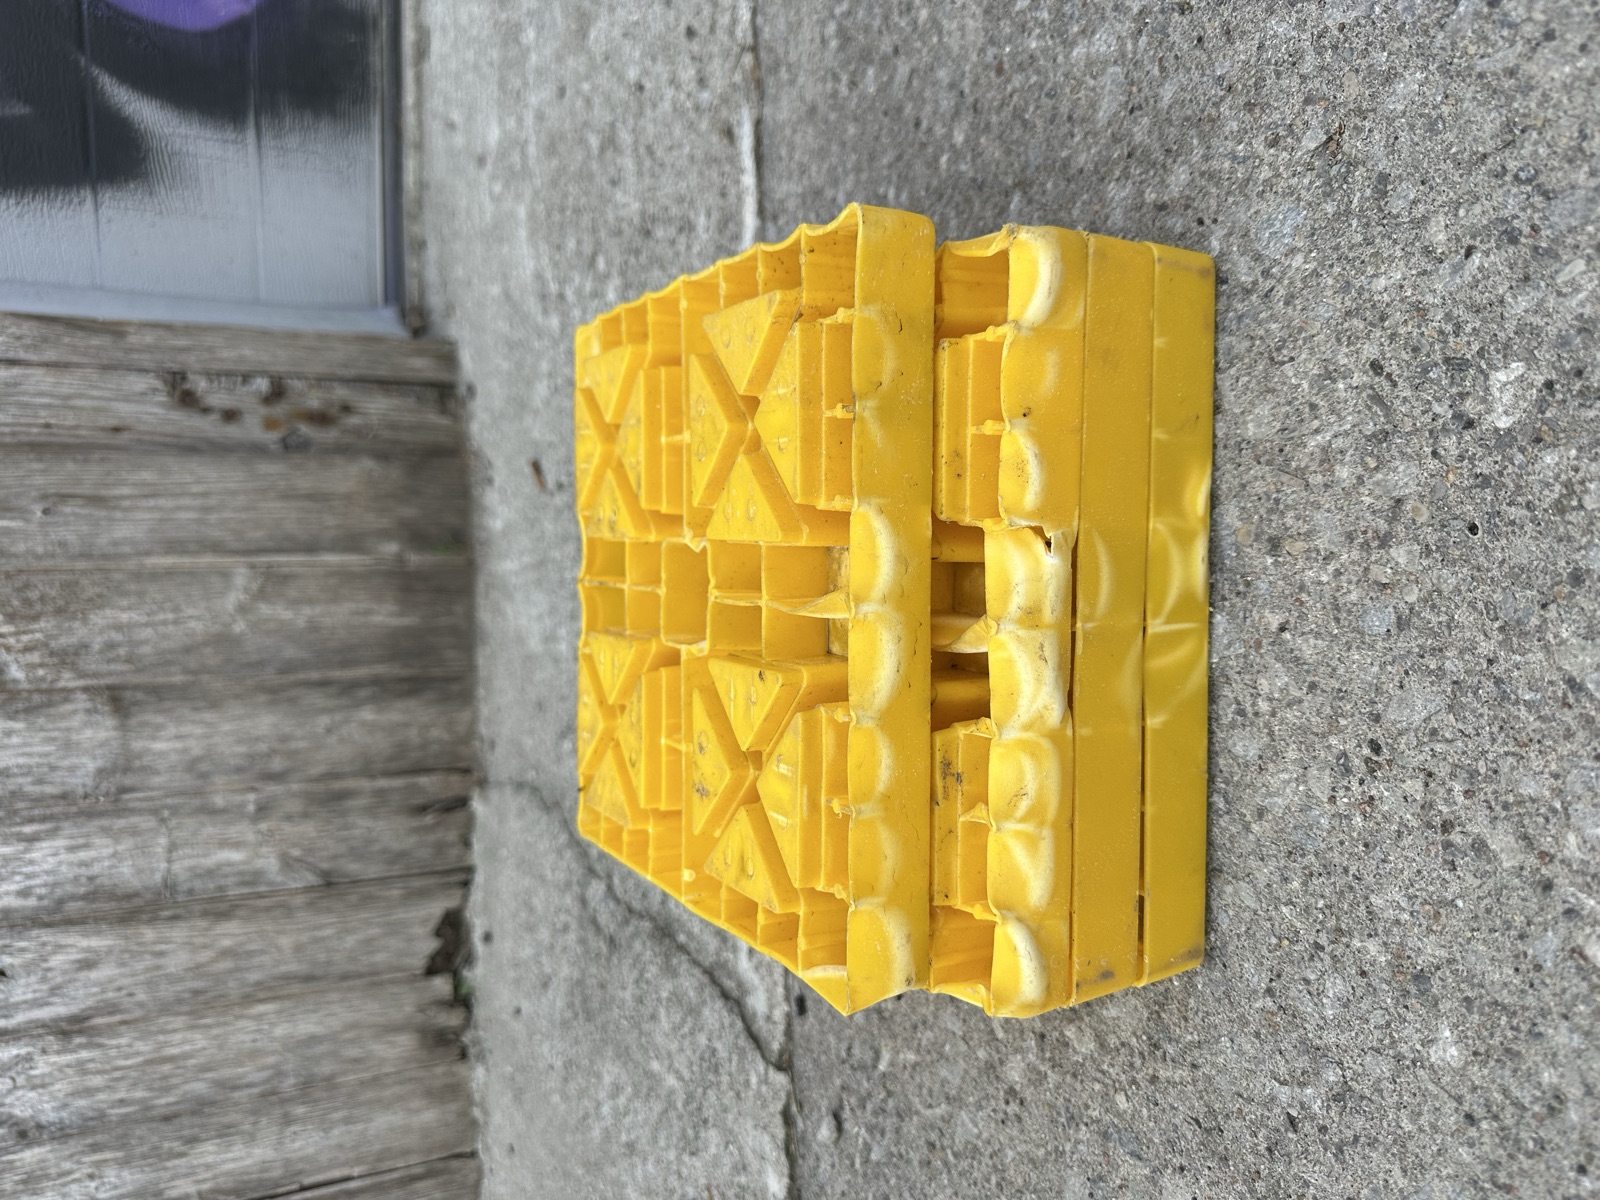
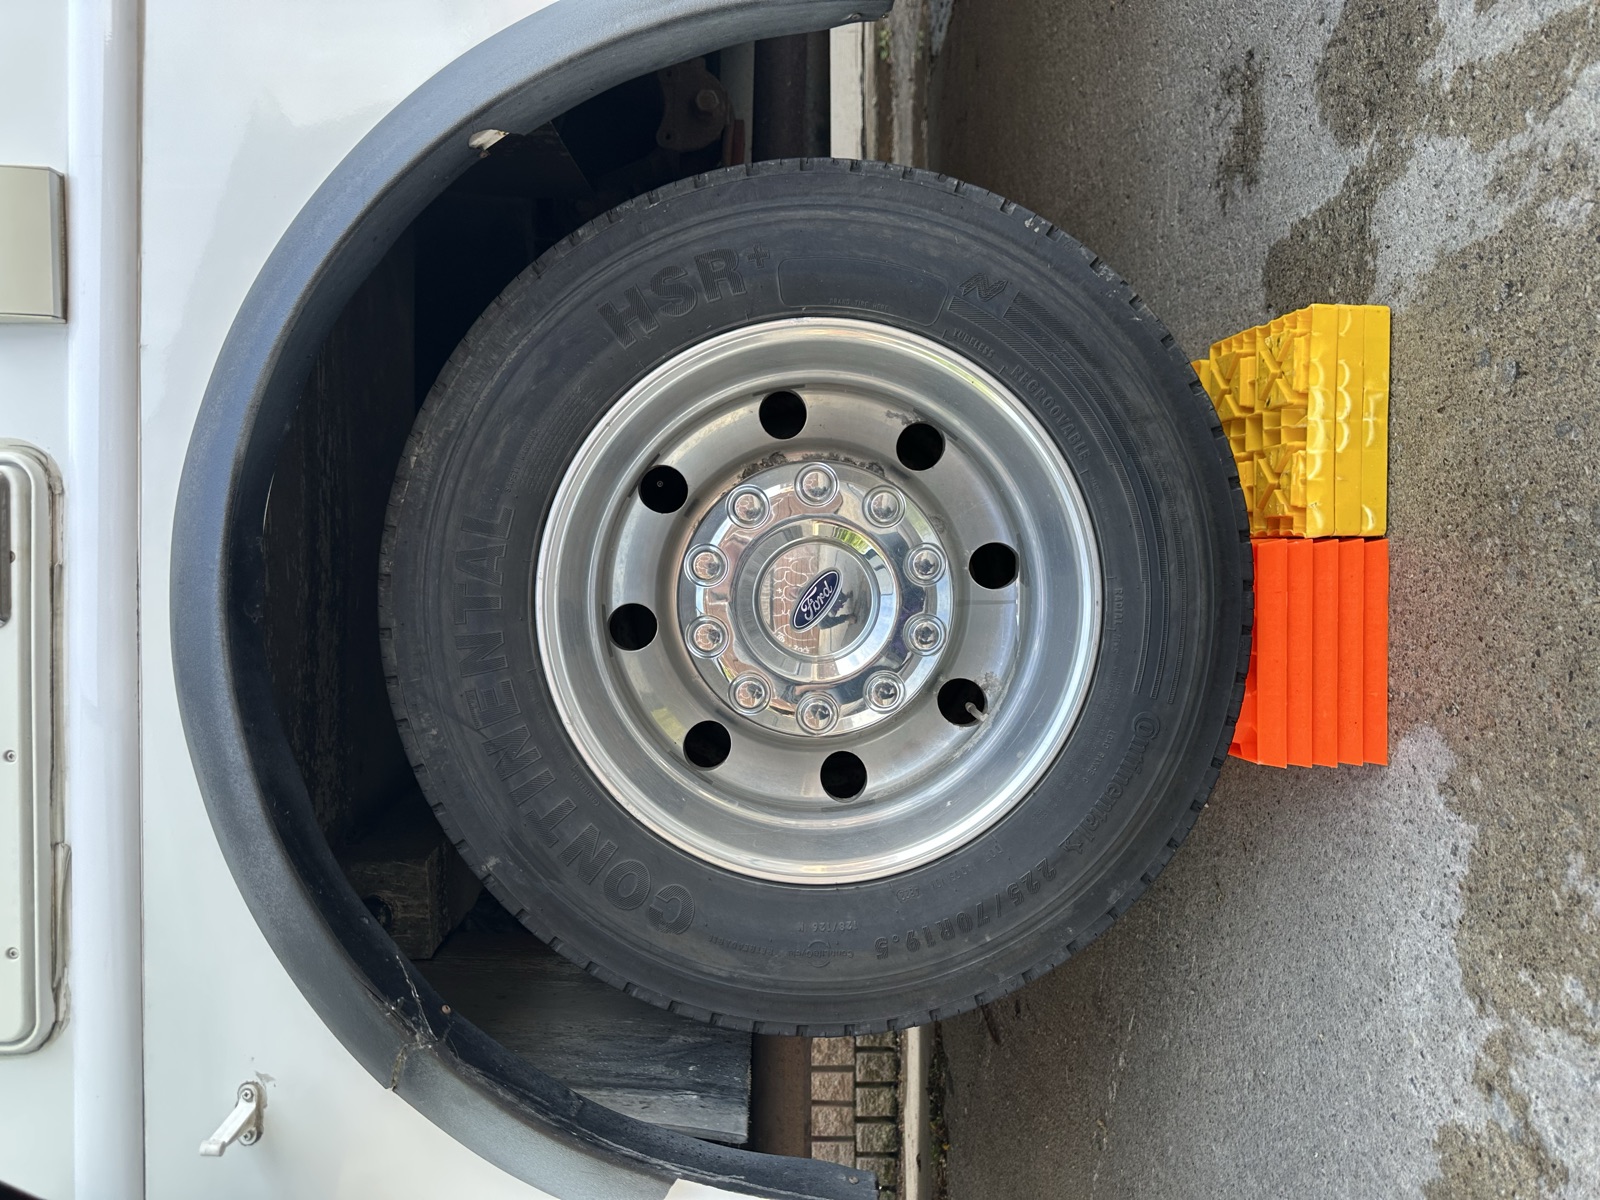
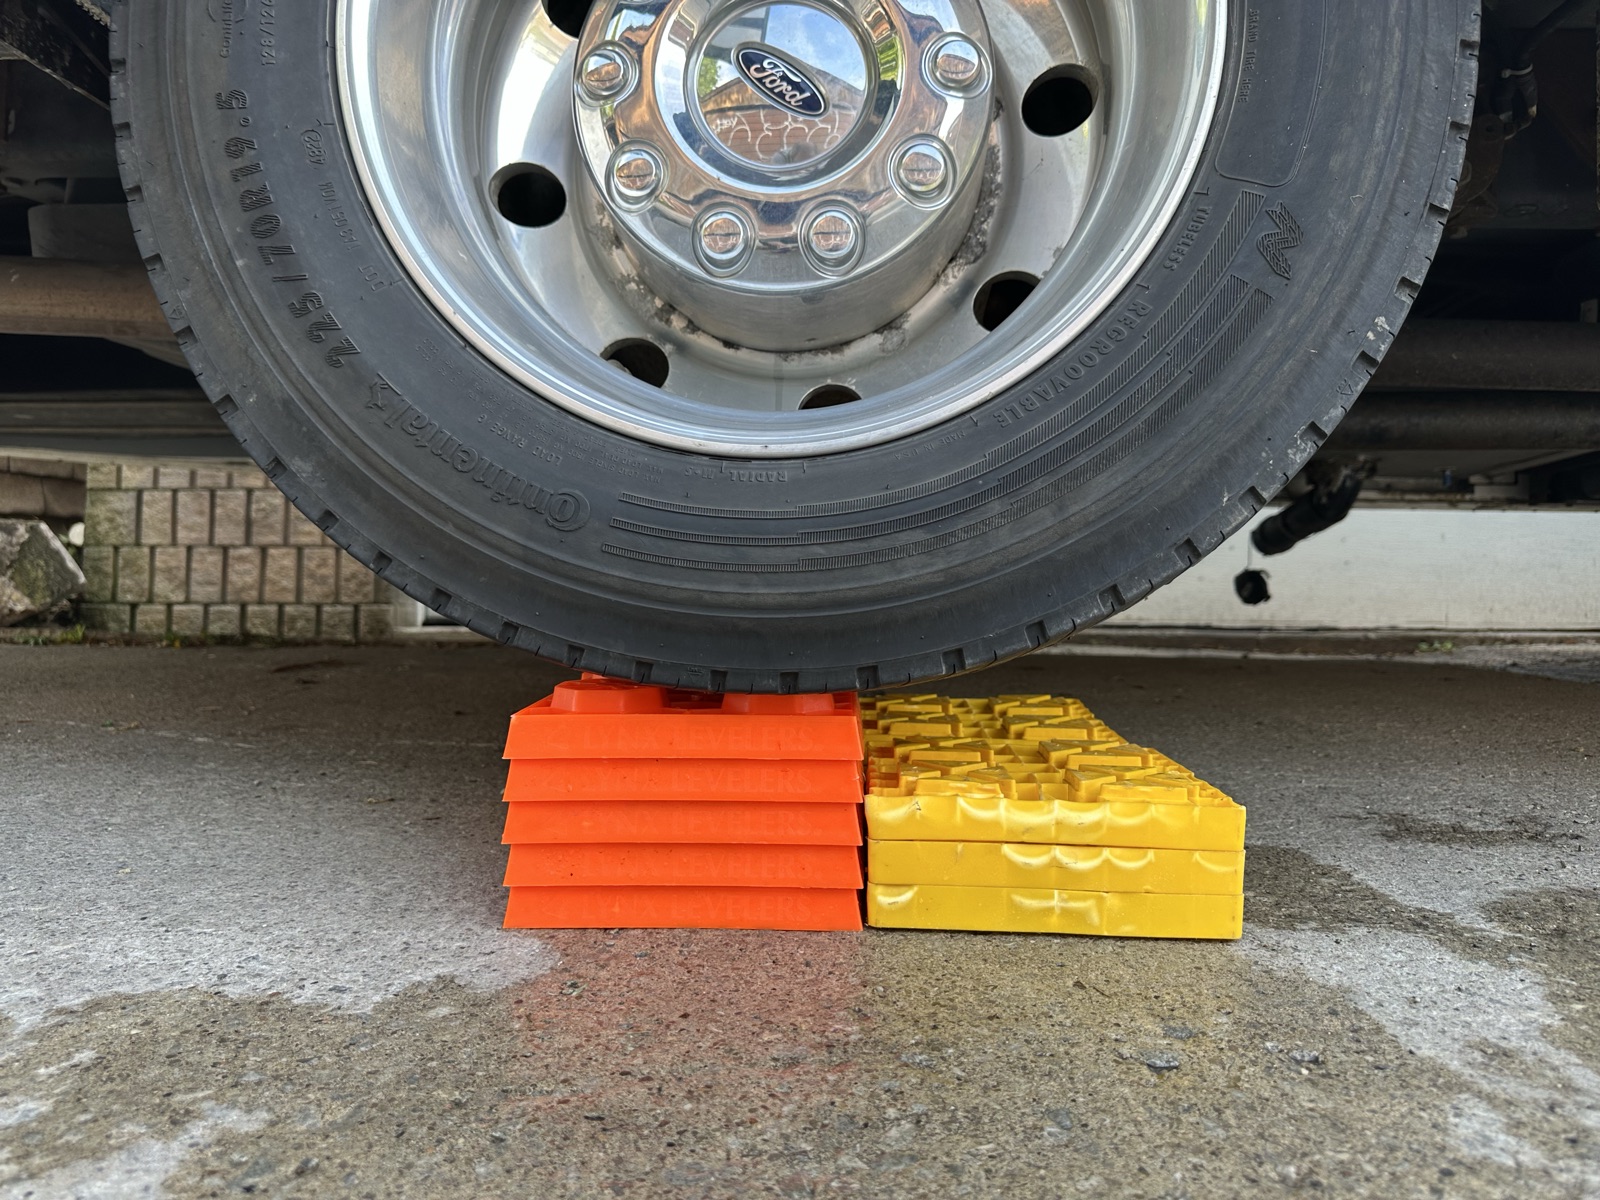
IMG_7987 Leveling blocks — stackedIMG_7988 Leveling blocks — second viewIMG_7949 Leveling blocks in use (close)IMG_7950 Leveling blocks in use (wide)
leveling-blocks Demo: driving up and down the leveling blocks. NOTE: this is an extreme-leveling example — 5 pads stacked with an intermediate step. Most sites only need 1–2 pads.
Used to level the RV when your site isn't flat. Leveling matters for your comfort, for the fridge to run properly, and so water doesn't sit/overflow in the wrong places. Watch the short demo video for the technique.
Do
Back up a few feet, set to Park, turn off the engine.
Place 1–2 blocks (max) in front of the wheels that need to go up.
Back wheels are a dual axle — place blocks for both tires on the side you're raising.
Confirm no one is around the RV. Have someone watch the wheels while you drive forward up the blocks.
Stop when the RV is level — use your phone's level app (built into iPhone Compass / Android Measure) if you're not sure. Set to Park while wheels are fully on the blocks.
If you can't get level with 2–3 blocks, reposition the RV on the site instead.
Caution
Drive on/off slowly — too fast and the blocks shoot out.
Add wheel chocks after leveling, not before (see next stop).
Wheel chocks review★ quick-ref
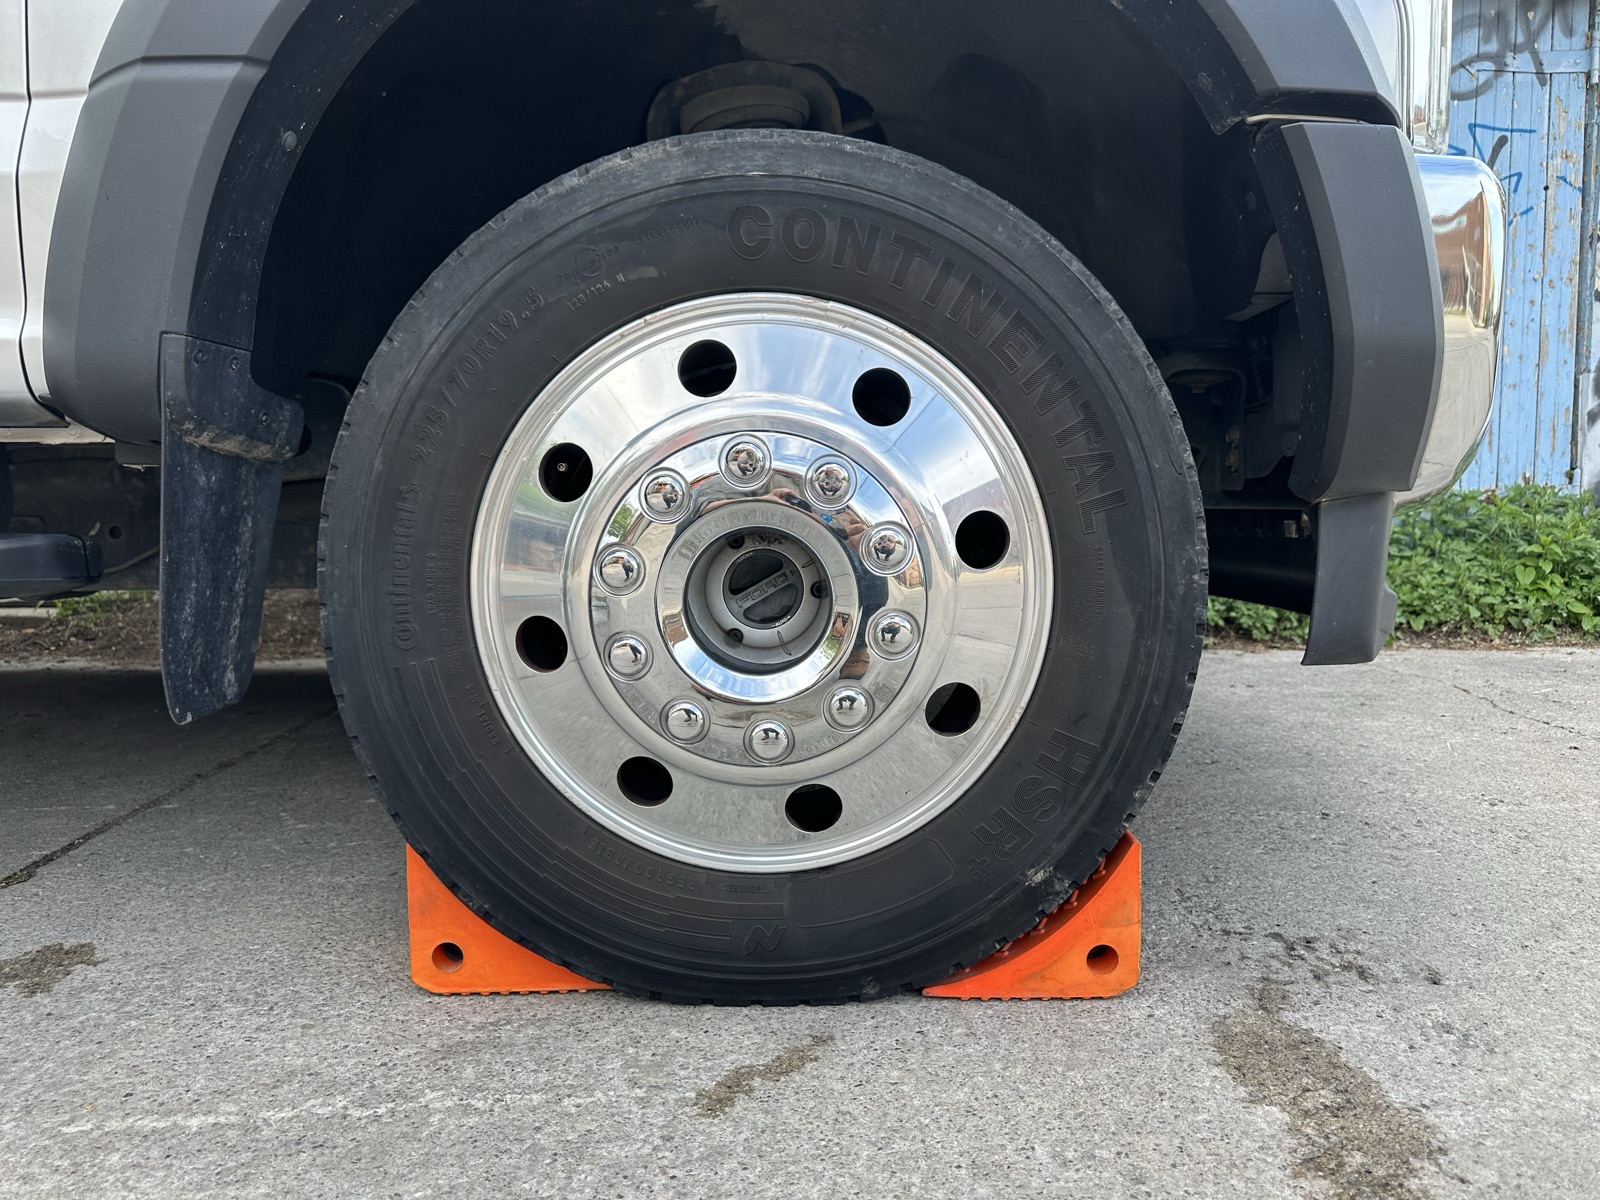
IMG_7989 Wheel chocks — also stored in the left rear storage
Wheel chocks are small wedges that go against the tires to prevent the RV from rolling. They live in the same big left storage bay as the leveling blocks.
Do
Place a chock against the downhill side of a tire after leveling is done.
Use at least one chock — two (front + back of the same wheel) on noticeably sloped sites.
Caution
Add chocks after leveling, not before. Otherwise the RV can't roll onto the blocks.
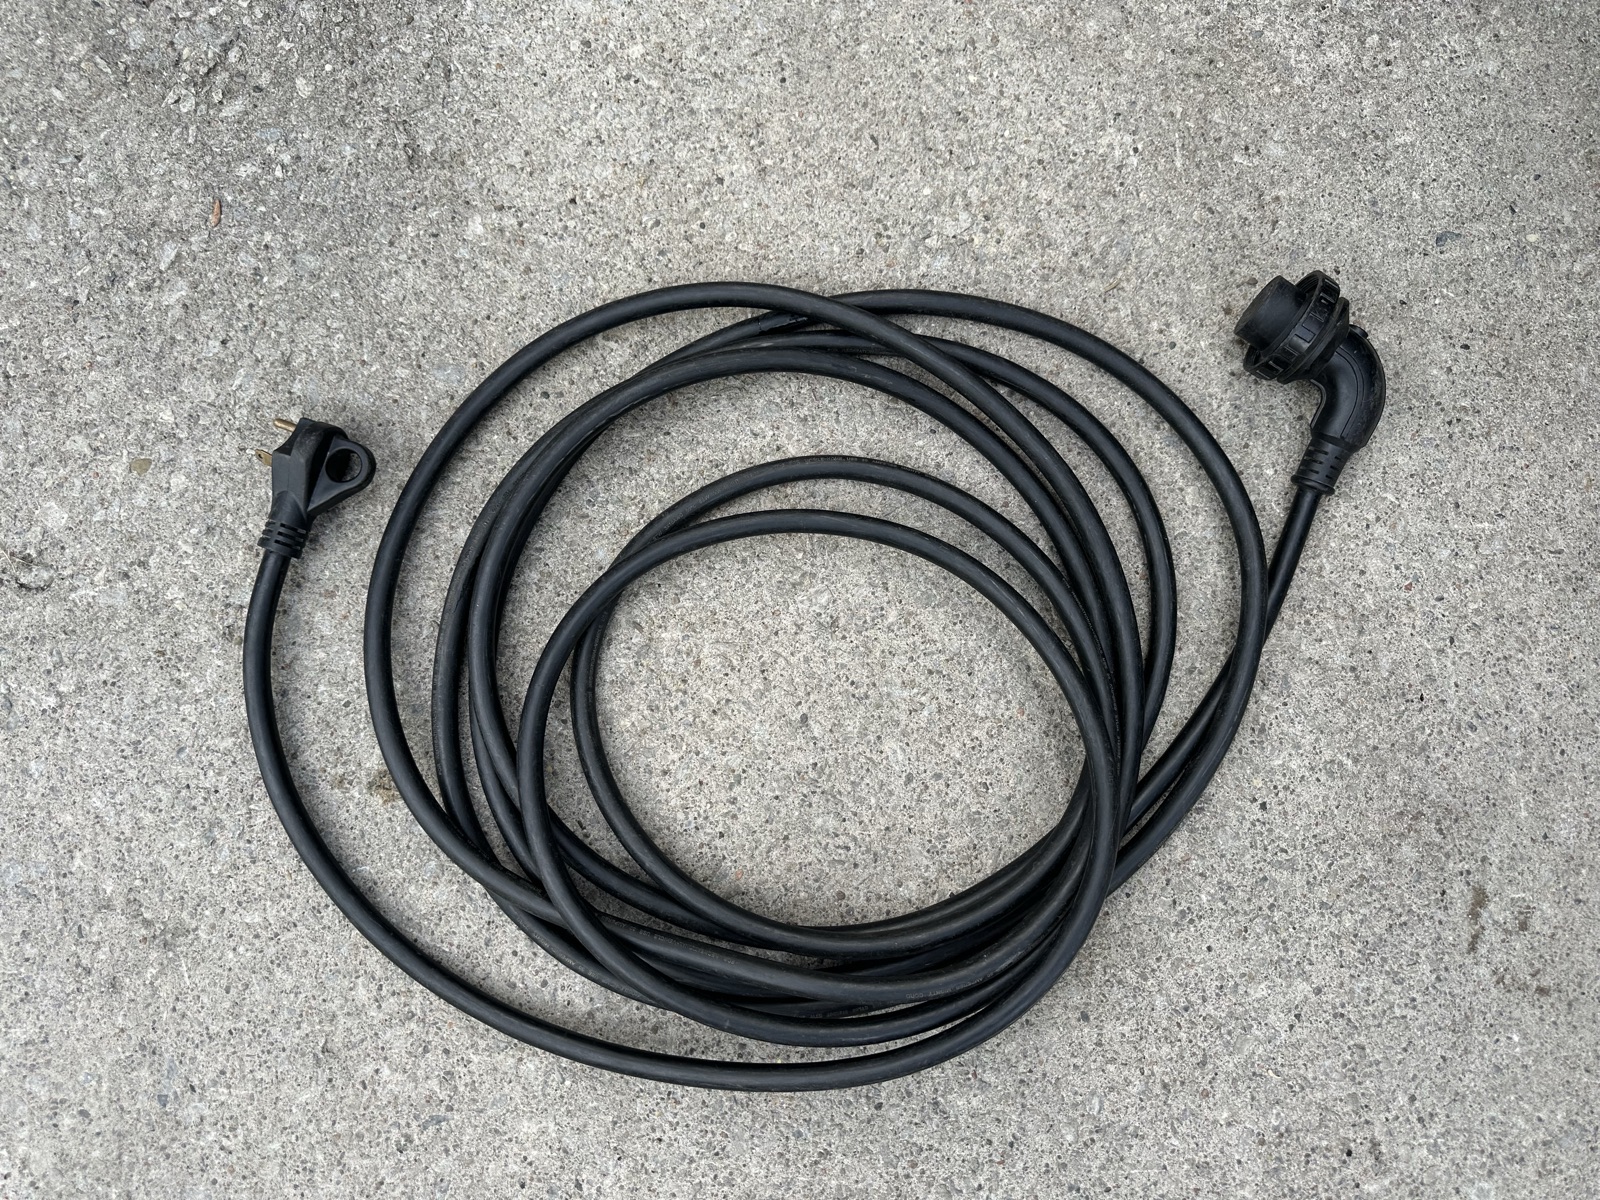
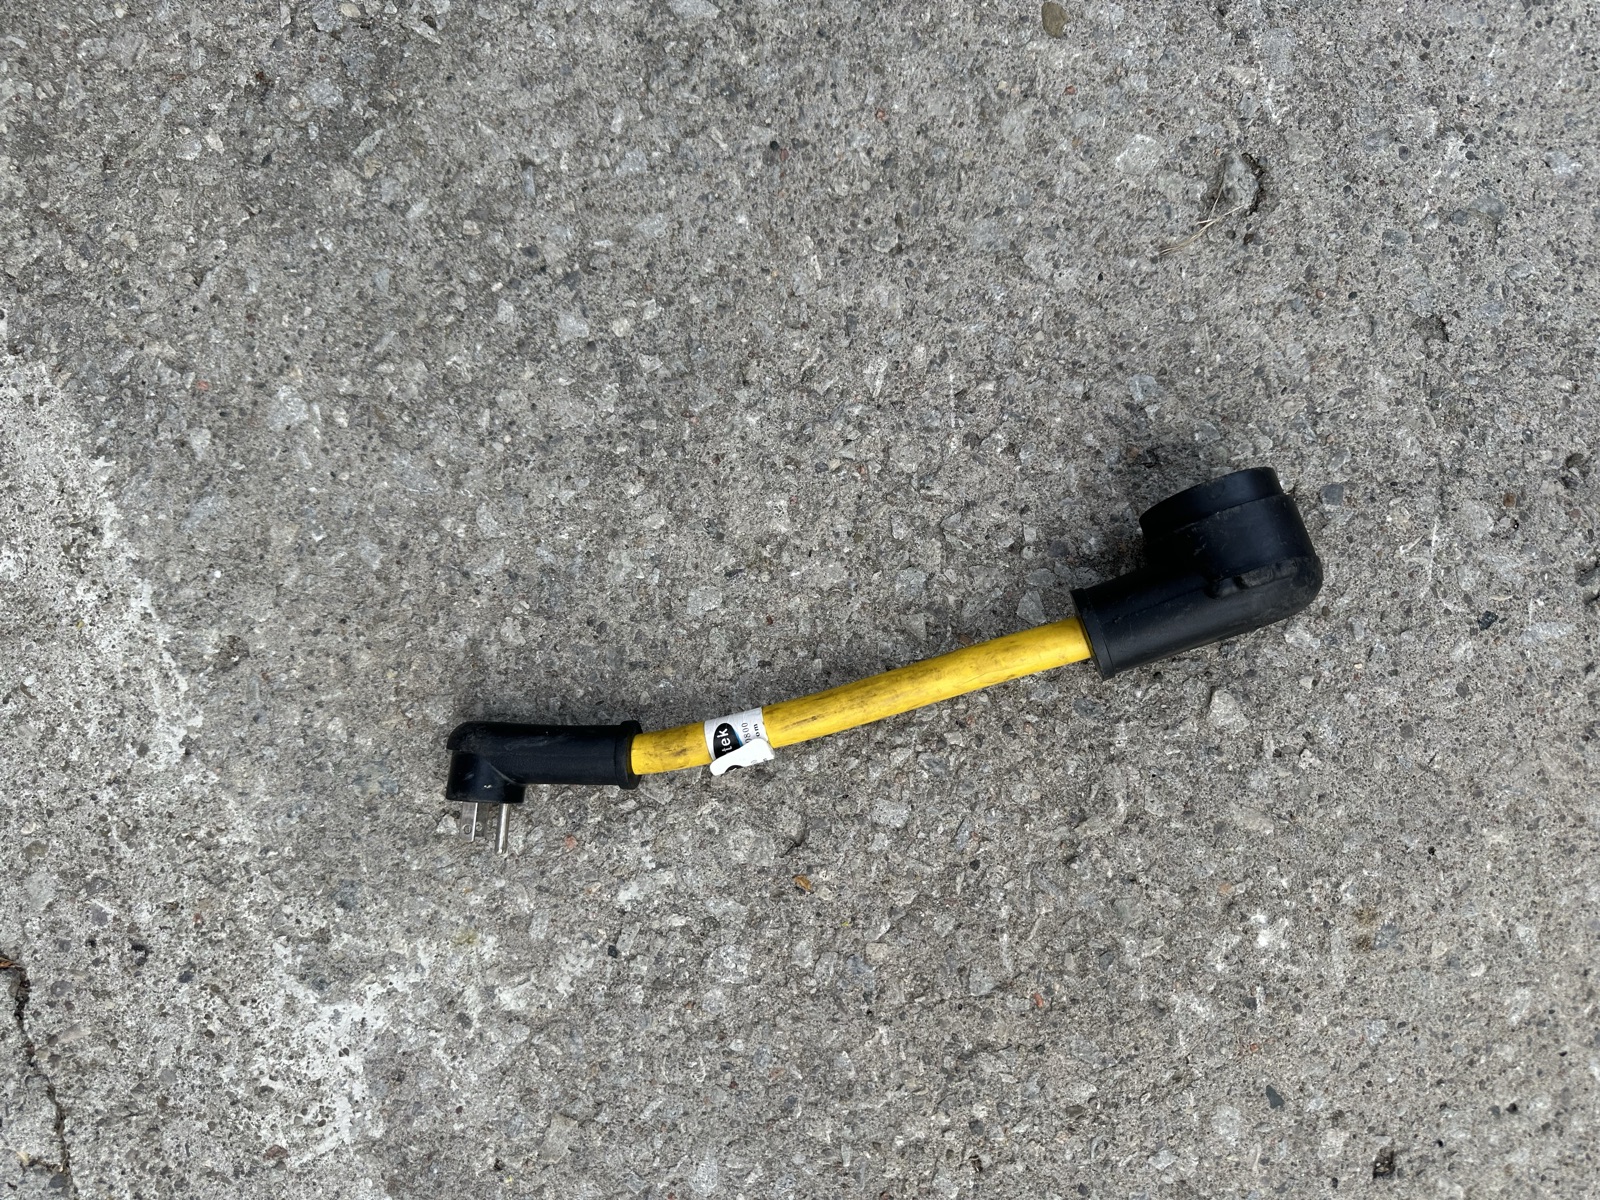
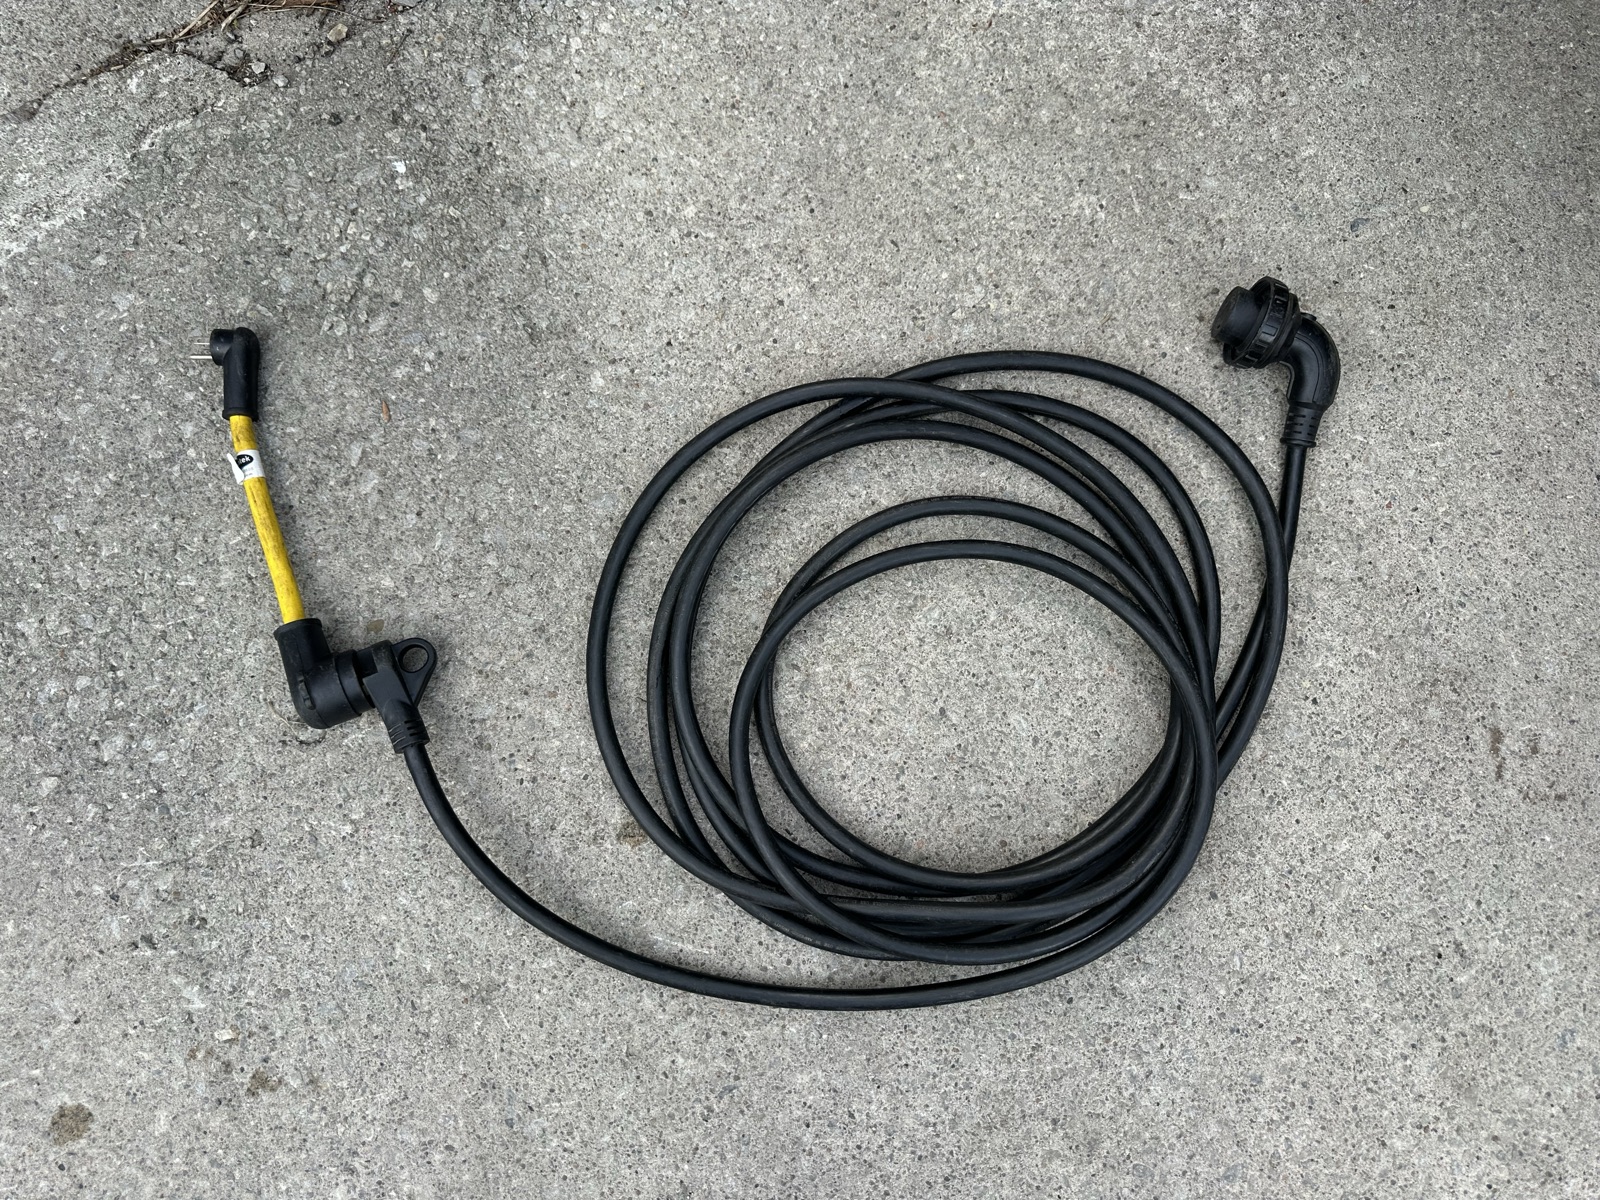
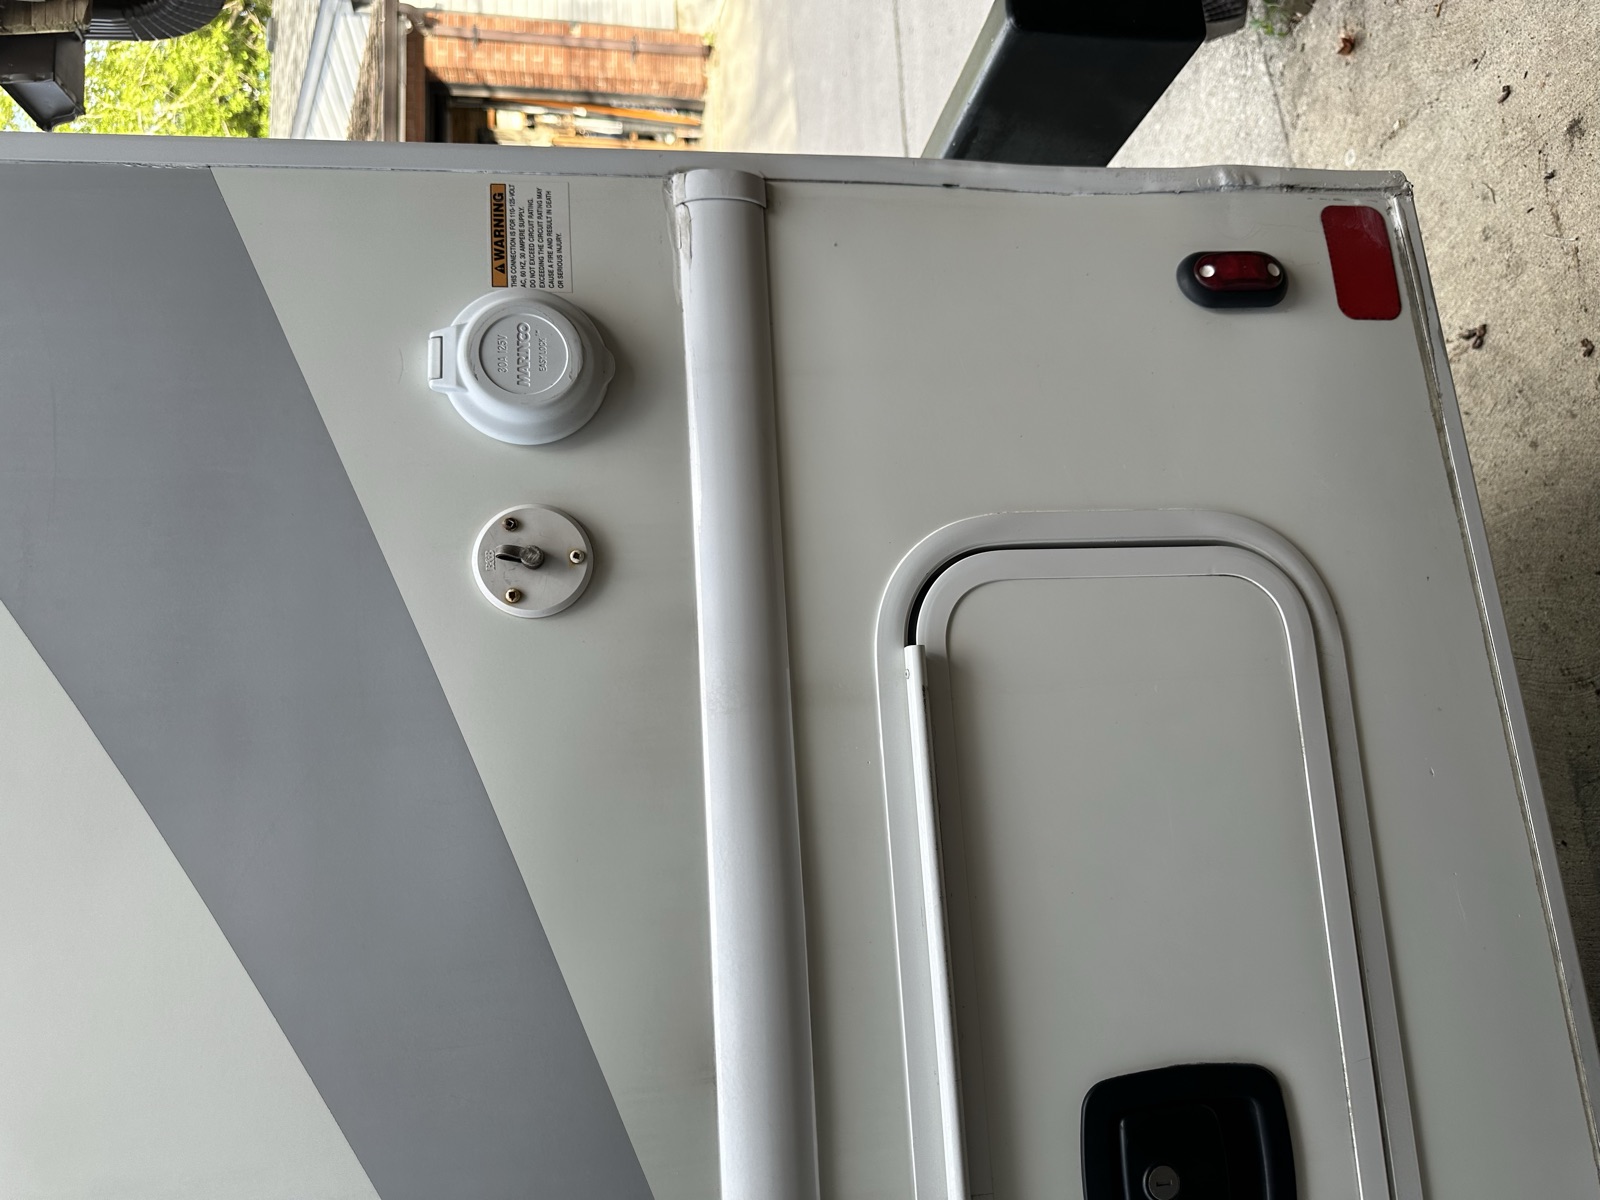
Electrical cables — what each one is for draft★ quick-ref
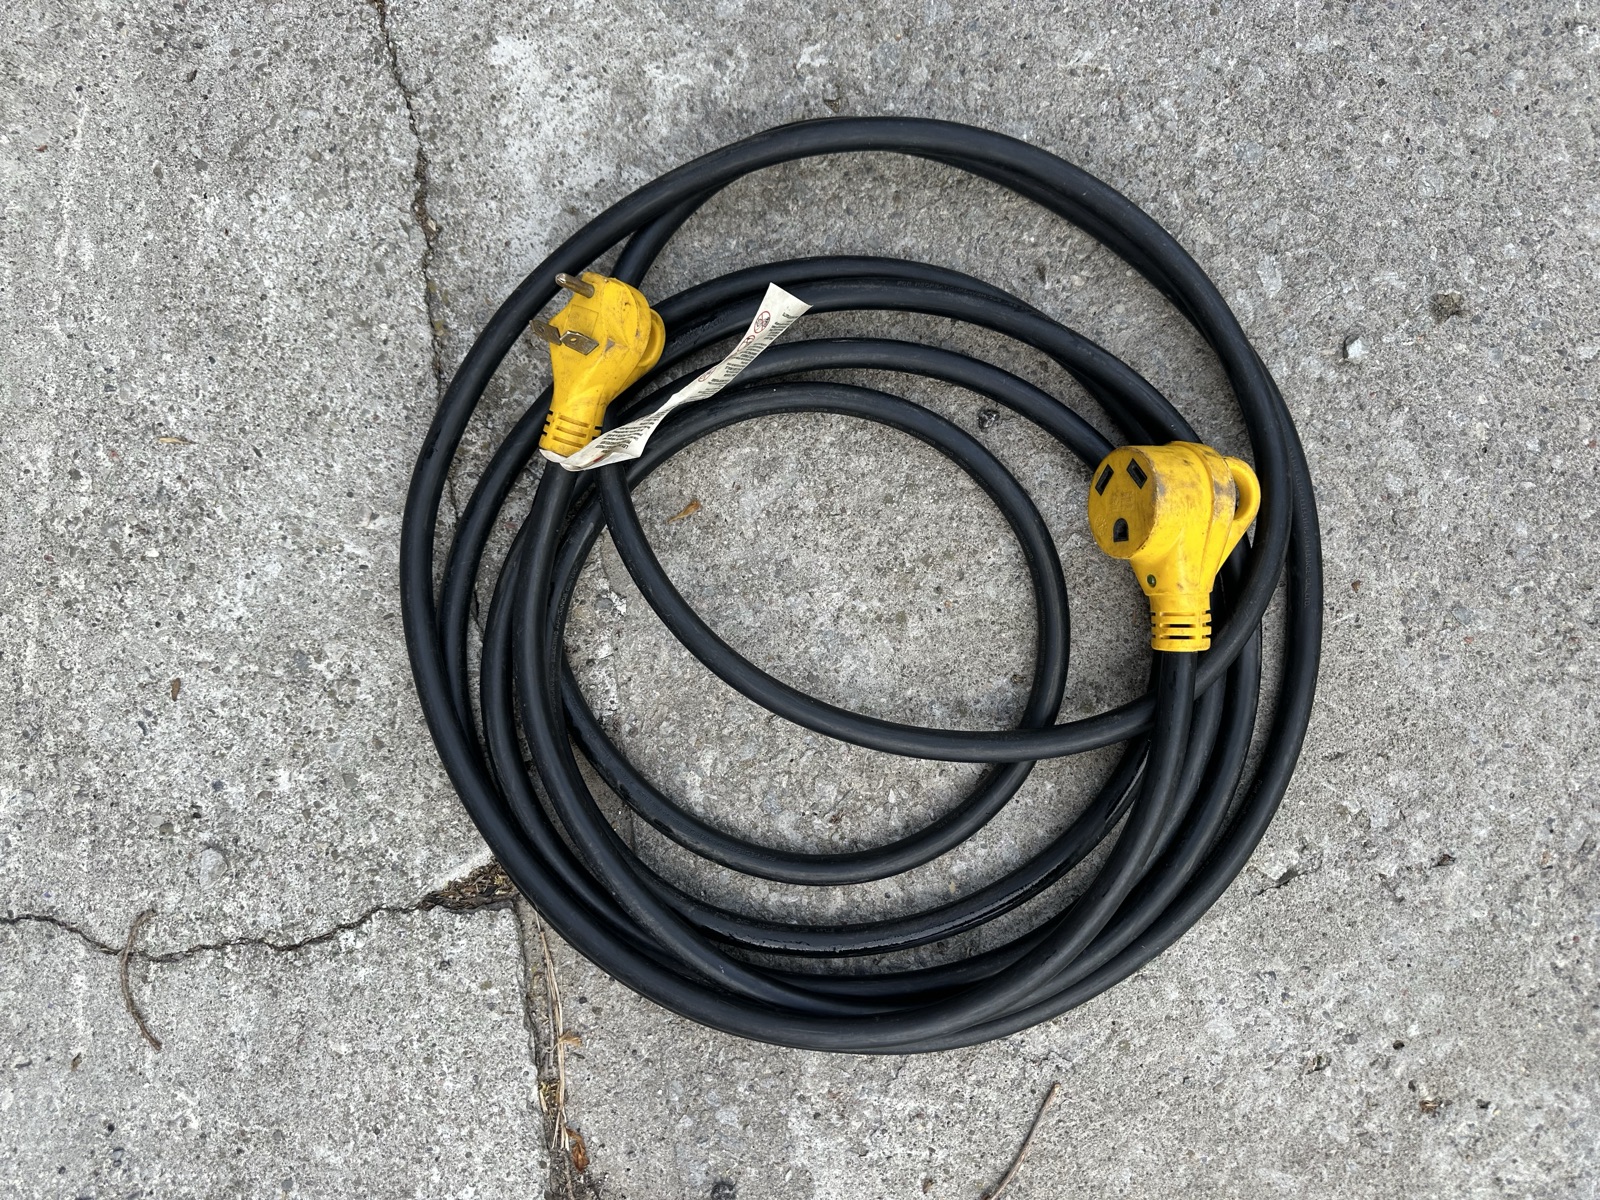
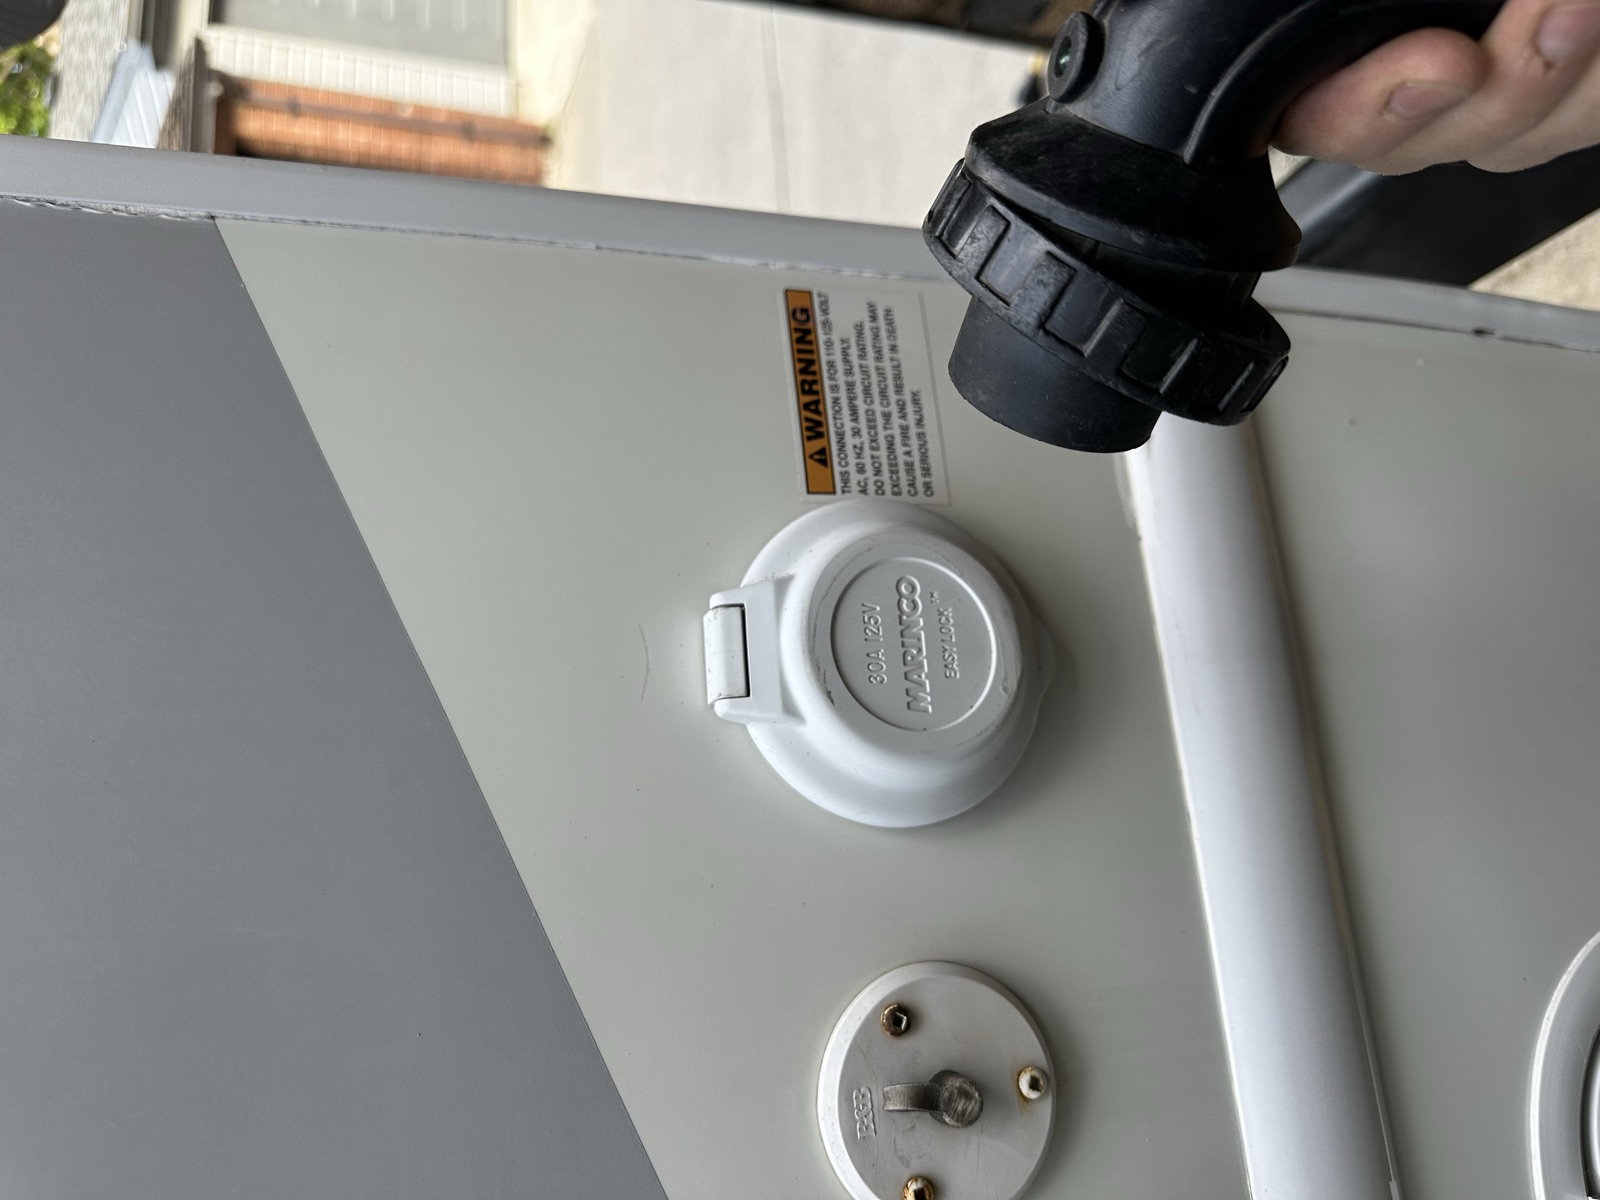
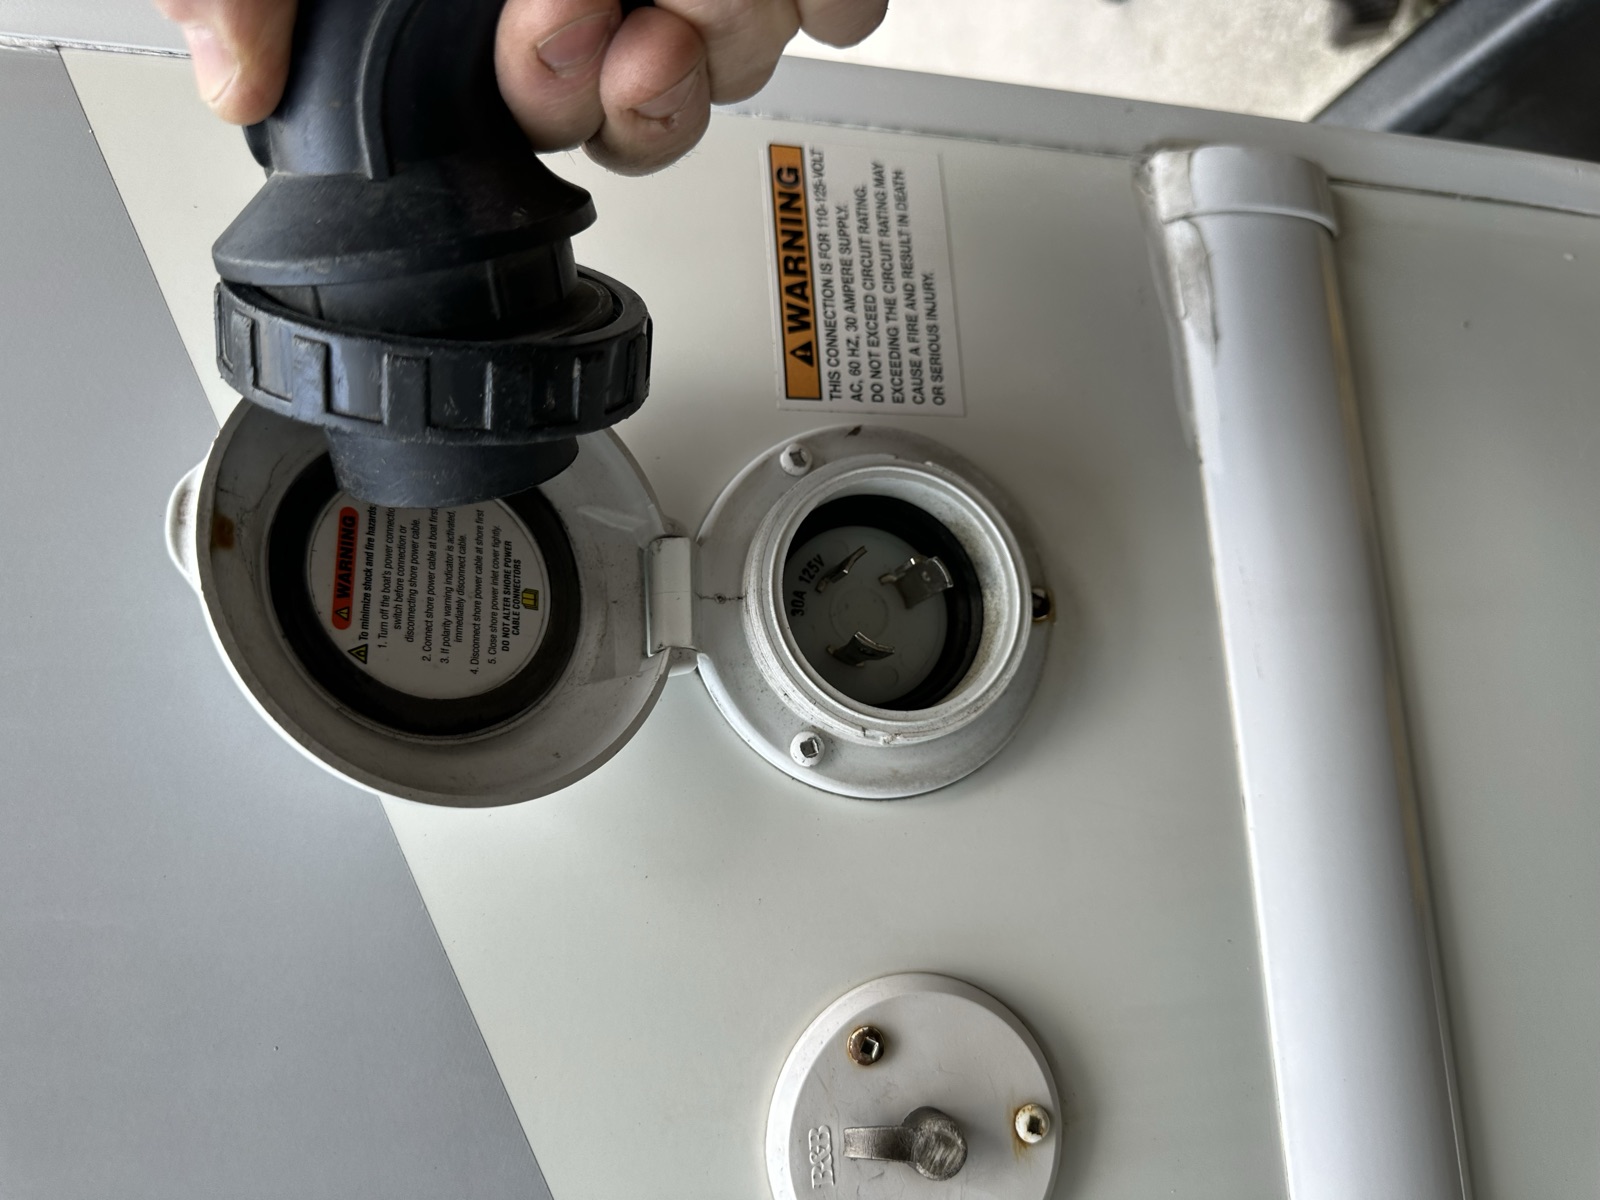
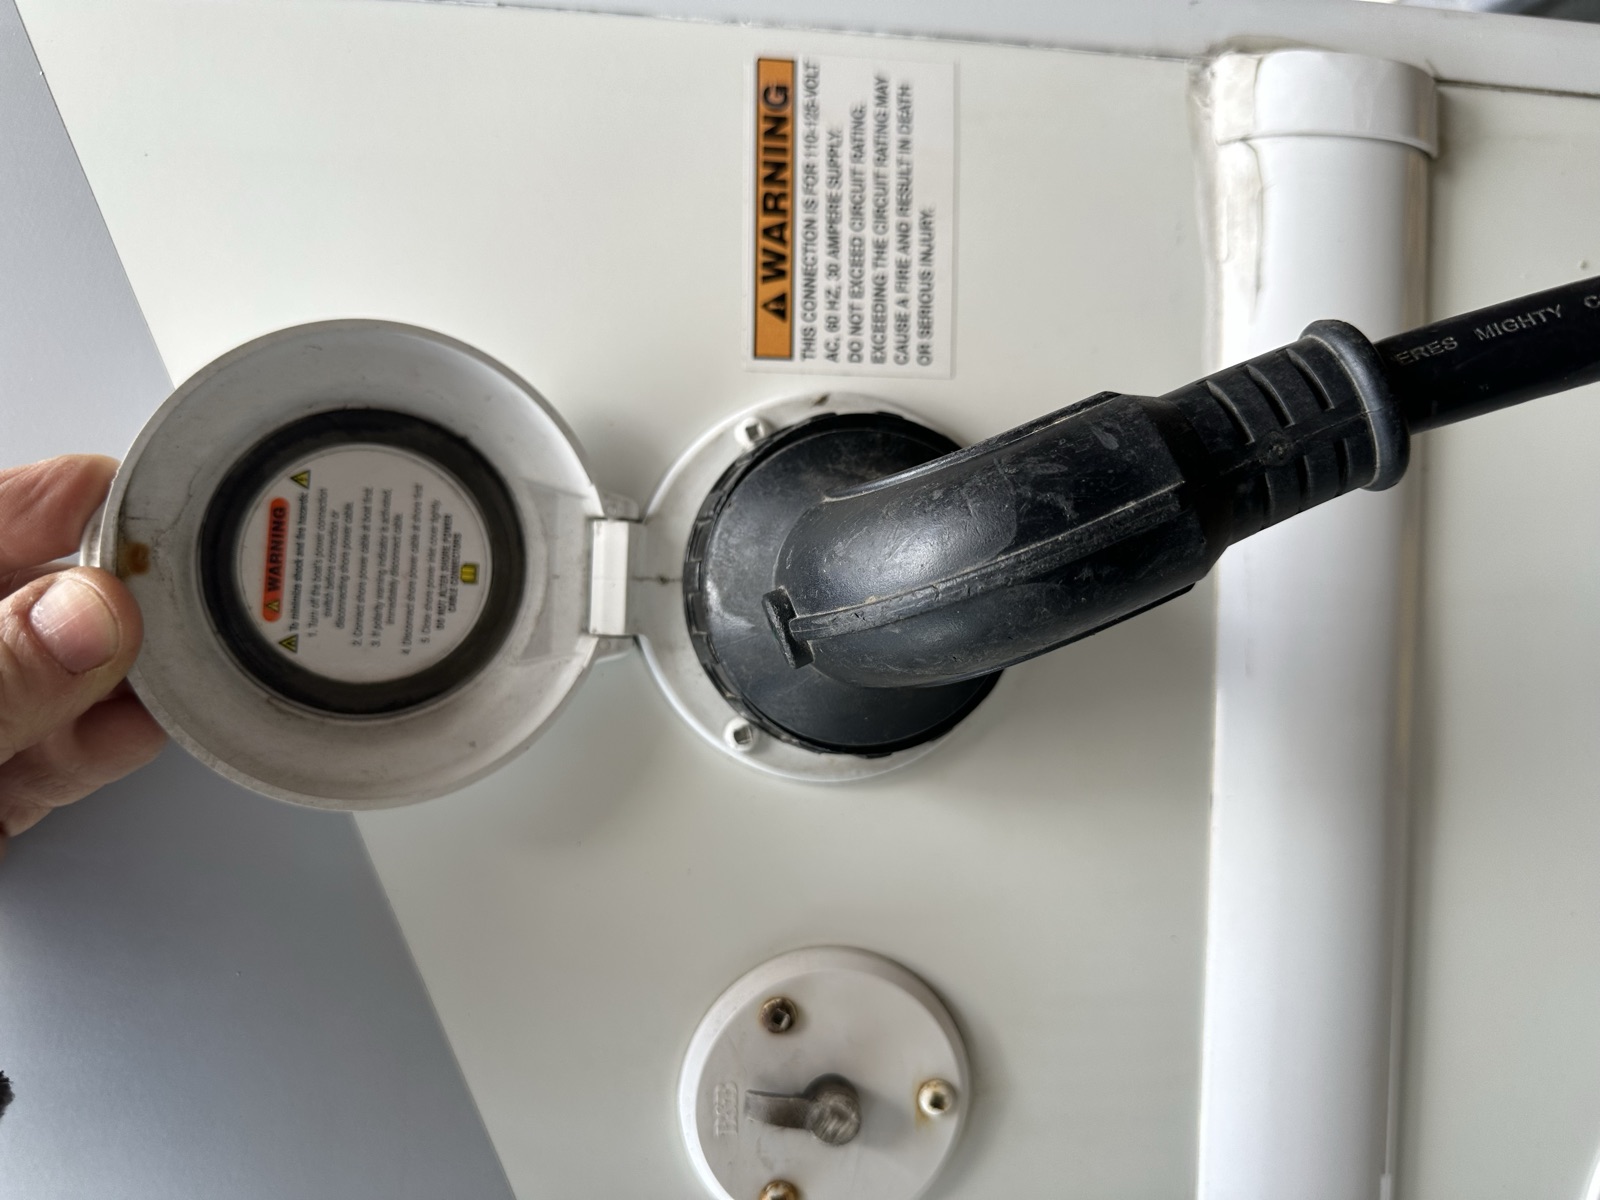
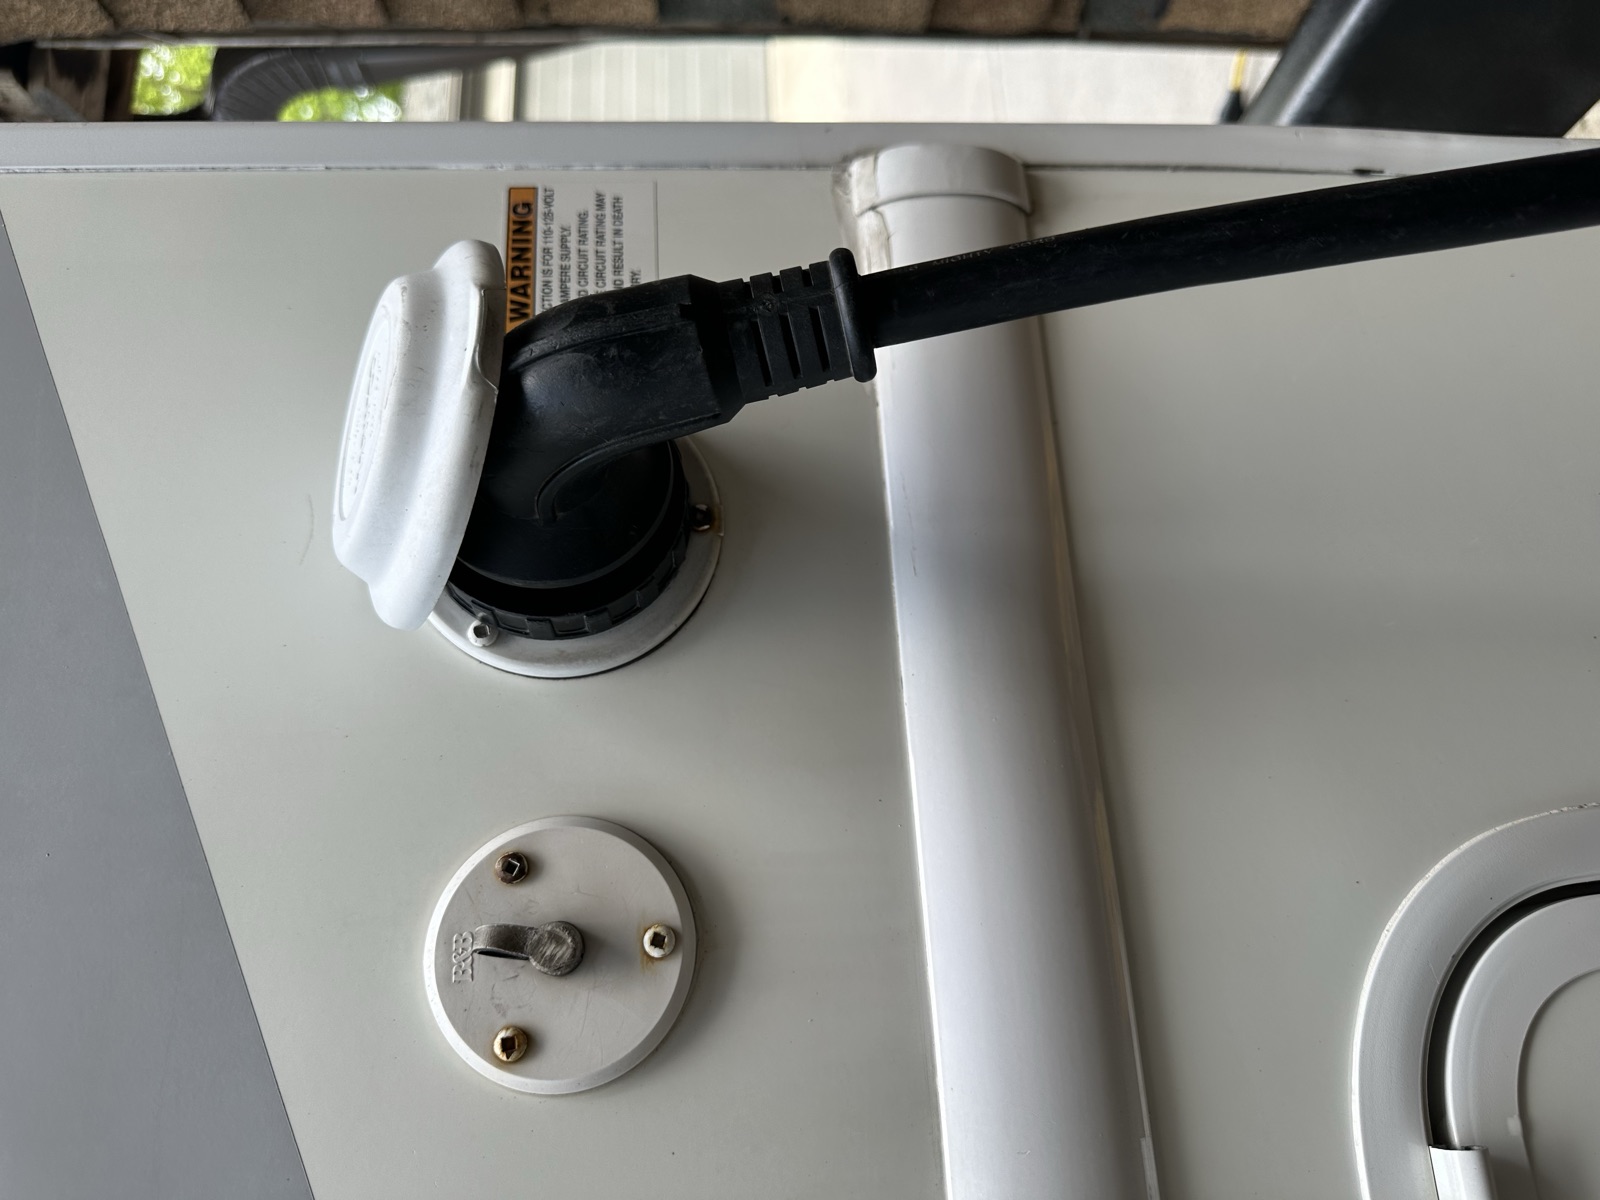
IMG_7978 30A extension cordIMG_7980 Main RV power cordIMG_7979 30A → 15A adapterIMG_7981 Main cord with 30→15A adapter attachedIMG_7977 Where the main cord plugs into the RV
Three pieces of electrical kit, used together depending on what your site offers:
Main RV cord — the heavy one, plugs the RV into a 30A campsite pedestal.
30A extension cord — adds length if the pedestal is far.
30A → 15A adapter — for sites with only a regular household outlet.
Do
Match cord + adapter to what the site offers before plugging in.
Always plug into the RV first, then the pedestal/outlet last (so you're not handling live cables).
Caution
Never run high-draw appliances (A/C, microwave) on a 15A connection — breaker will trip.
How to plug the main cord into the RV draft★ quick-ref
The RV-side connector is a twist-lock. Insert, then rotate to lock.
Potable water hose draft★ quick-ref
IMG_7990 Potable water hose — for city-water hookup
The white/blue hose is for city water at sites that offer a water hookup. Connects from the campsite tap to the RV's "city water" inlet (covered later, near the water systems door).
Three campsite service levels (explainer) draft★ quick-ref
Campsites generally fall into three categories. Know which one you have before you arrive — it changes what you set up.
No services (dry/boondocking): No water, no power, no sewer. Use the fresh tank, batteries, and generator.
Partial / electric only: Power available at a pedestal. Plug in with the main cord (+ adapter if 15A).
Full hookups: Power + city water + sewer connection at the site. Use all three.
Tools compartment review
IMG_8054 Tools compartment — door open
A small compartment holds a few basic tools — useful for in-trip fixes and light adjustments at the site.
Photos still needed
Same door closed (for context — which door it is on the left side)
Storage under kitchen seats (exterior access) draft
IMG_7995 Large, low storage under the kitchen seats
A wide but shallow storage area accessible from outside, below the kitchen bench seats inside. Good for flat items.
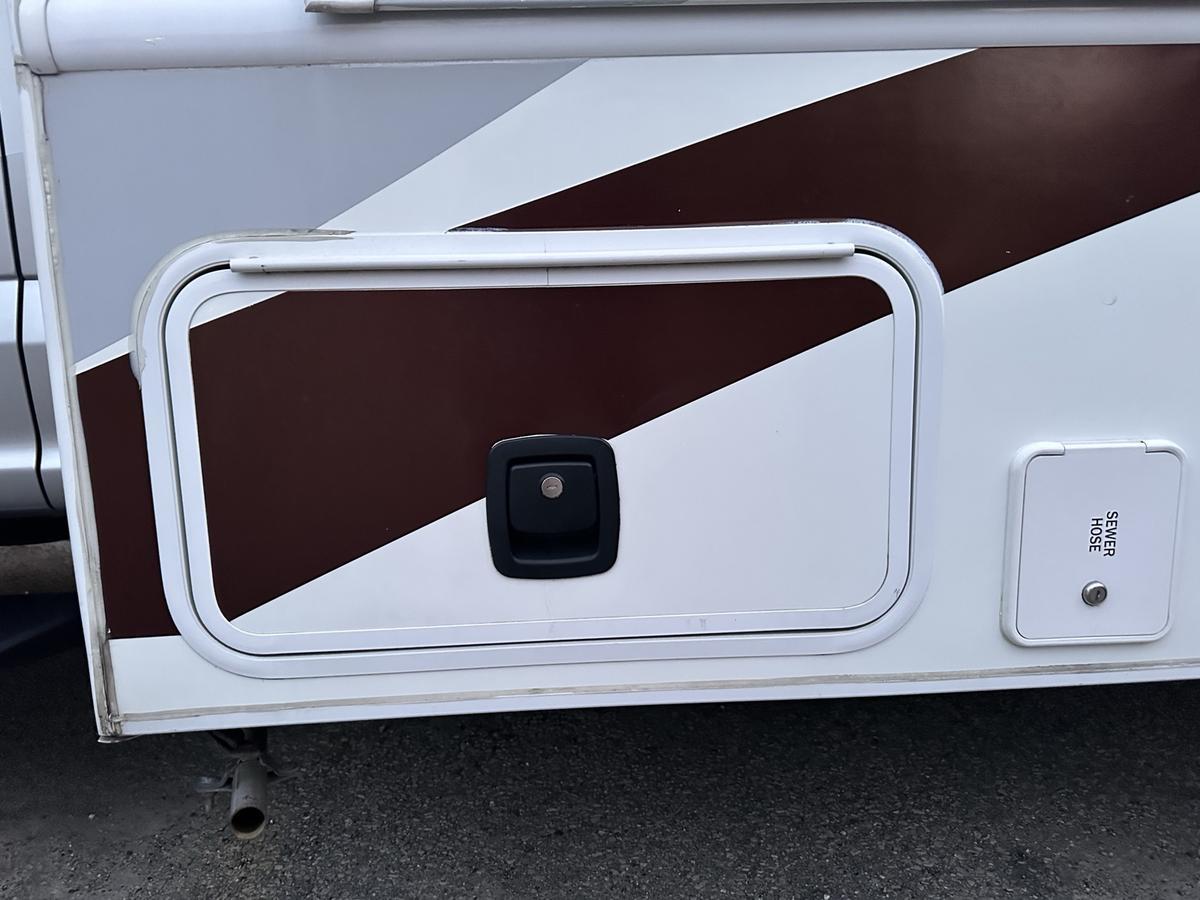
Water systems bay — overview draft★ quick-ref
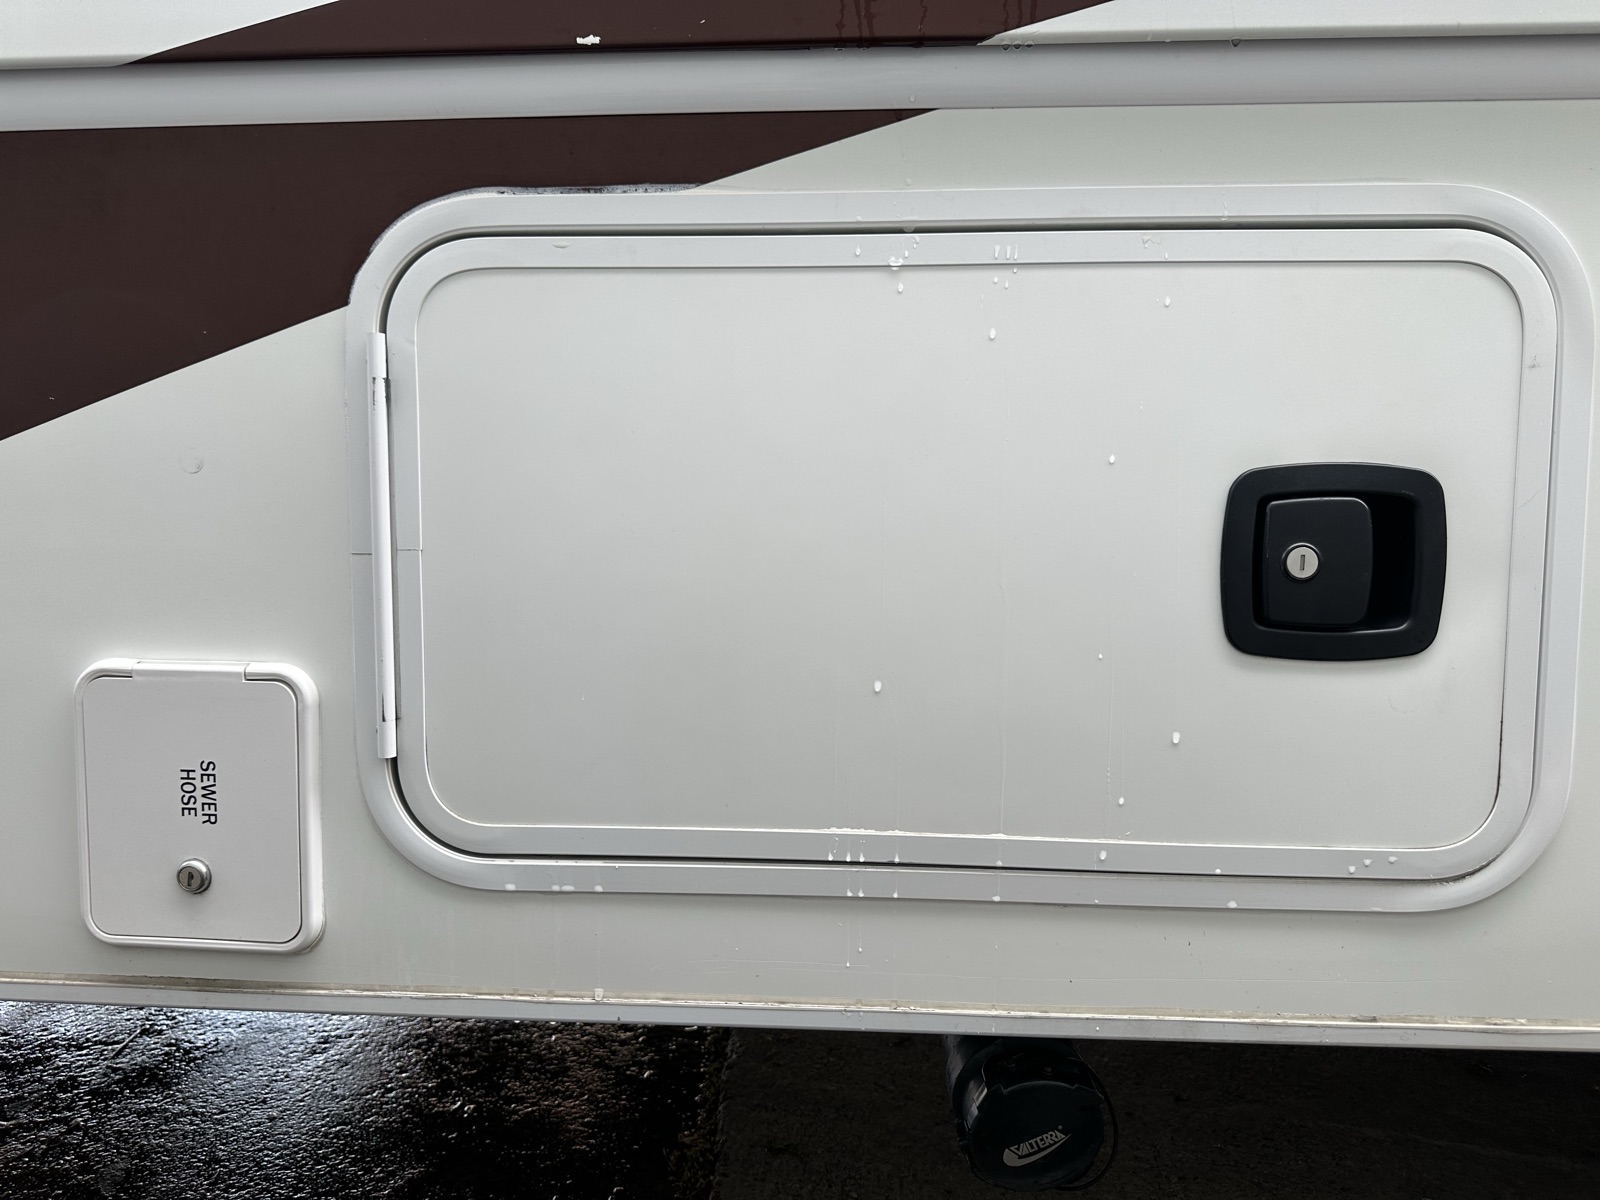
IMG_7996 Water systems bay — closed doors
The most important compartment to understand. Two doors: a small one for the sewer hose, a large one for the city-water connection and the grey/black tank valves.
Sewer hose storage draft★ quick-ref
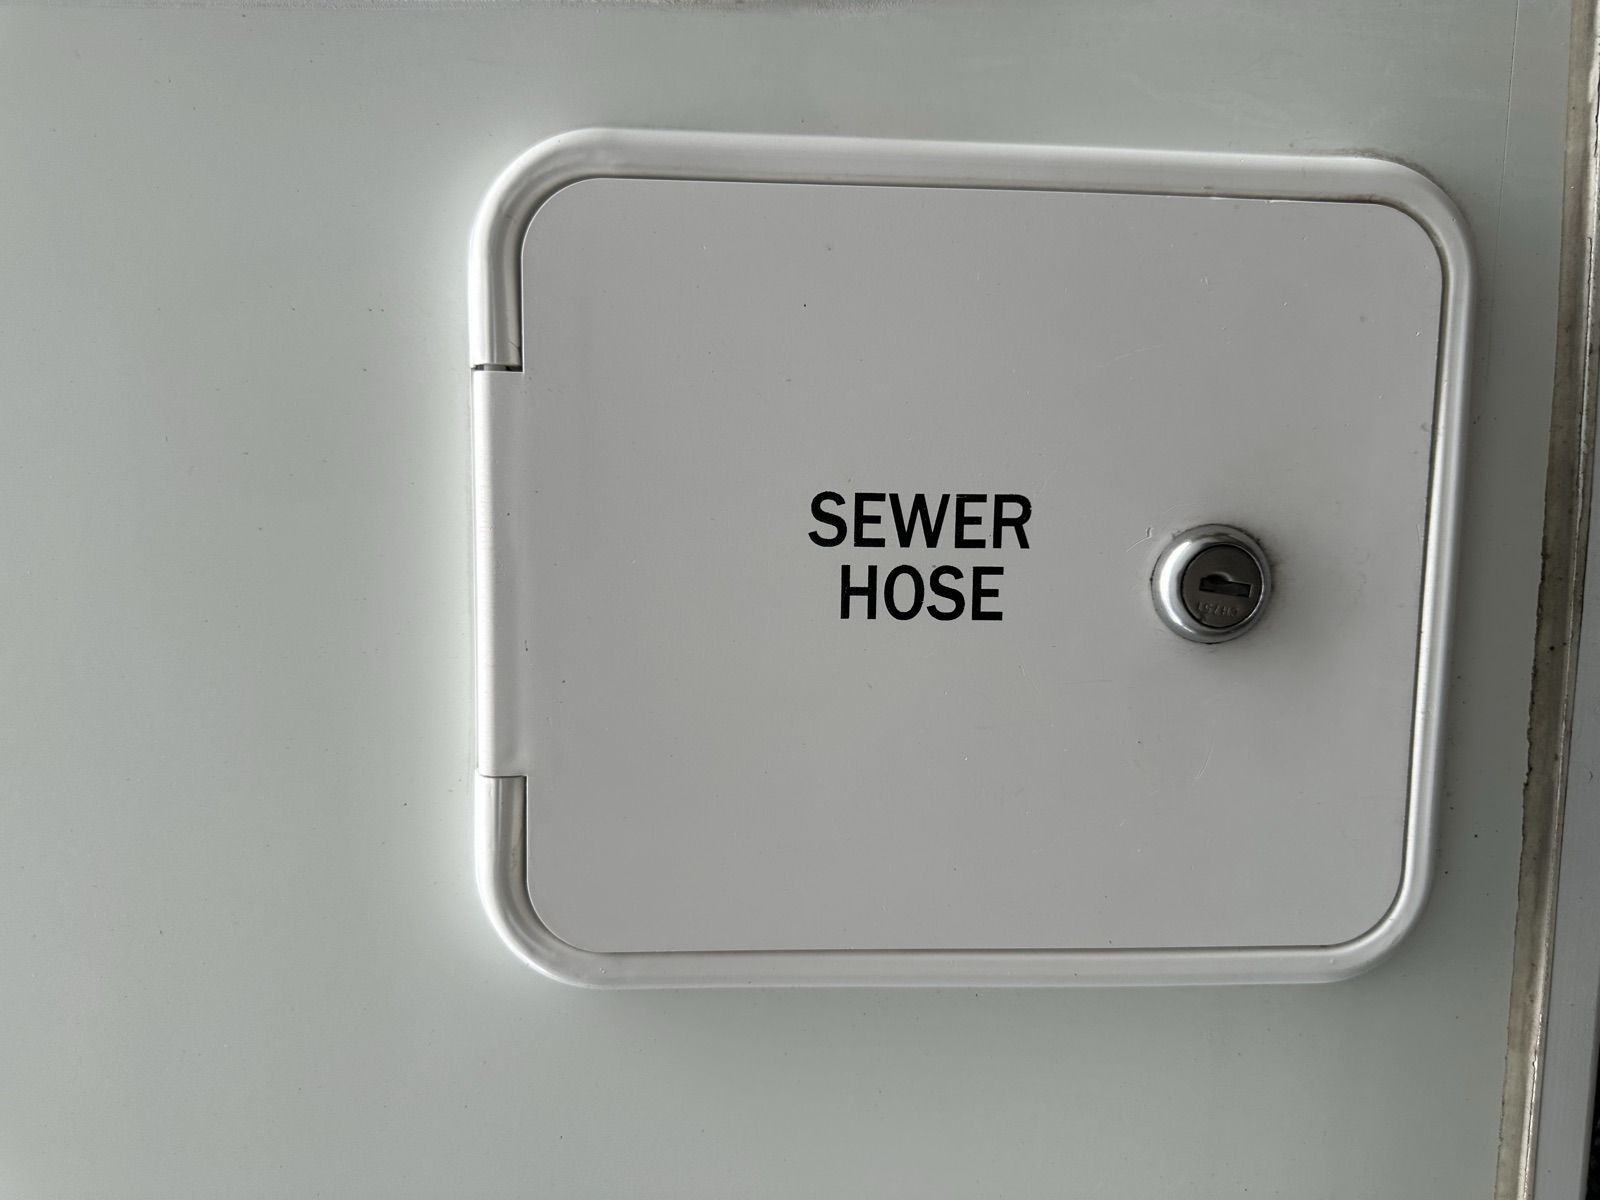
IMG_7997 Small door — sewer hose lives here
The flexible sewer hose is stored behind this small door.
Caution
Wear gloves when handling. Keep this hose separate from the potable water hose.
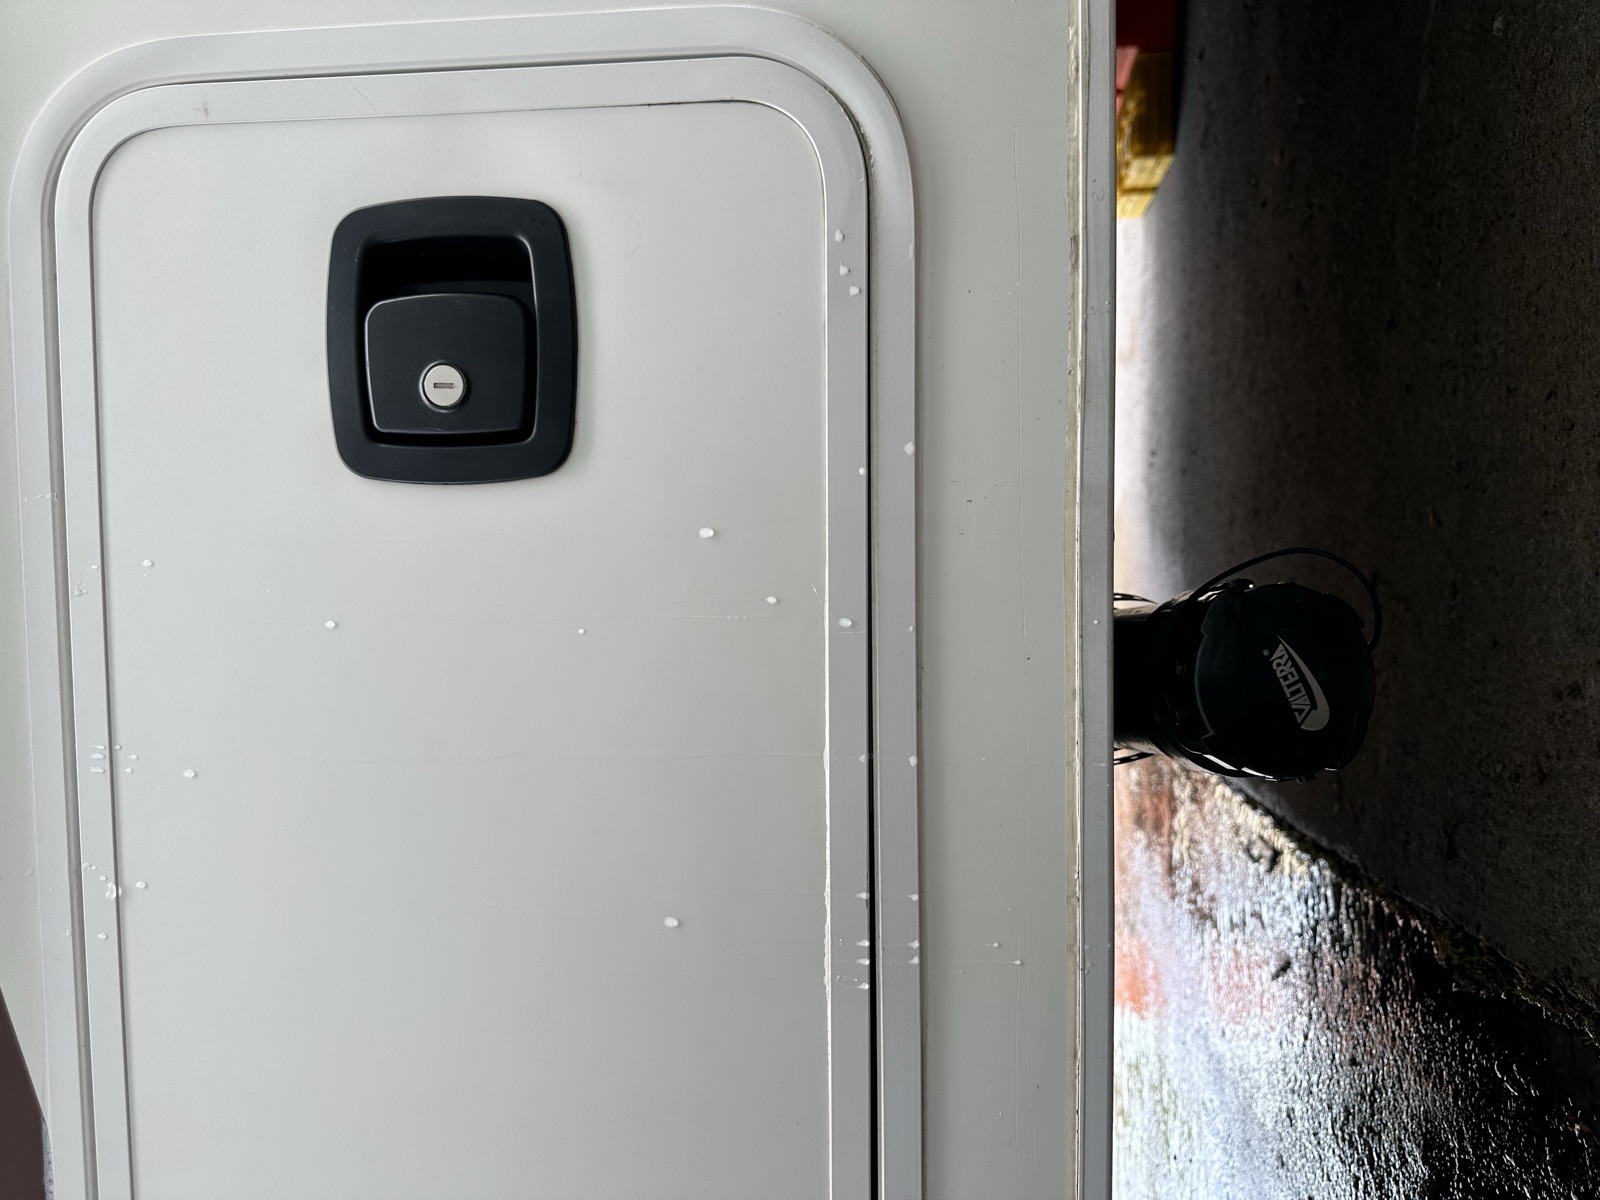
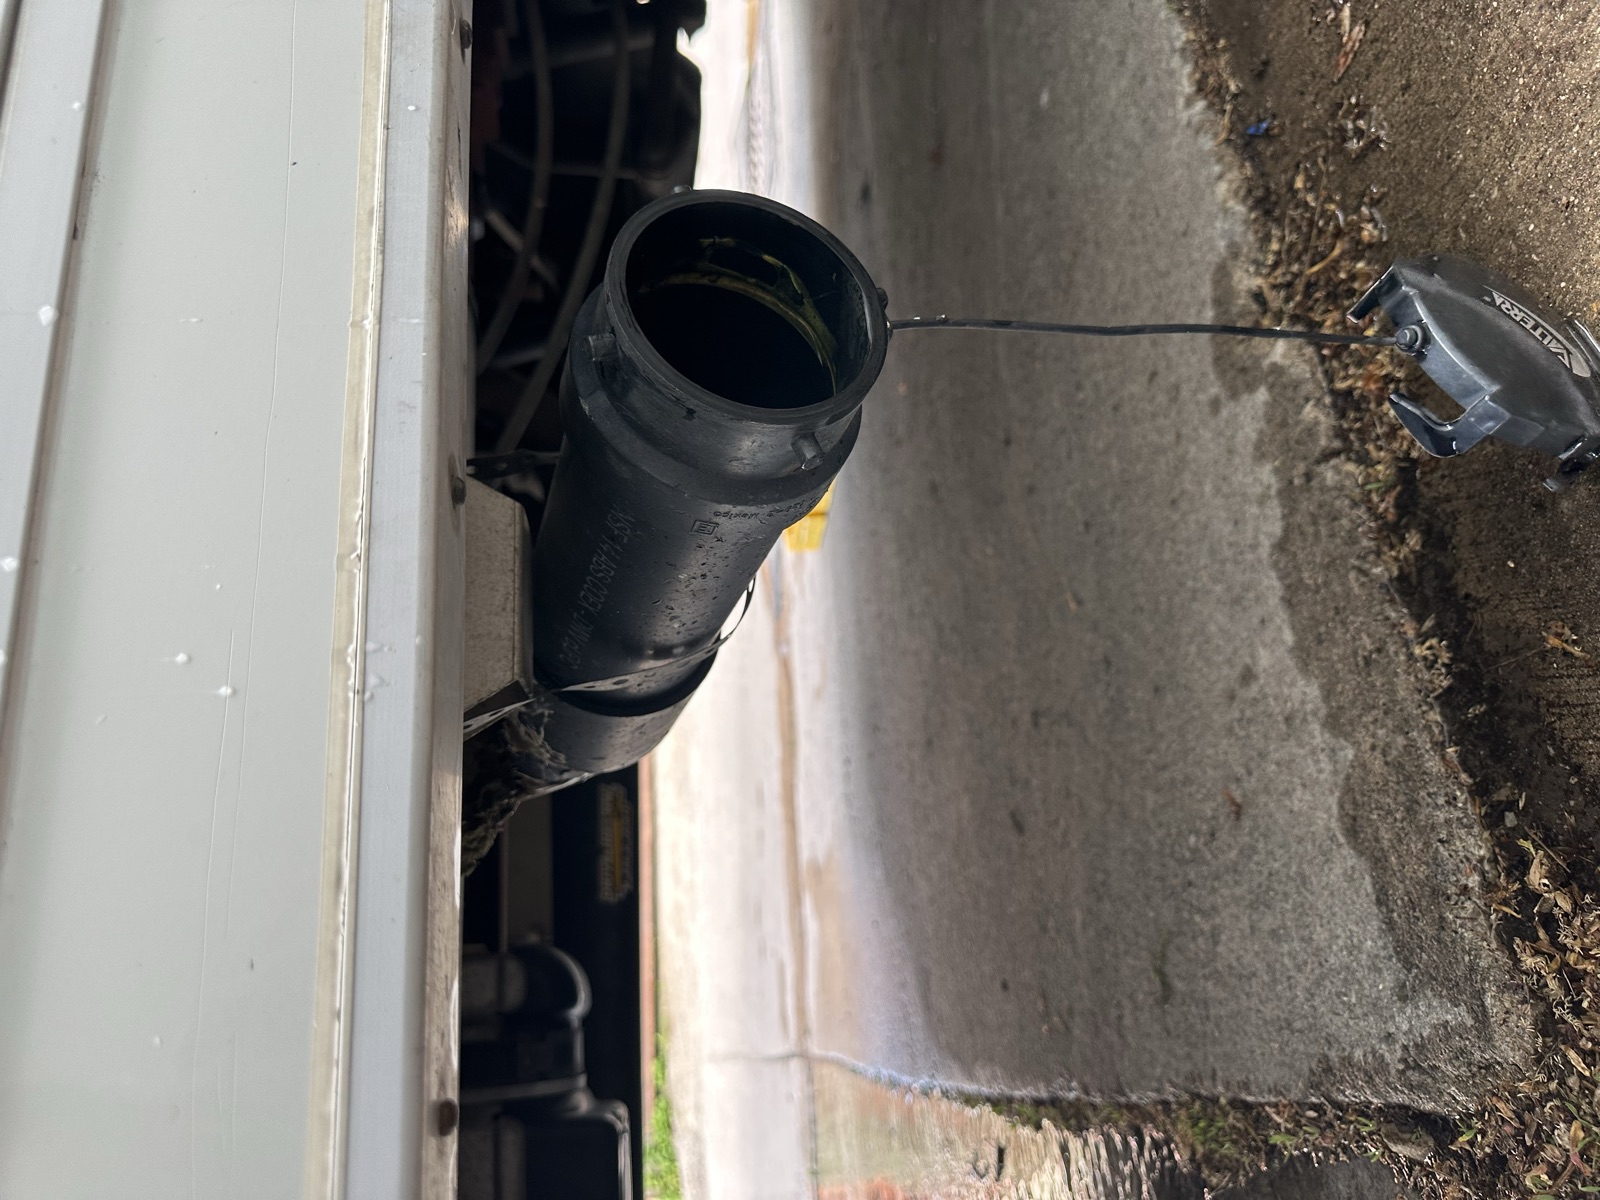
Below the bigger door is the sewer output. The hose attaches here, and the other end goes into the campsite sewer port (or a dump station outlet).
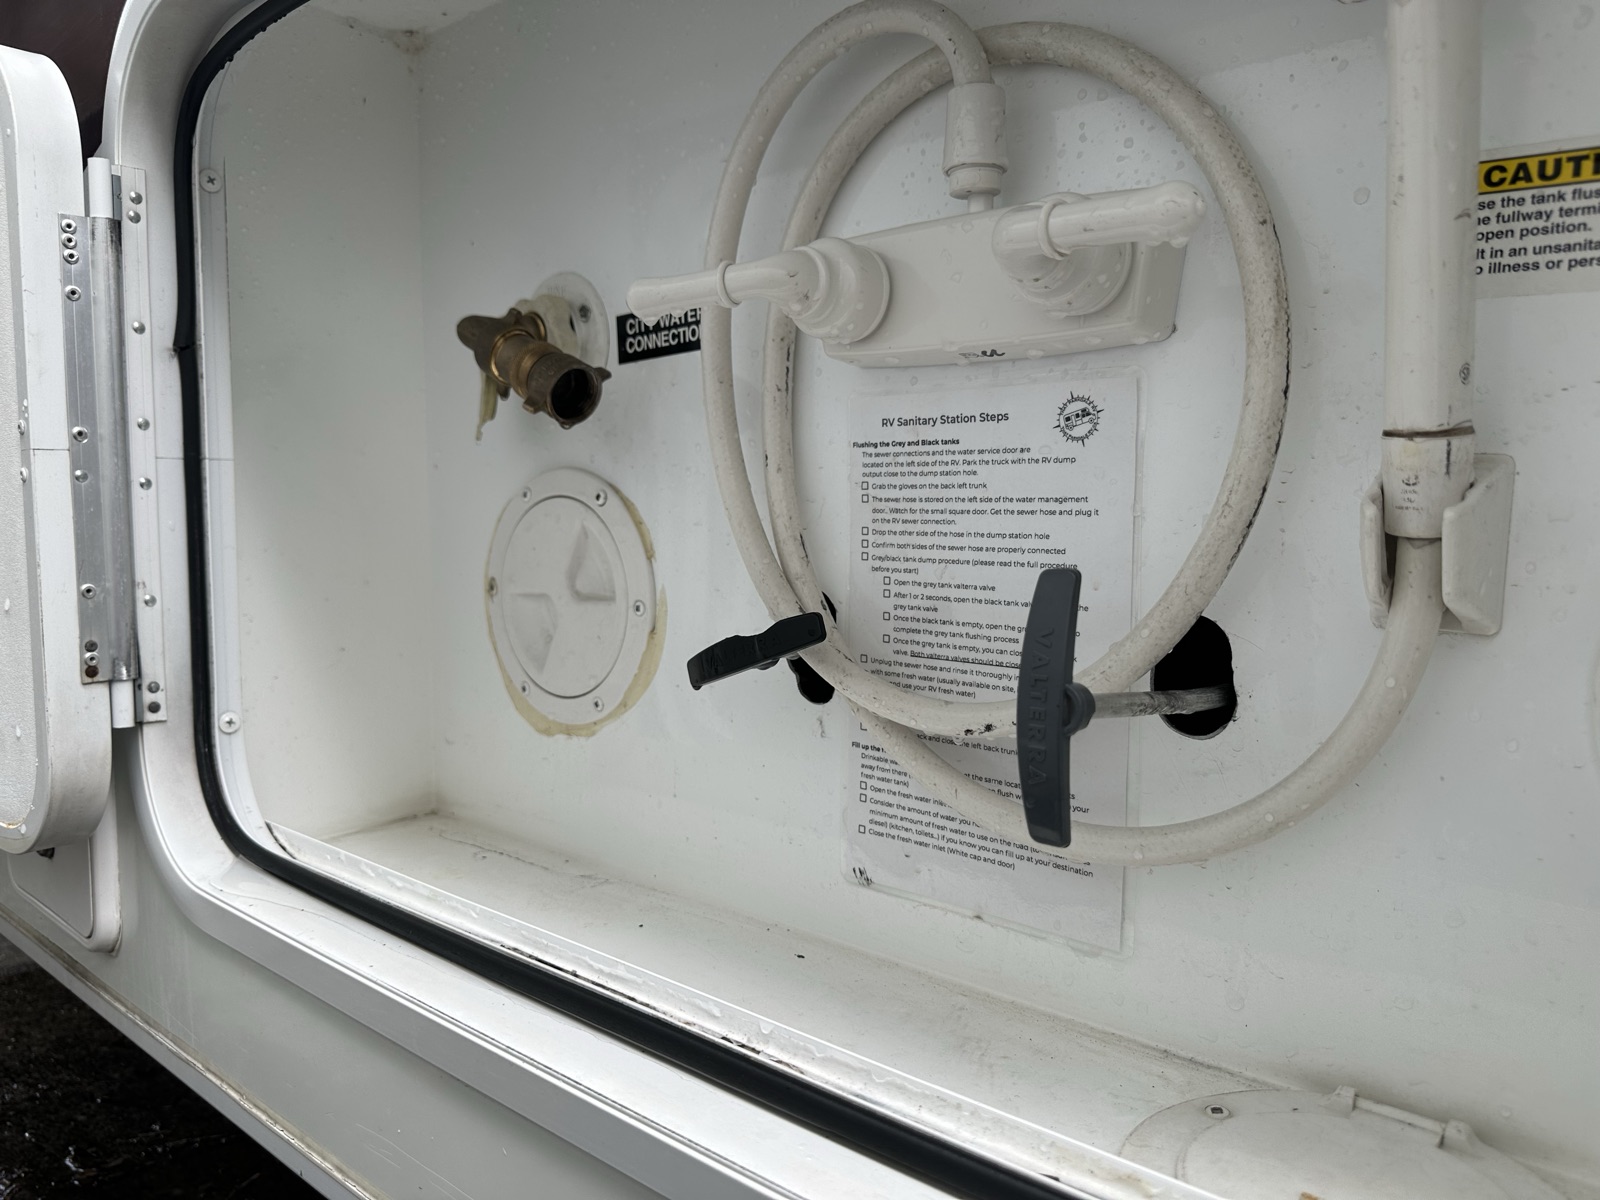
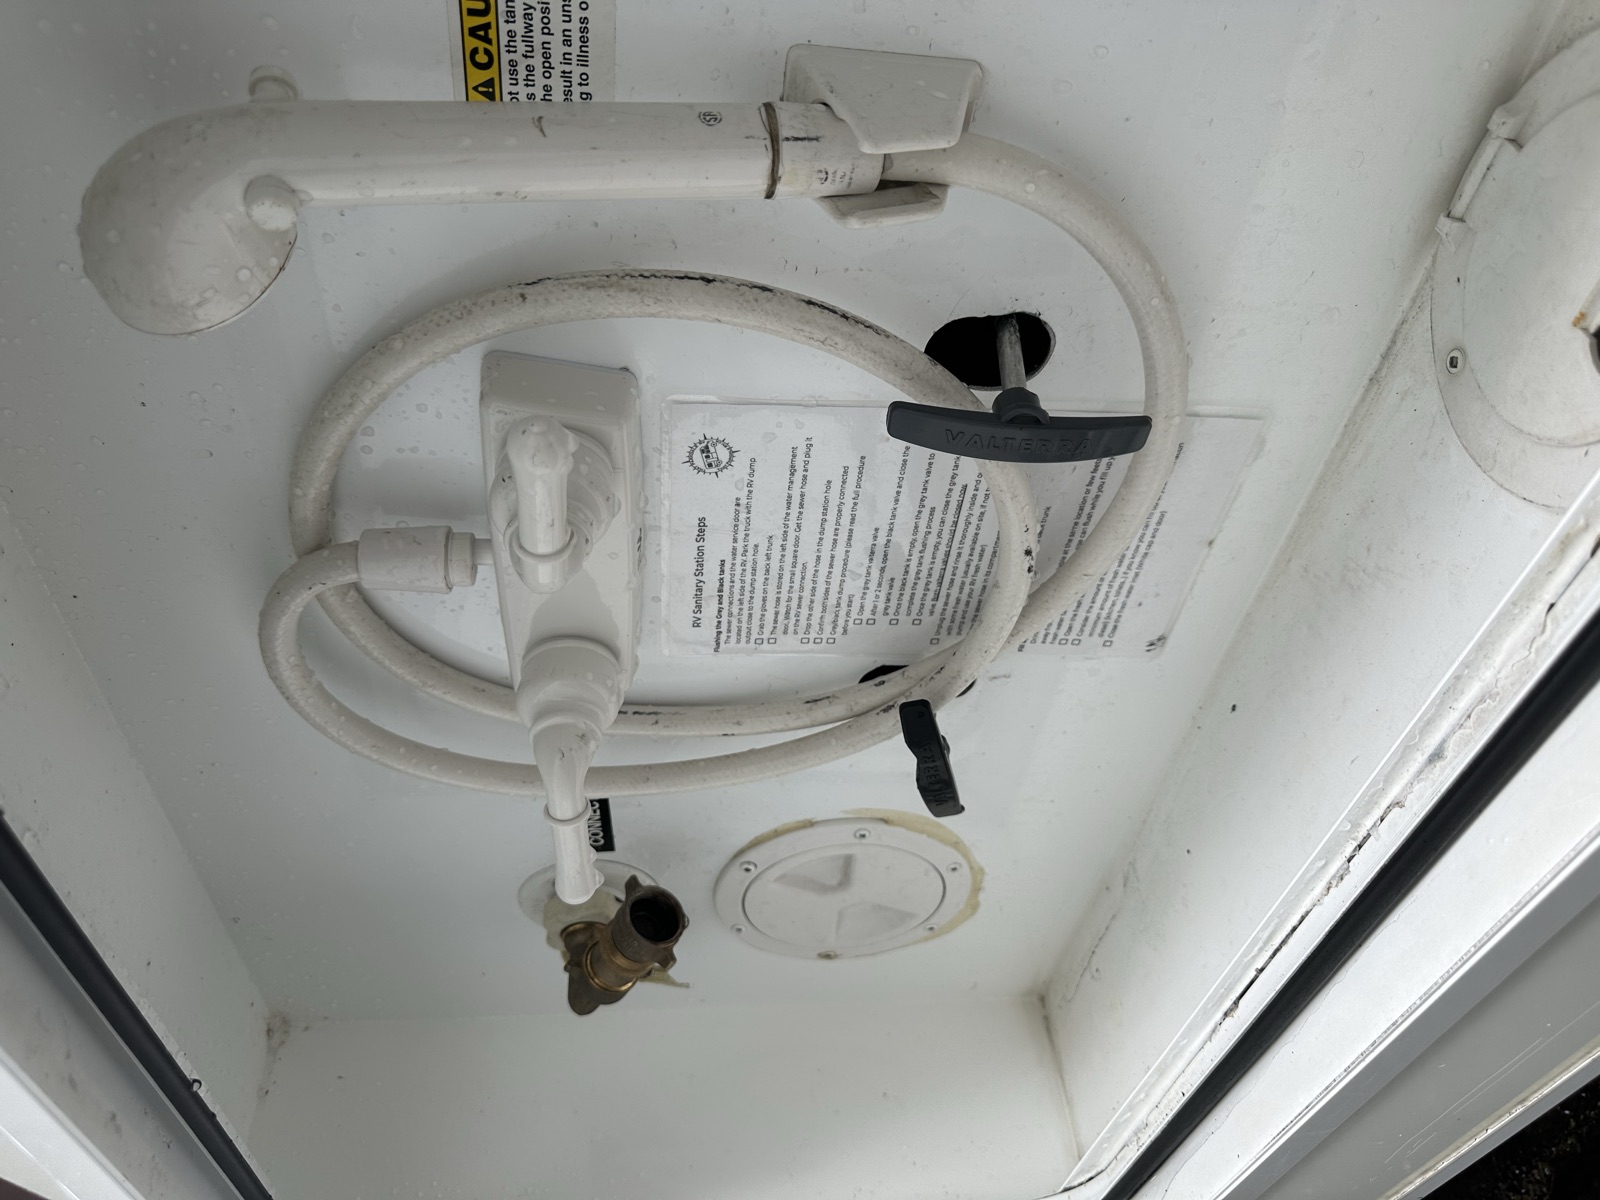
Water systems — open door (city water + tank handles) review★ quick-ref
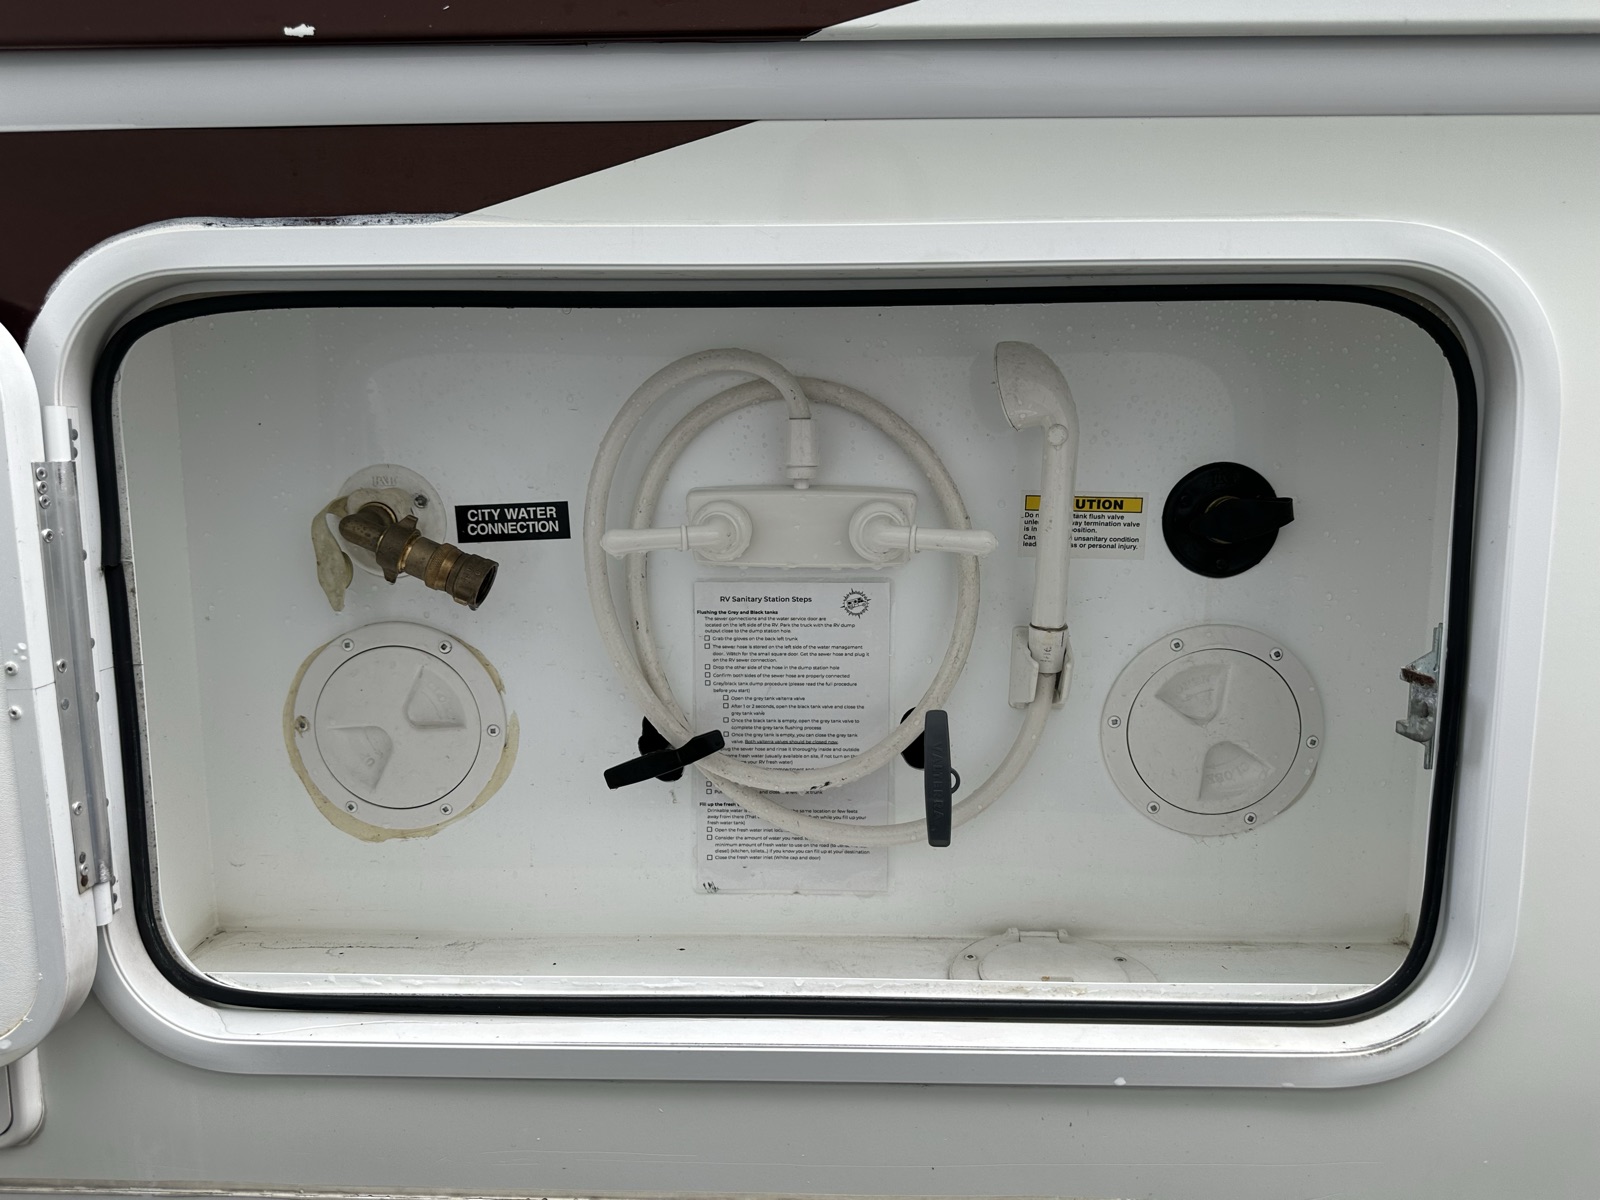
IMG_7991 Water systems bay — openIMG_7992 Valve handle PULLED OUT (open)IMG_7994 Same handle PUSHED IN (closed)
Inside this bay:
City water inlet — where the blue potable hose connects when the site has a water hookup.
Grey handle — opens the grey water valve (kitchen + bathroom sinks + shower). Tank: 30 gal / 115 L.
Black handle — opens the black water valve (toilet only). Tank: 30 gal / 115 L.
Both handles stay pushed in (closed) during normal site use — water accumulates in the tanks. You only open them at a dump station.
Do
At a dump station — “black sandwich” procedure:
1) Connect the sewer hose to the RV outlet and the dump-station hole. Confirm both ends are secure.
2) Open the grey valve for 1–2 seconds (wets the inside of the hose so solids slide).
3) Close grey, then open black. Wait until the black tank is fully empty.
4) Open grey again. This flushes the hose with grey water.
5) Close grey when empty. Both valves now closed.
Rinse the sewer hose inside and out with fresh water before stowing.
Cap the RV outlet (black cap) and close the bay doors before driving.
Caution
💩 Never open the black valve before the sewer hose is connected at both ends.
🛑 At full-hookup sites: KEEP THE BLACK VALVE CLOSED during normal use. It feels logical to leave it open if you're connected to sewer — but liquid drains continuously while solids stay behind. They build into a hardened cone at the tank bottom (the “poop pyramid”) that can't be flushed out and sometimes needs professional cleaning. Dump in place when the tank hits 2/3 full or more (use the “black sandwich” procedure), then close right after.
Same rule for grey: keep it closed during the stay. The grey water you save flushes the sewer hose at dump time (see the “black sandwich” procedure).
Wear the gloves stored in the back-left trunk when handling the sewer hose.
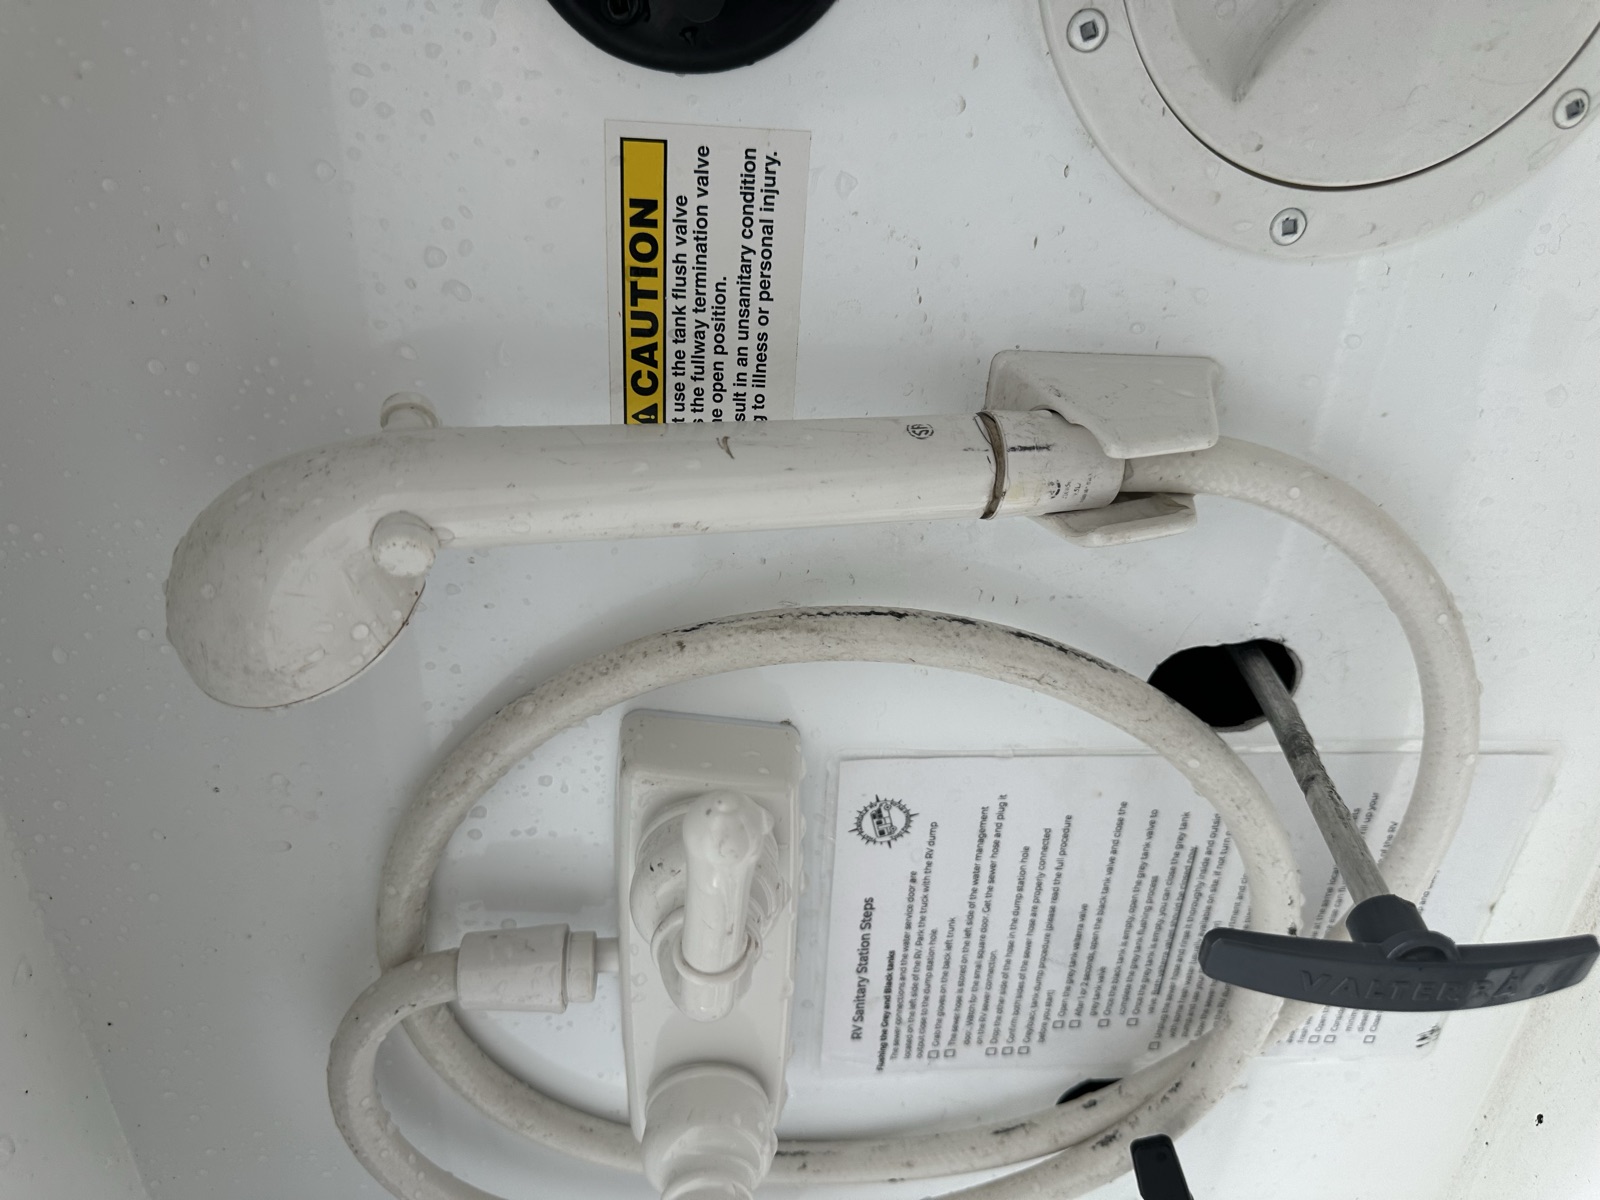
Outdoor shower draft
IMG_7993 Outdoor shower head — note the on/off stop button
An outdoor shower is also tucked in this area. The shower head has its own water-stop button so you can pause flow without going back to the valves.
Generator compartment review★ quick-ref
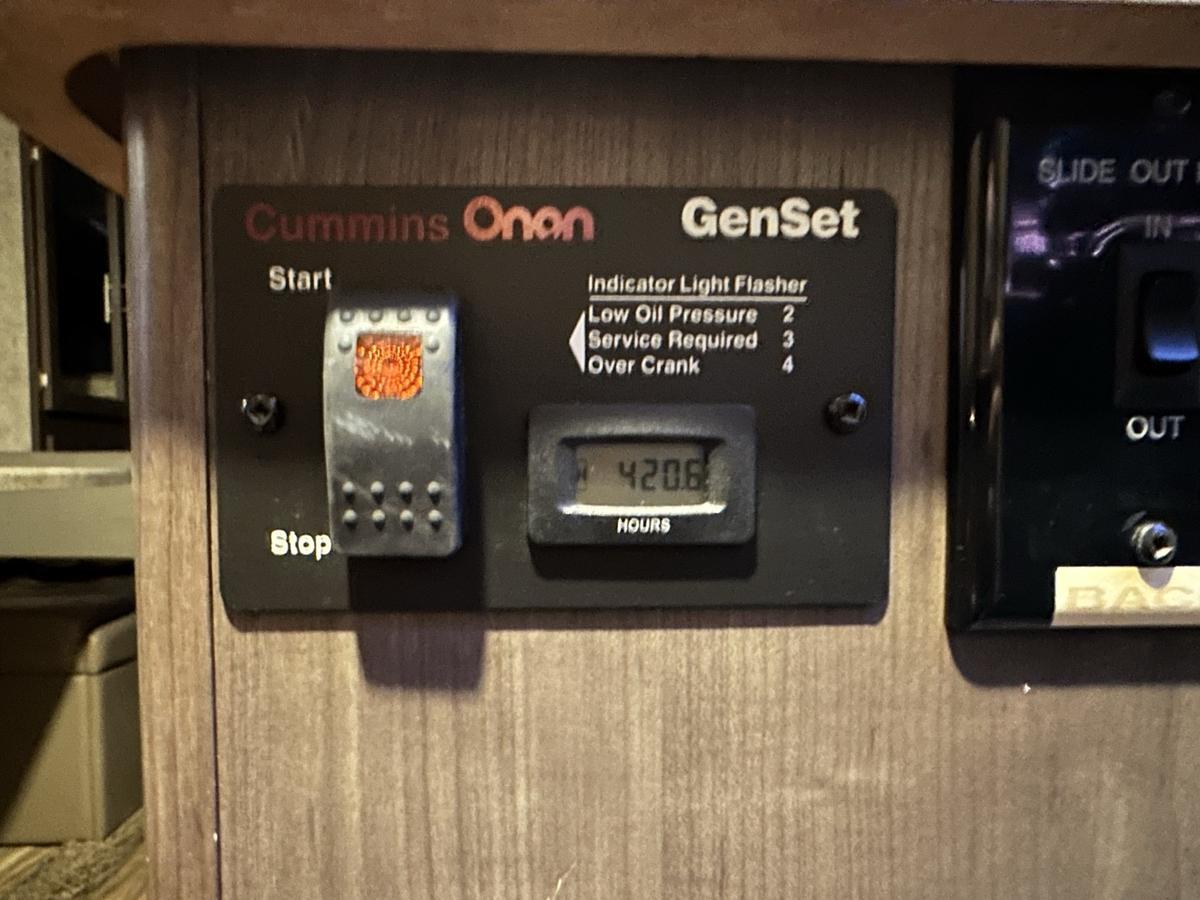
IMG_8055 Generator compartment — door closed (last door on the left)IMG_8056 Interior generator start/stop panel (near the microwave inside the RV)
Last door on the left is the generator bay. Nothing to do here from the outside — the generator is started from inside the RV using the panel near the microwave. It runs on propane (same tank as the stove/furnace).
Do
To start the generator:
1) Confirm the propane tank valve is open.
2) Press and hold the stop/prime button until the indicator light turns on.
3) Press and hold the start button until the generator engages.
4) Wait ~45 seconds for stable current — the microwave beeps when AC power is ready.
To stop: press the stop button until the generator shuts down.
Caution
The generator draws from the propane tank. Watch the propane gauge if you run it for extended periods.
Inside walkthrough
5 — Interior overview
Quick orientation before we dive into the specifics. The interior lives on three planes: the rear queen bedroom, the mid living area (dinette + kitchen), and the over-cab bunk above the driving cab. Watch the short walkthrough video, then we'll cover each system one at a time.
Layout — a 45-second tour draft★ quick-ref
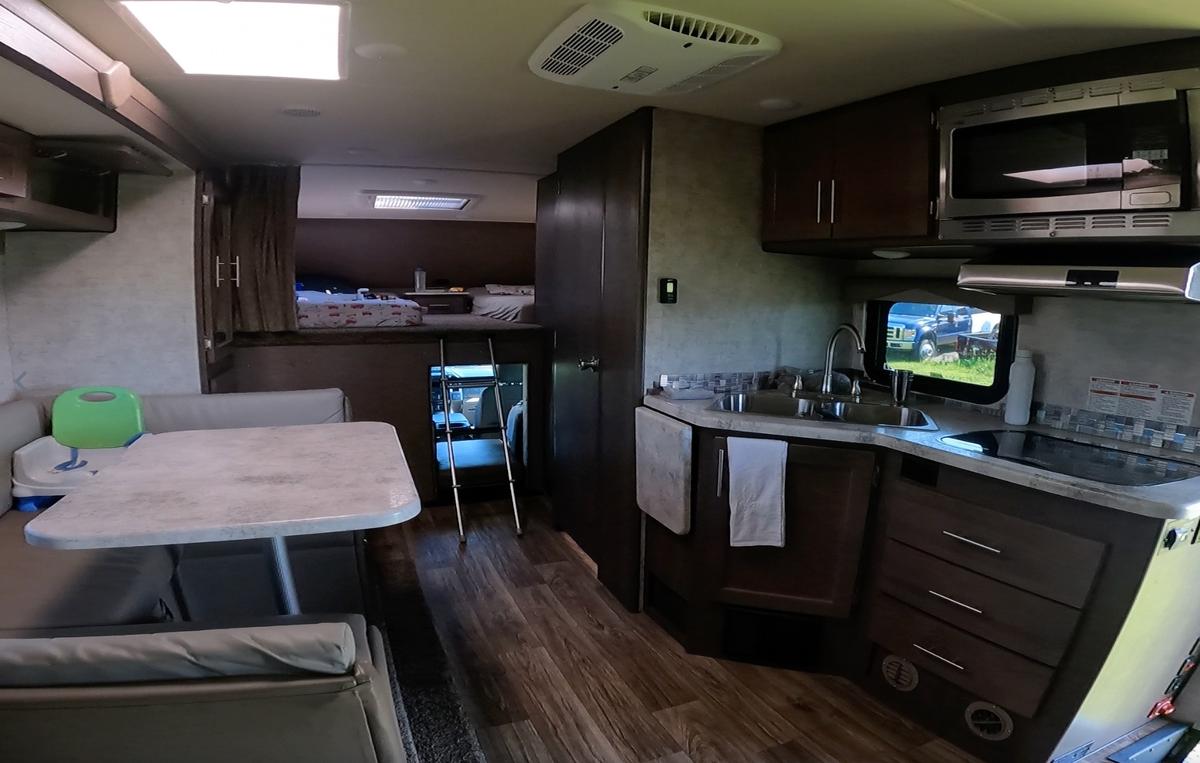
SCR-interior-layout Looking forward from the rear: dinette on the left, kitchen on the right, ladder up to the over-cab bunk.
GH010044 Walkthrough video — from the entry door to the rear bed, then forward to the cab and back.
Open the entry door and you're between the kitchen (right) and the dinette (left). Step back to the rear couch/queen bed area, or forward through the galley to the cab and the over-cab bunk above it. The bathroom is on the right, between the kitchen and the cab.
Do
Take a slow lap before you start loading — knowing where every system lives makes the rest of this walkthrough click into place.
6 — Main control panel
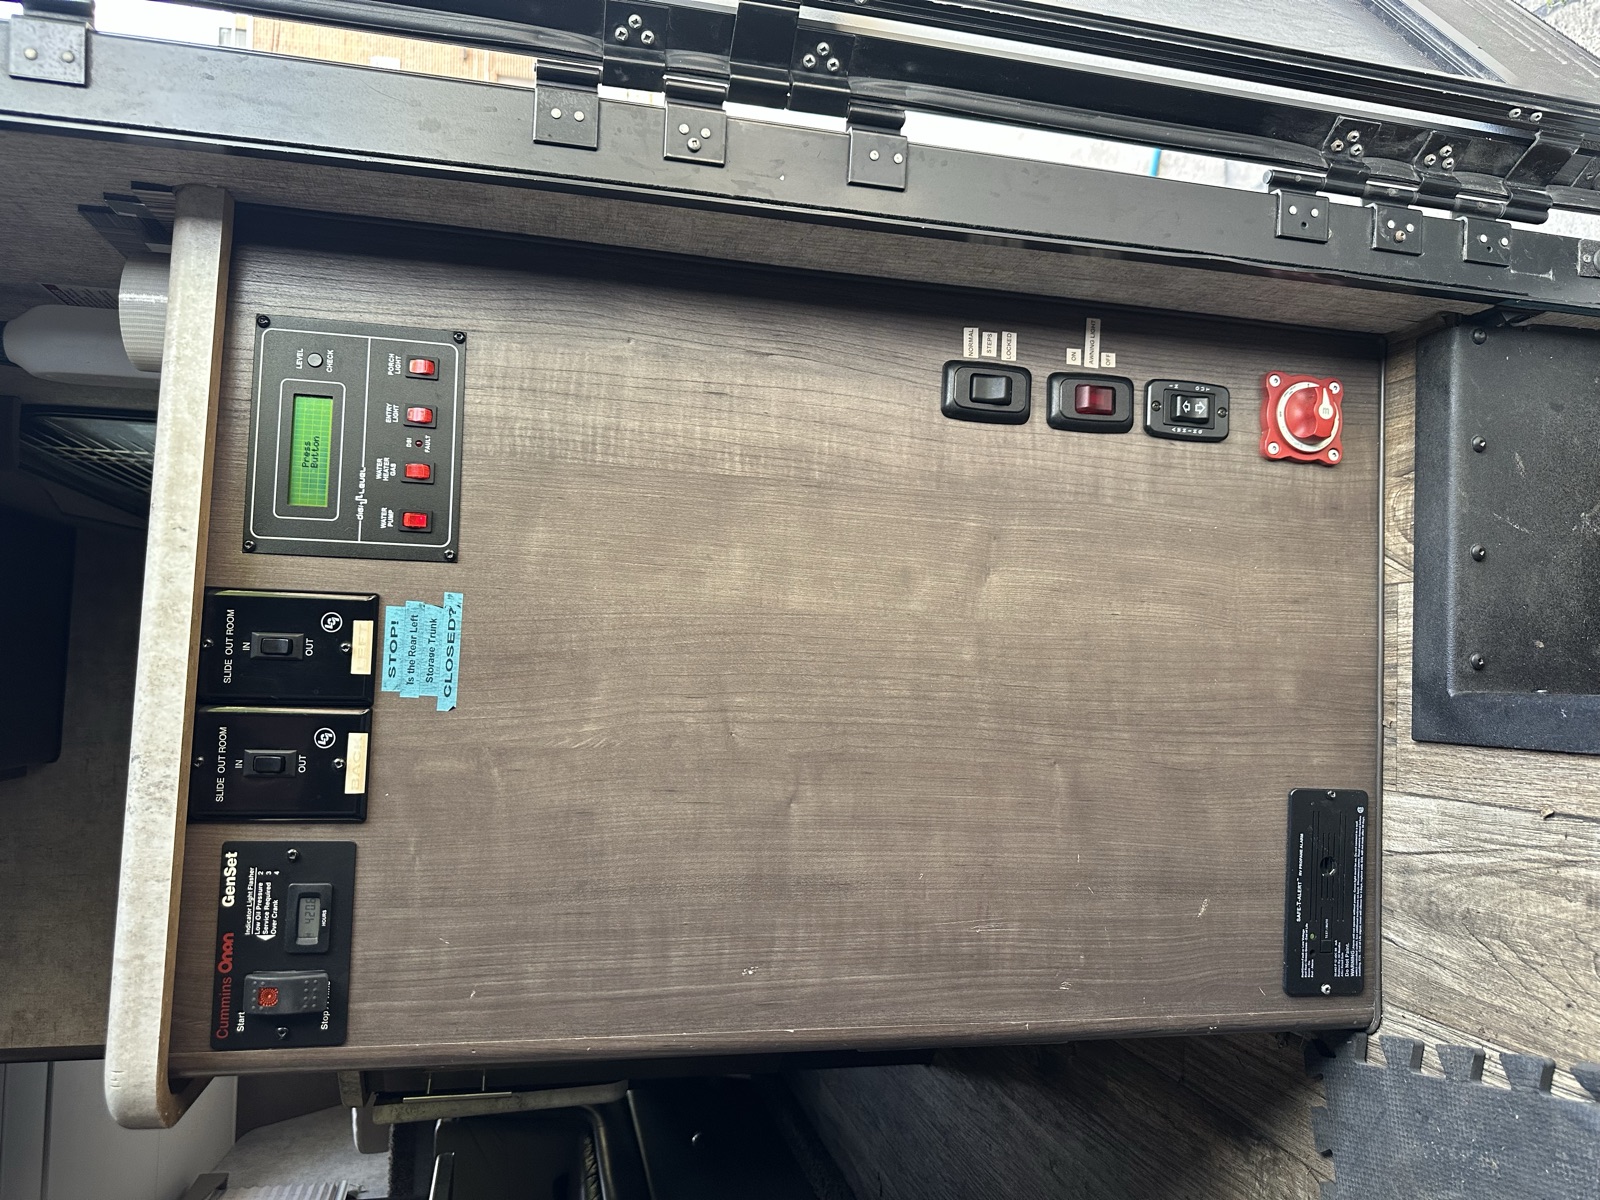
When you walk in through the main door, the control panel is on the right. Most of the RV's systems are switched from here.
Control panel — overview draft★ quick-ref
IMG_7951 Main control panel — to the right of the entry door
One panel, four quadrants. We'll walk through each.
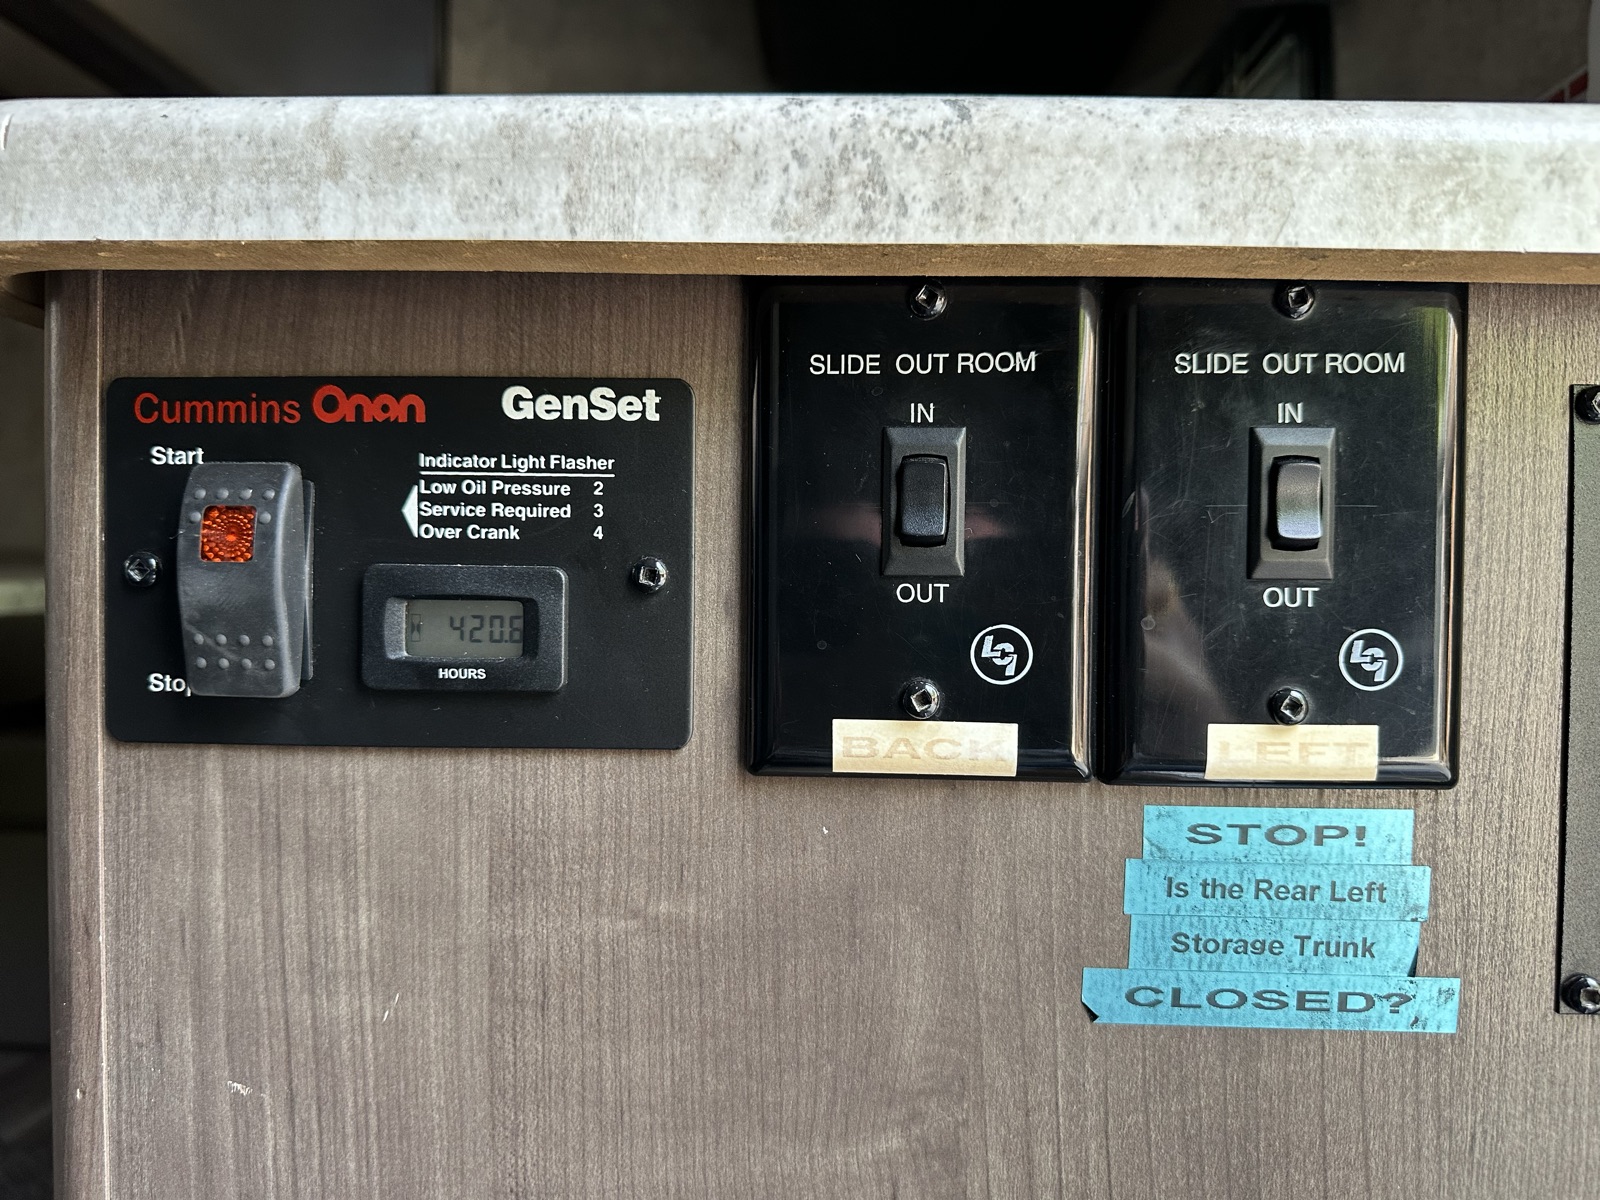
The top-left quadrant holds the propane generator controls and the left slide / back slide switches.
Do
Start the generator: Confirm propane valve at tank is OPEN. Press and hold DOWN to prime until the indicator light is on. Then press and hold UP until the engine starts. Wait a few seconds for stable AC output.
Stop the generator: Press and hold DOWN until shutdown completes.
Slides: Press and hold DOWN to open, UP to retract. Prefer to run the slide fully in or fully out in one go (keeps both motors in sync).
Caution
🛑 Safety overrides preference: if you see anything in the slide's path or getting squished — STOP IMMEDIATELY. A desync is annoying to fix; a crushed object (or person) is much worse. Never finish the motion through an obstruction.
Preference: run the slide fully in or out in one go. Stopping mid-travel can desync the two motors — the next operation may send one motor while the other stops. Resync is complex and may need a pro.
If a slide desyncs: try short alternating pulses (open 1s / close a few seconds, repeat) until fully in or fully out. If that fails, stop and call us.
Confirm nothing is in the slide's path inside AND outside before operating. Also confirm the back-left trunk is closed (left slide) and bike rack leaned back (back slide).
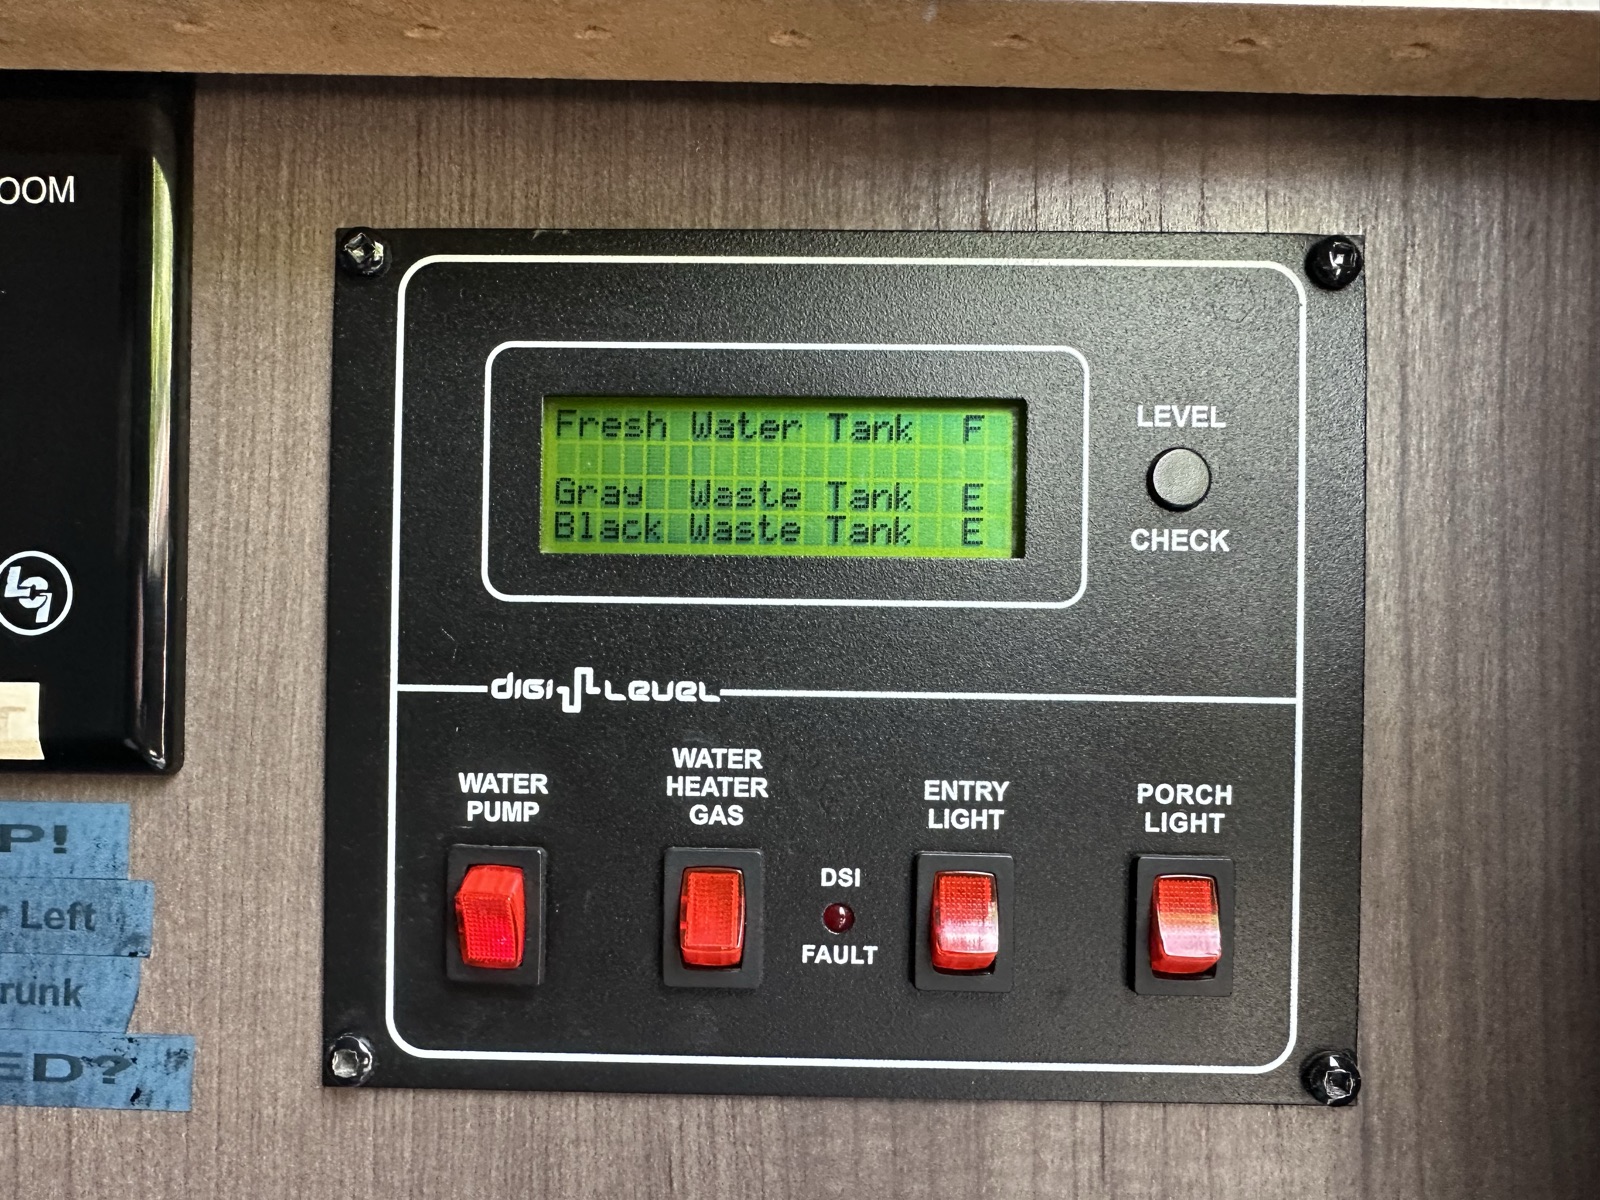
Top right — Tank levels, water pump, water heater, lights draft★ quick-ref
IMG_7955 Top-right quadrant: levels, pump, water heater, entry/porch lights
Tank level buttons (press to read), the water pump switch, the water heater switch, and the entry/porch light switches.
Do
Check tank levels: press the corresponding button. F = full, E = empty. Steps in thirds.
Plan a dump-station trip when any waste tank hits 2/3 (grey/black) or the fresh tank hits 1/3.
Water pump: press DOWN to start. When ON, water flows from the fresh tank as soon as a tap is opened.
Water heater (propane): press DOWN to start. Plan ~15 minutes before you want hot water — the tank is small.
Entry / porch lights: press DOWN for ON, UP for OFF.
Caution
Never leave the water pump ON when leaving the RV — a leak or open tap will drain the fresh tank into the floor.
Never leave the water heater ON when leaving the RV — propane runs dry, and dry-firing the element damages it.
Water heater burns propane. Check the propane gauge before each trip and during longer stays.
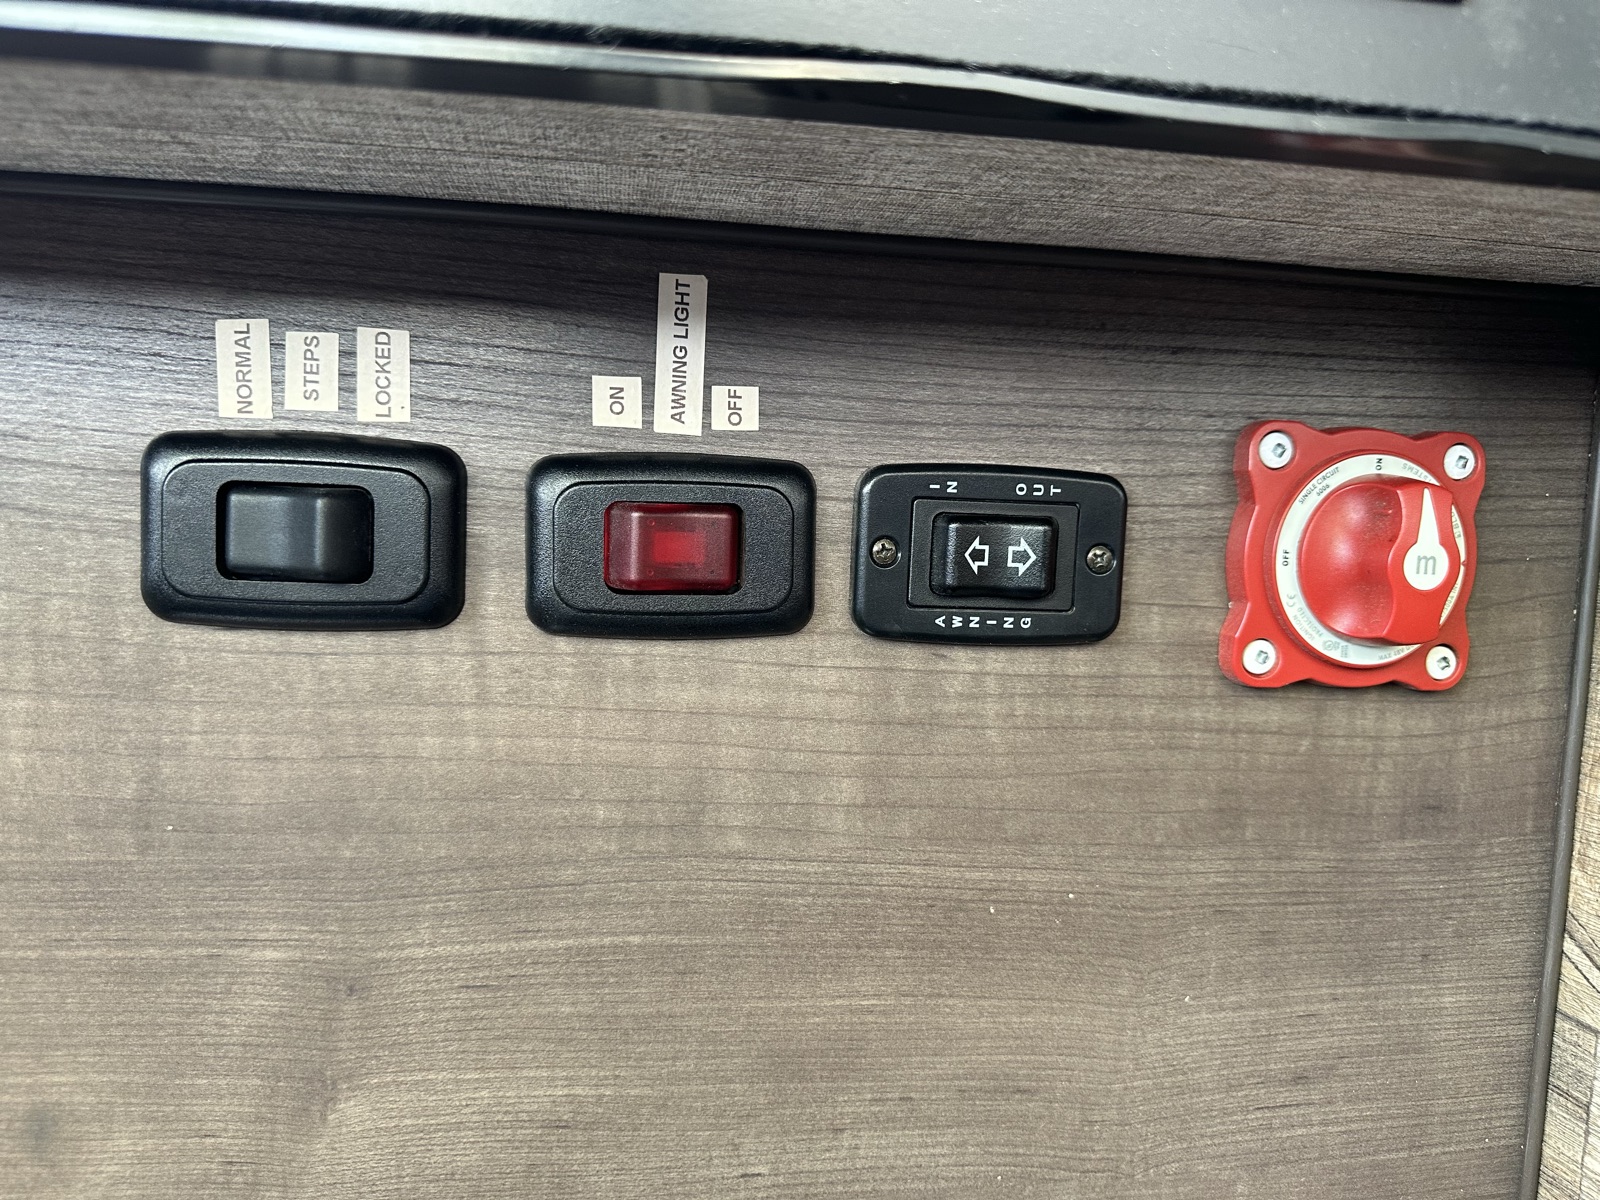
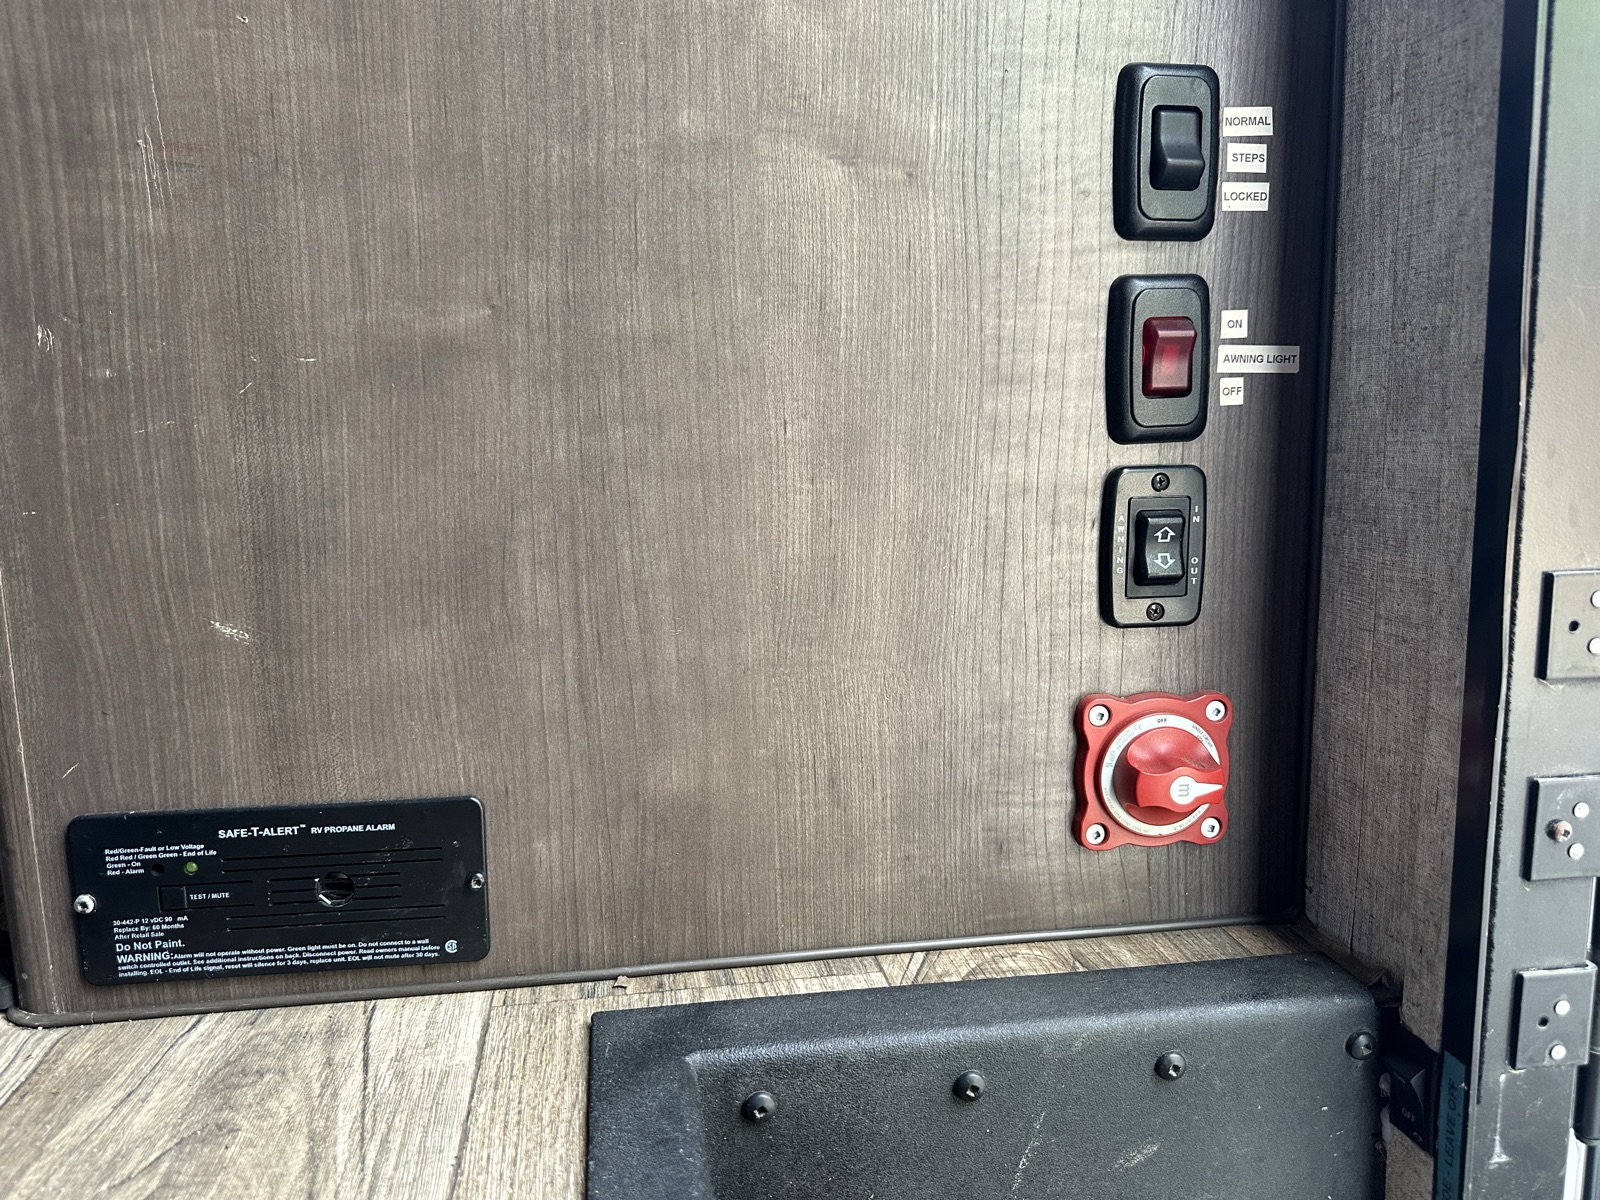
Bottom right — Steps, awning, 12V main draft★ quick-ref
IMG_7956 Bottom-right quadrant: steps, awning, 12V main switch
The step switch, the awning light, the awning in/out control, and the 12V main switch.
Do
Steps switch — UP (normal): steps deploy when the door opens, retract when it closes. Use while driving / on the road.
Steps switch — DOWN (locked): steps stay extended even when the door closes. Use at a parked campsite so they don't cycle in/out every time someone enters.
Awning: light button (ON/OFF) and in/out control.
12V main: leave it ON unless you're shutting down the entire 12V system for service.
Caution
🛑 Never step on the power steps while they're moving — risk of a crushed/pinched foot.
🛑 Awning rules: never leave it open unattended. Retract immediately at the first sign of wind or rain — a gust can rip it off.
Bottom left — CO / smoke detector draft
IMG_7957 Bottom-left quadrant: CO / smoke detector
The CO / smoke detector sits in the bottom-left quadrant. Nothing to do here — it's always on. If it alarms, treat it seriously: open windows, kill the propane valve, exit the RV.
7 — Energy & climate
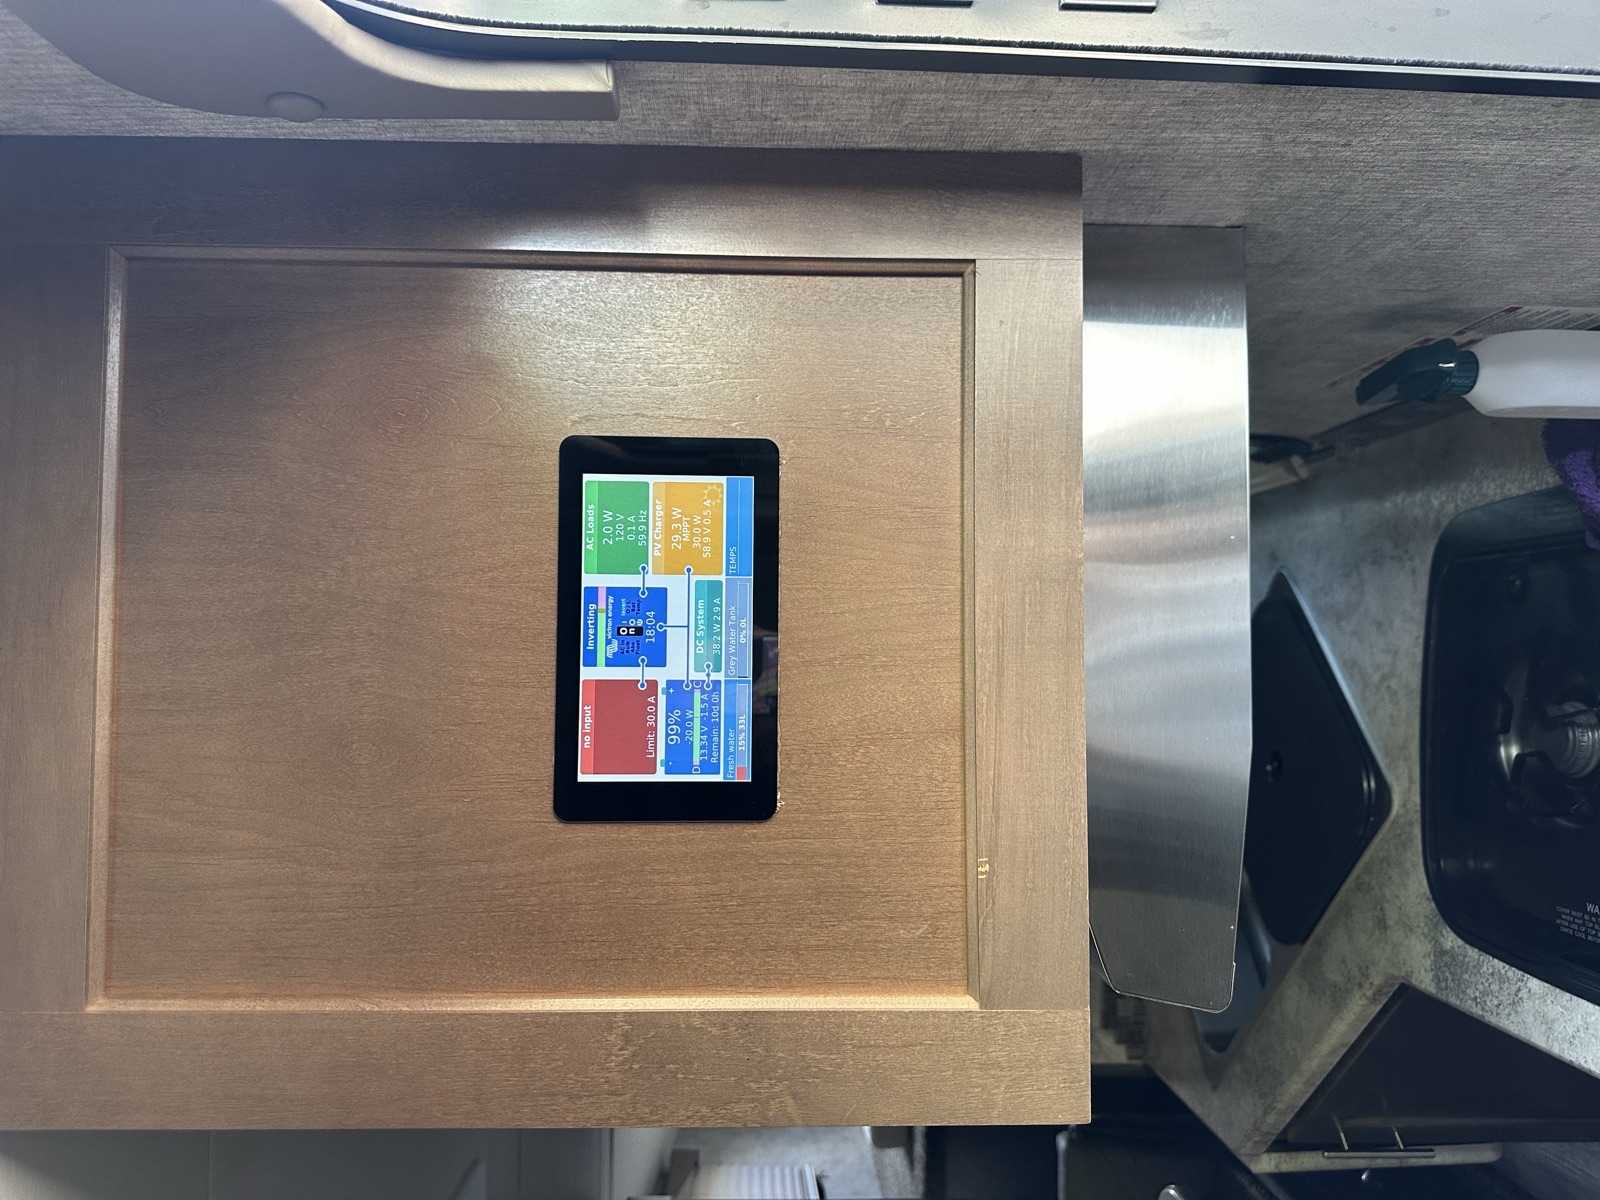
Victron energy management screen draft★ quick-ref
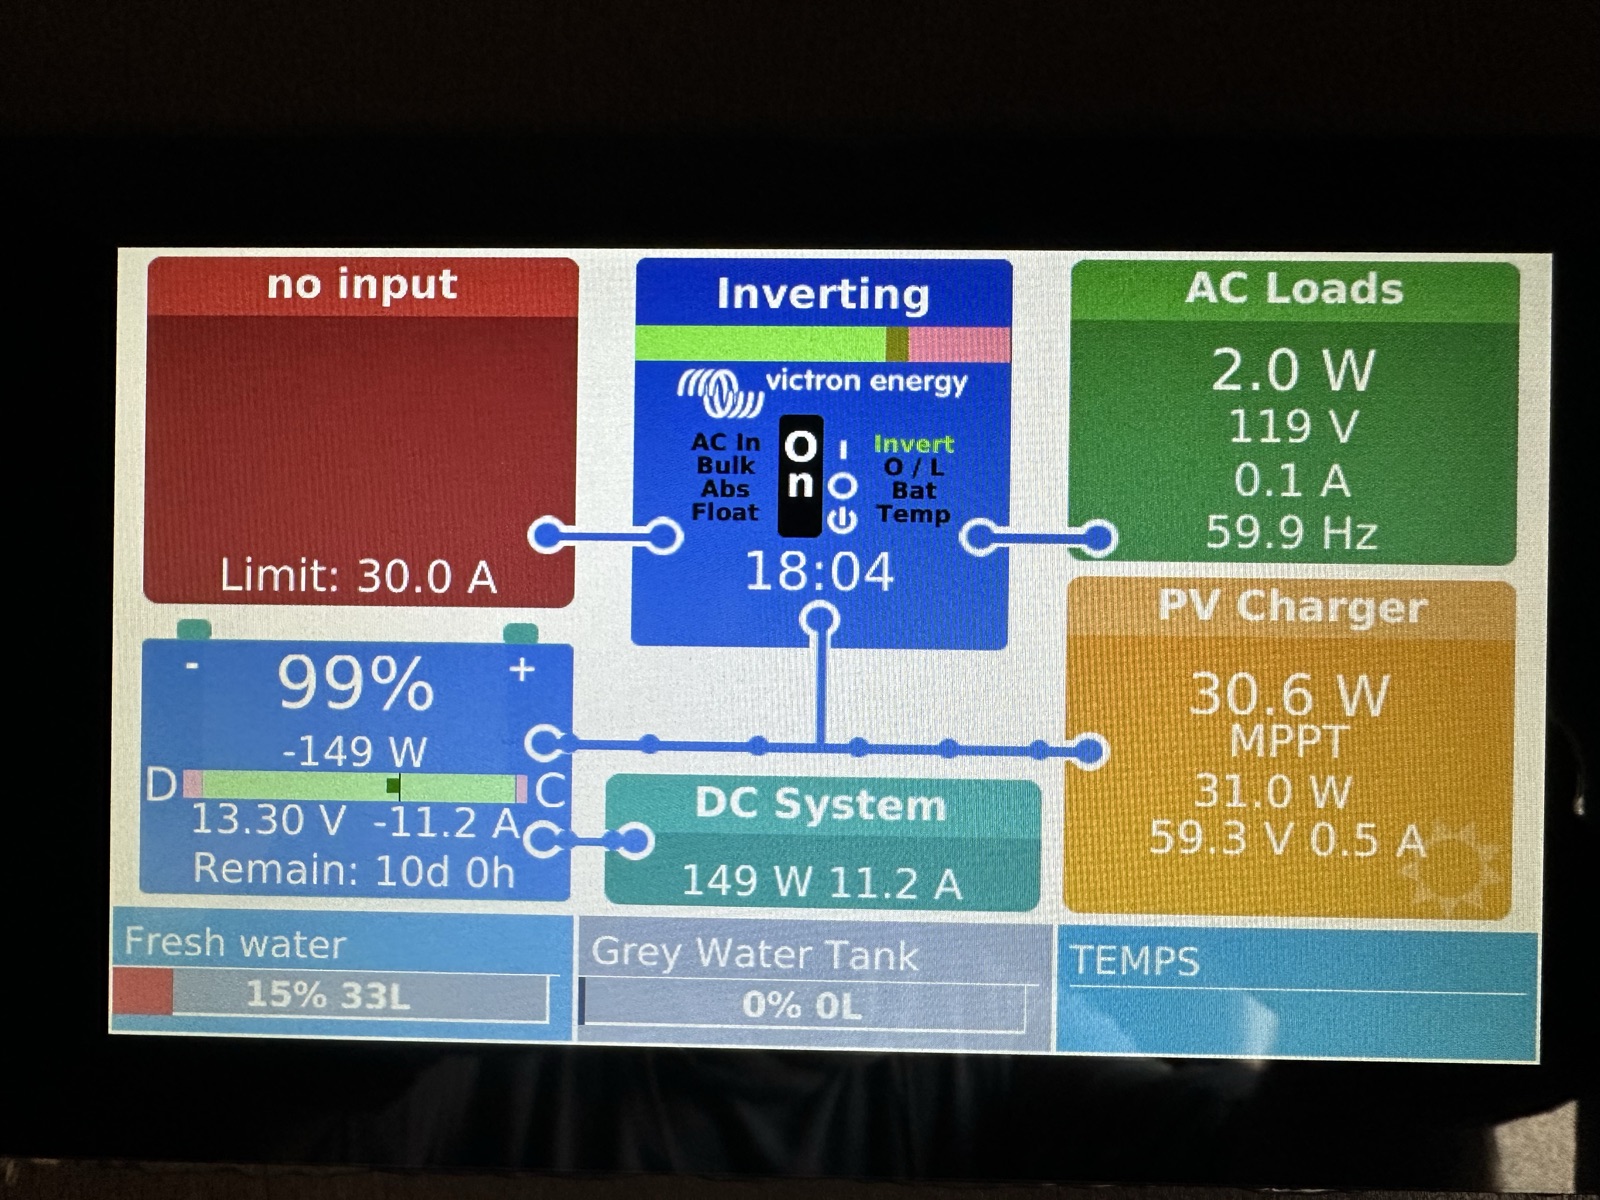
IMG_7952 Look up — the Victron touchscreenIMG_7953 Close-up of the Victron screen
Above the entry / control area, look up: the Victron touch screen monitors the whole energy system. From here you can see at a glance:
120V IN — shore power coming in
PV IN — solar panel production
Battery level — house battery state of charge
120V OUT — what AC loads are drawing
12V OUT — what DC loads are drawing
Do
Check the battery level daily, especially when boondocking (no shore power).
If 120V IN reads 0 when you expect shore power: check the cord at both ends, then the pedestal breaker.
Furnace thermostat draft★ quick-ref
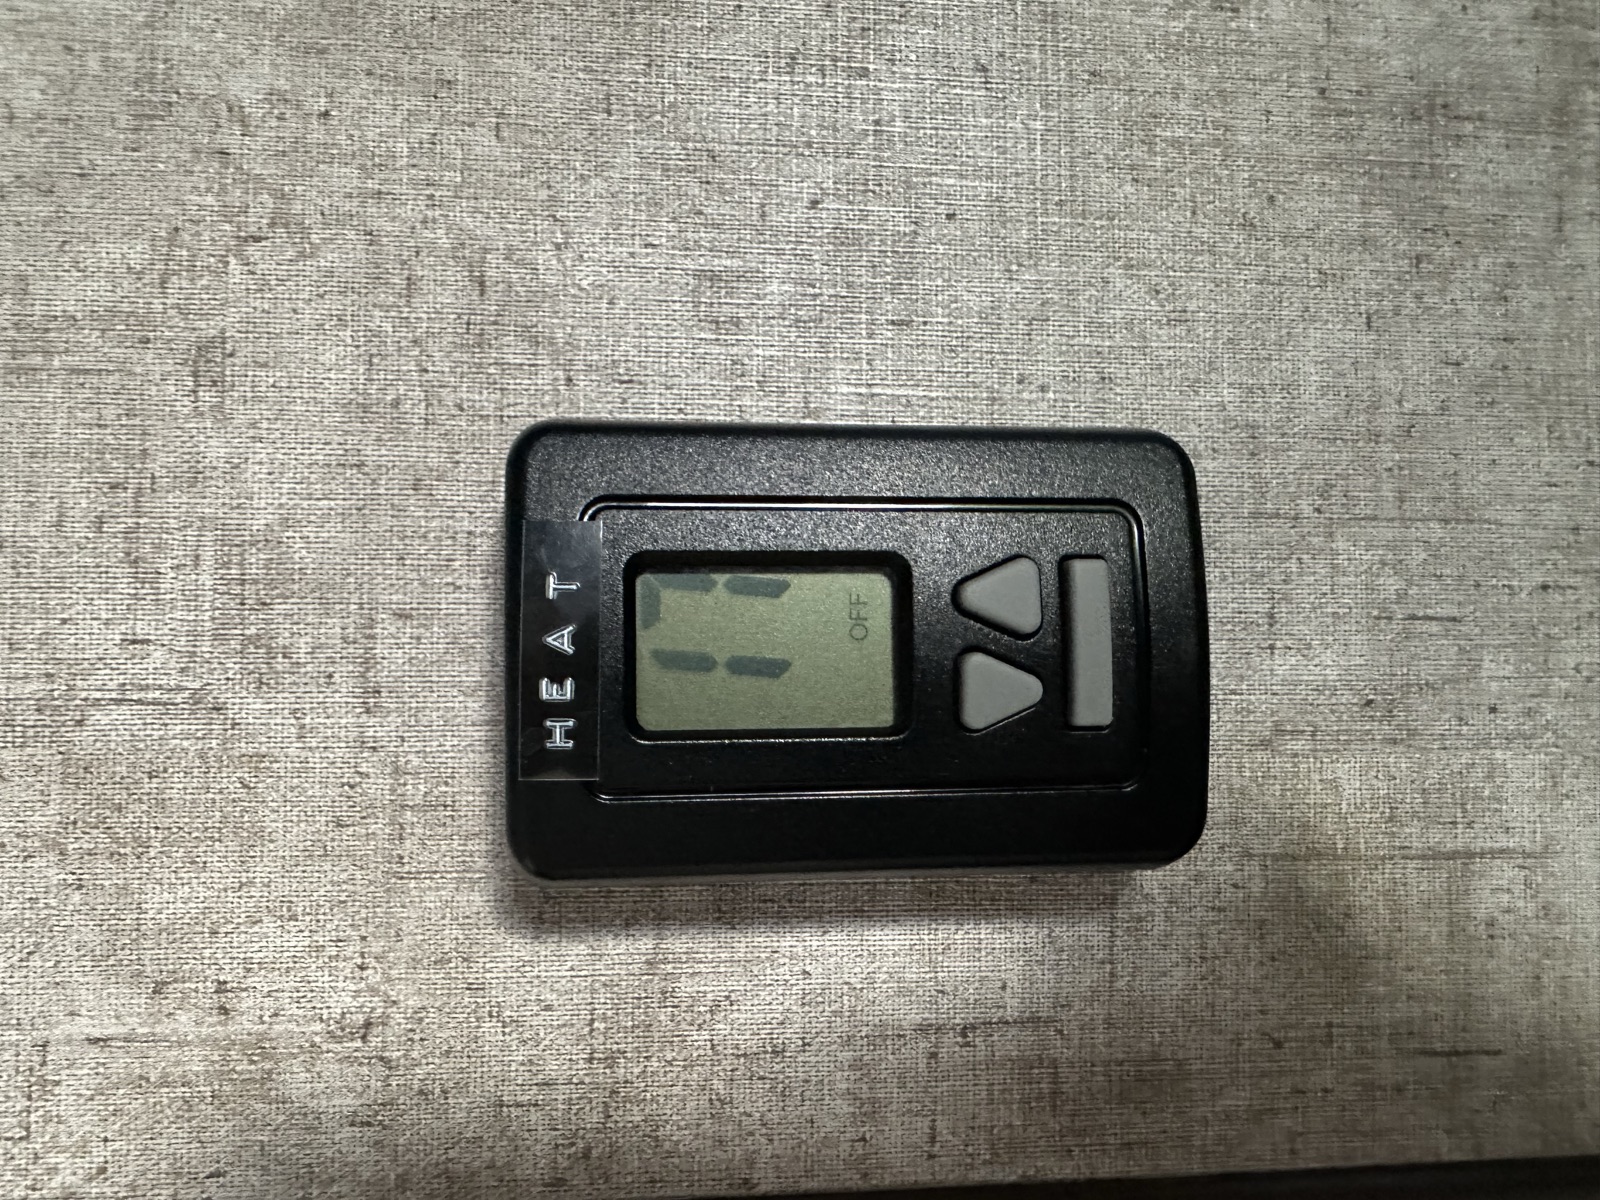
IMG_7958 Furnace thermostat
The wall thermostat controls the propane furnace only. (Roof AC has its own controls — covered next.)
Do
Navigate MODE to switch between Heat and Off. Other modes do nothing on this unit — ignore them.
Use the arrows to set target temperature.
Caution
Furnace burns propane fast in cold weather. Check the propane gauge daily during cold-weather trips.
Roof air conditioner draft★ quick-ref
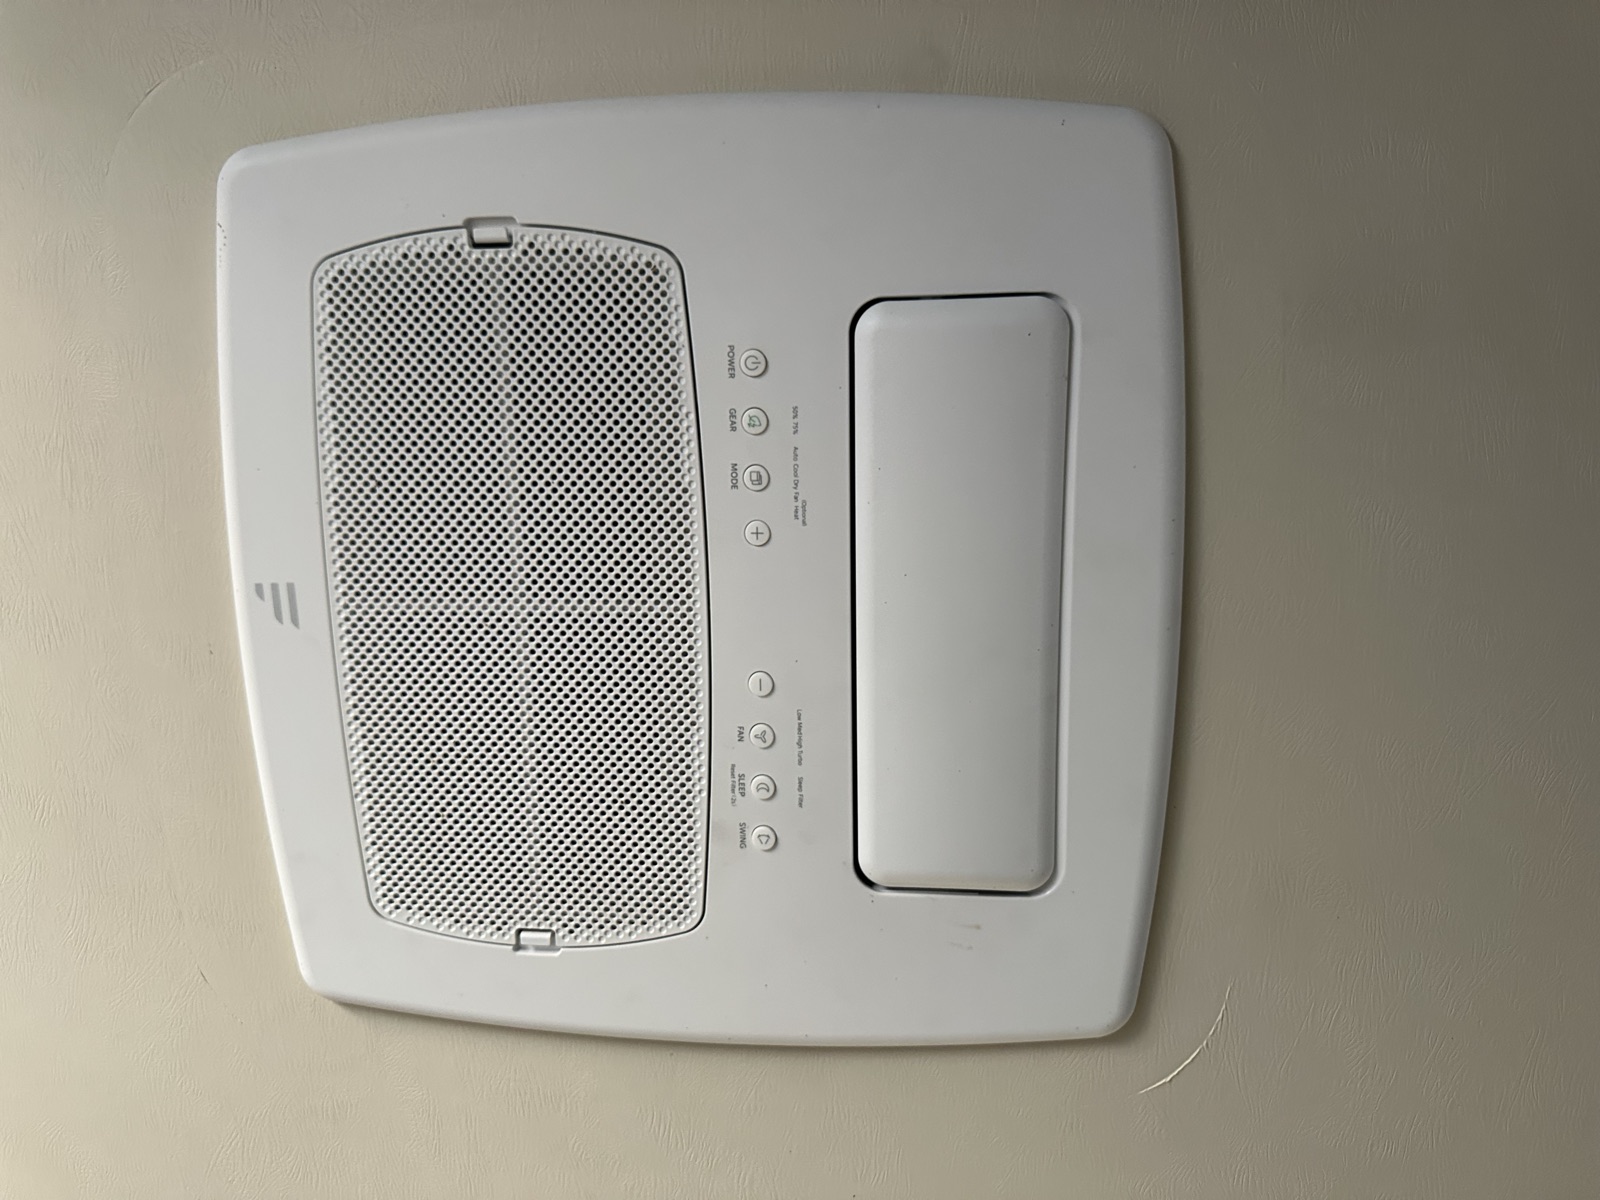
IMG_7960 Roof A/C controls
The roof A/C is the main cooling unit.
Do
Press POWER to turn on. Use +/– to set temperature.
Caution
A/C runs on 120V only. It needs a 30A shore connection. On a 15A campsite outlet it'll trip the breaker.
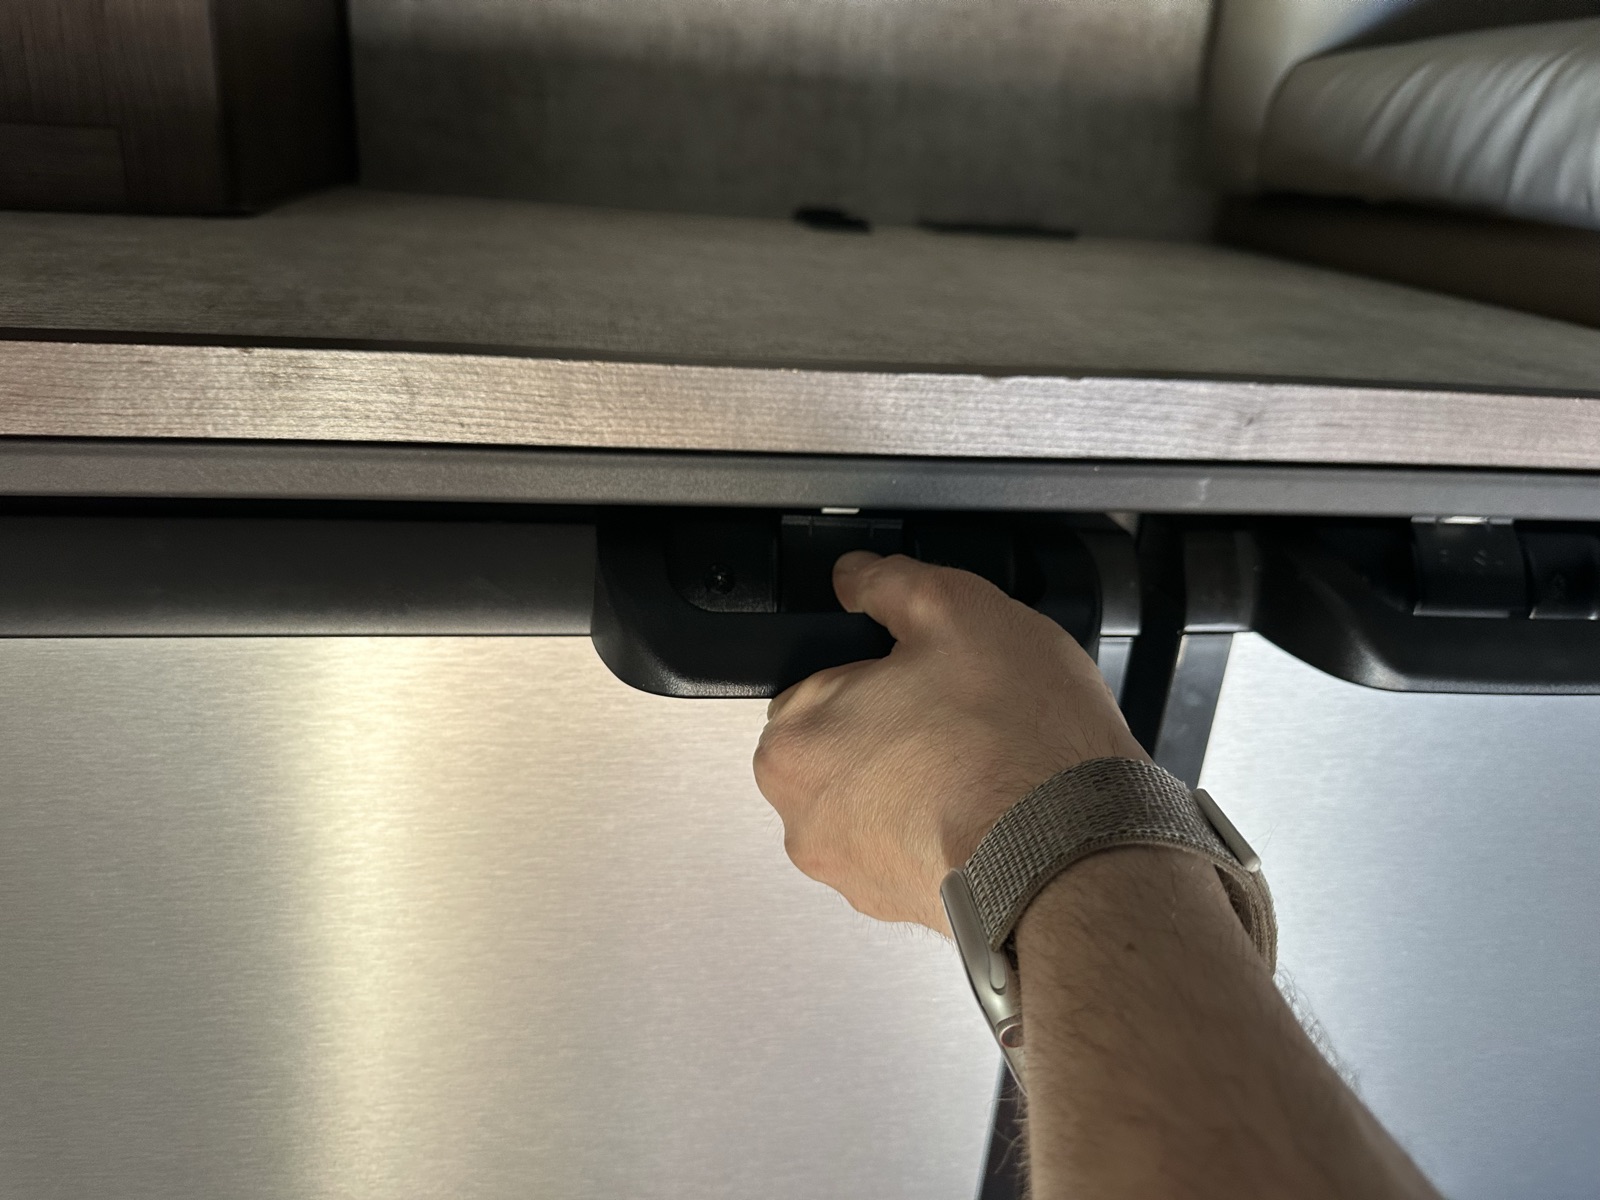
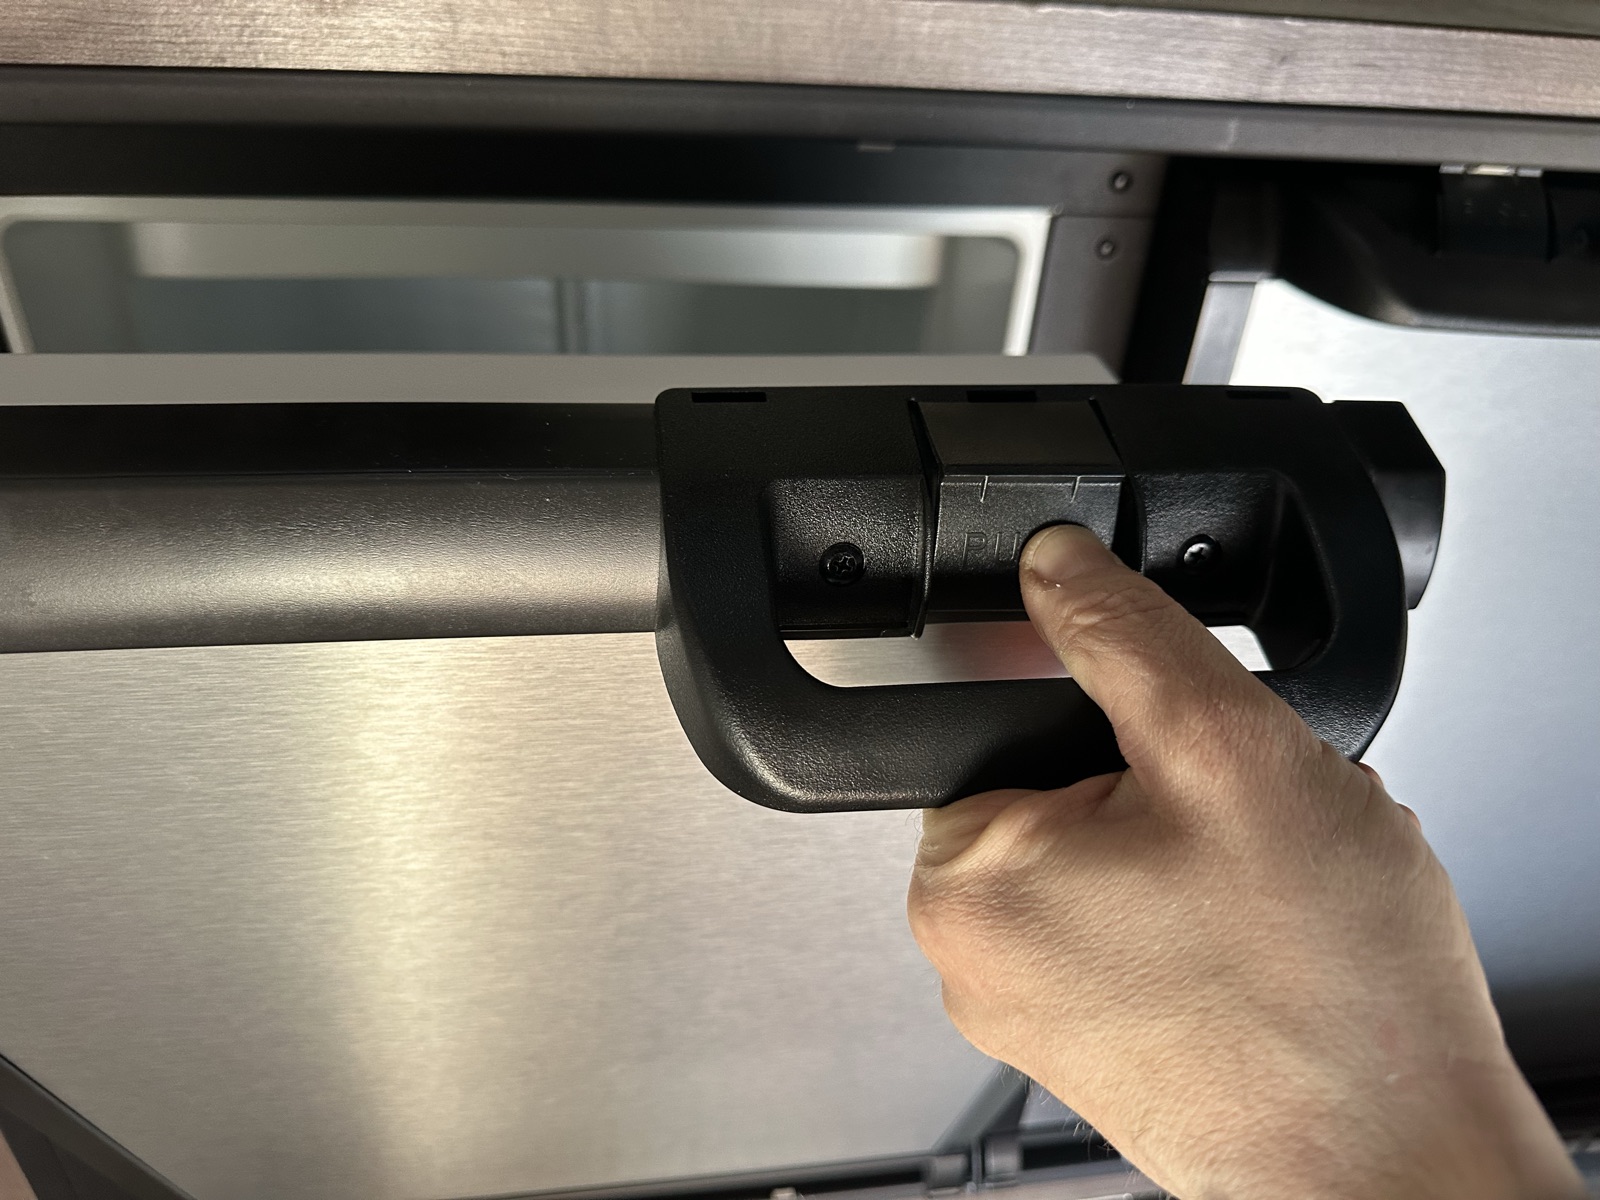
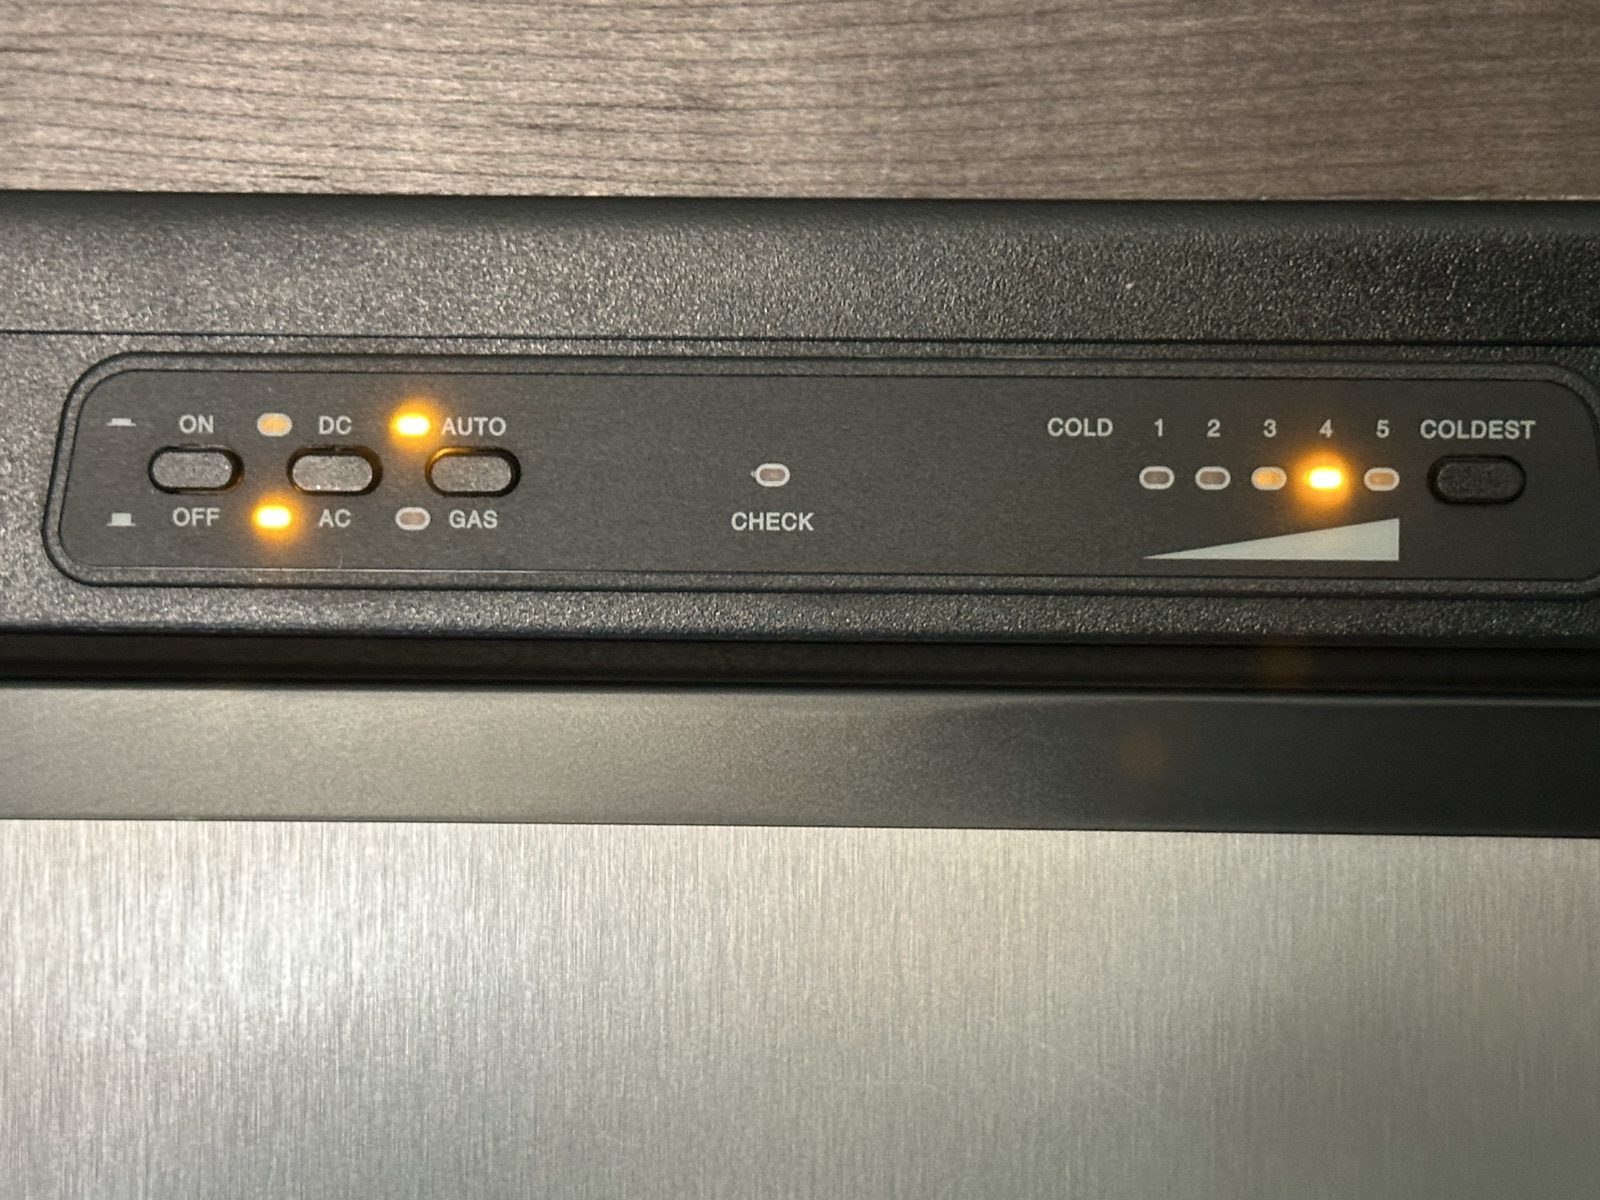
IMG_7962 Latch button — push this FIRST look: button on the handleIMG_7963 ...then pull the handle to openIMG_7966 Fridge control panel — set mode here (leave on Auto)
The fridge can run three ways: 120V (shore power), propane, or 12V (batteries).
Opening it: the handle has a small latch button — you must push the button first while pulling the handle. If you just pull, nothing happens (or you'll think it's broken).
Do
To open: push the latch button on the handle, then pull. Don't force it.
Leave the mode set to Auto. It uses 120V when available and switches to propane when you're off-grid.
Caution
🛑 Don't run the fridge on 12V. It's very inefficient and will drain the house batteries in hours.
Close and latch the door before driving (it should click). An unlatched RV fridge door swings open on the first turn.
Microwave draft
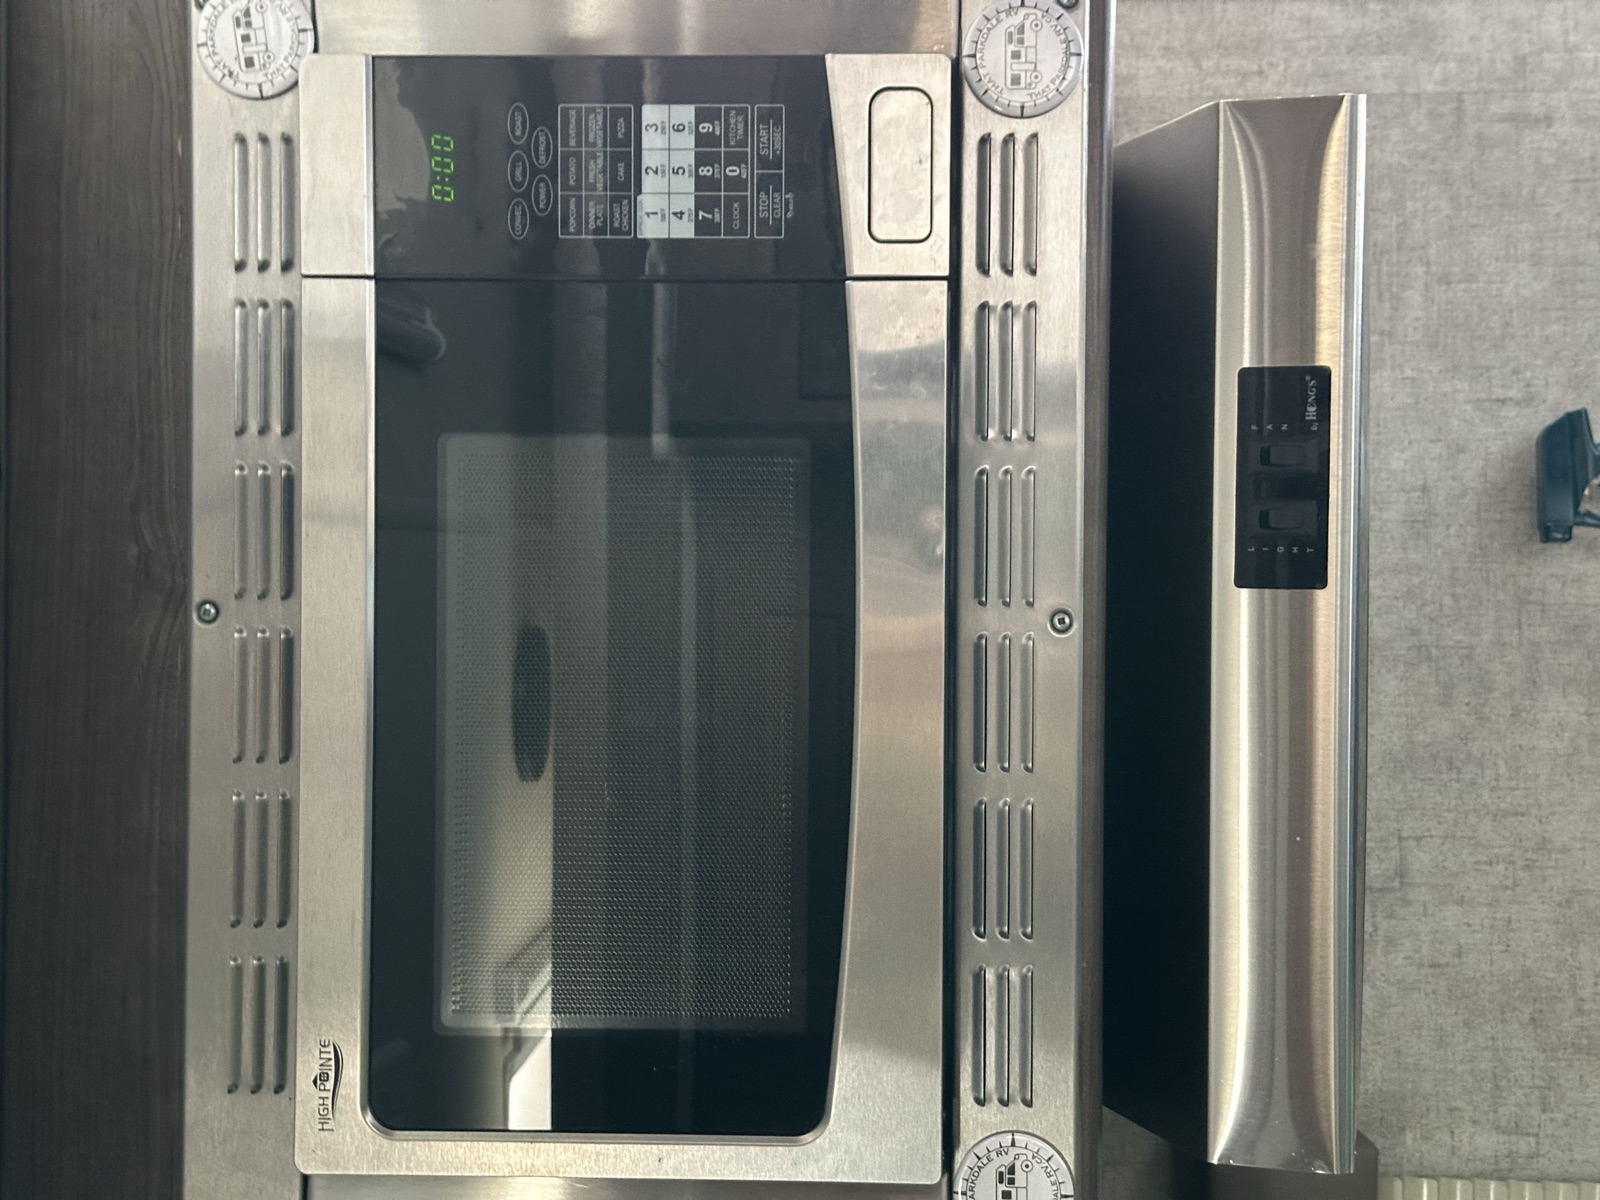
IMG_7968 Microwave
Standard microwave. Runs on 120V only — needs shore power.
Propane stove review★ quick-ref
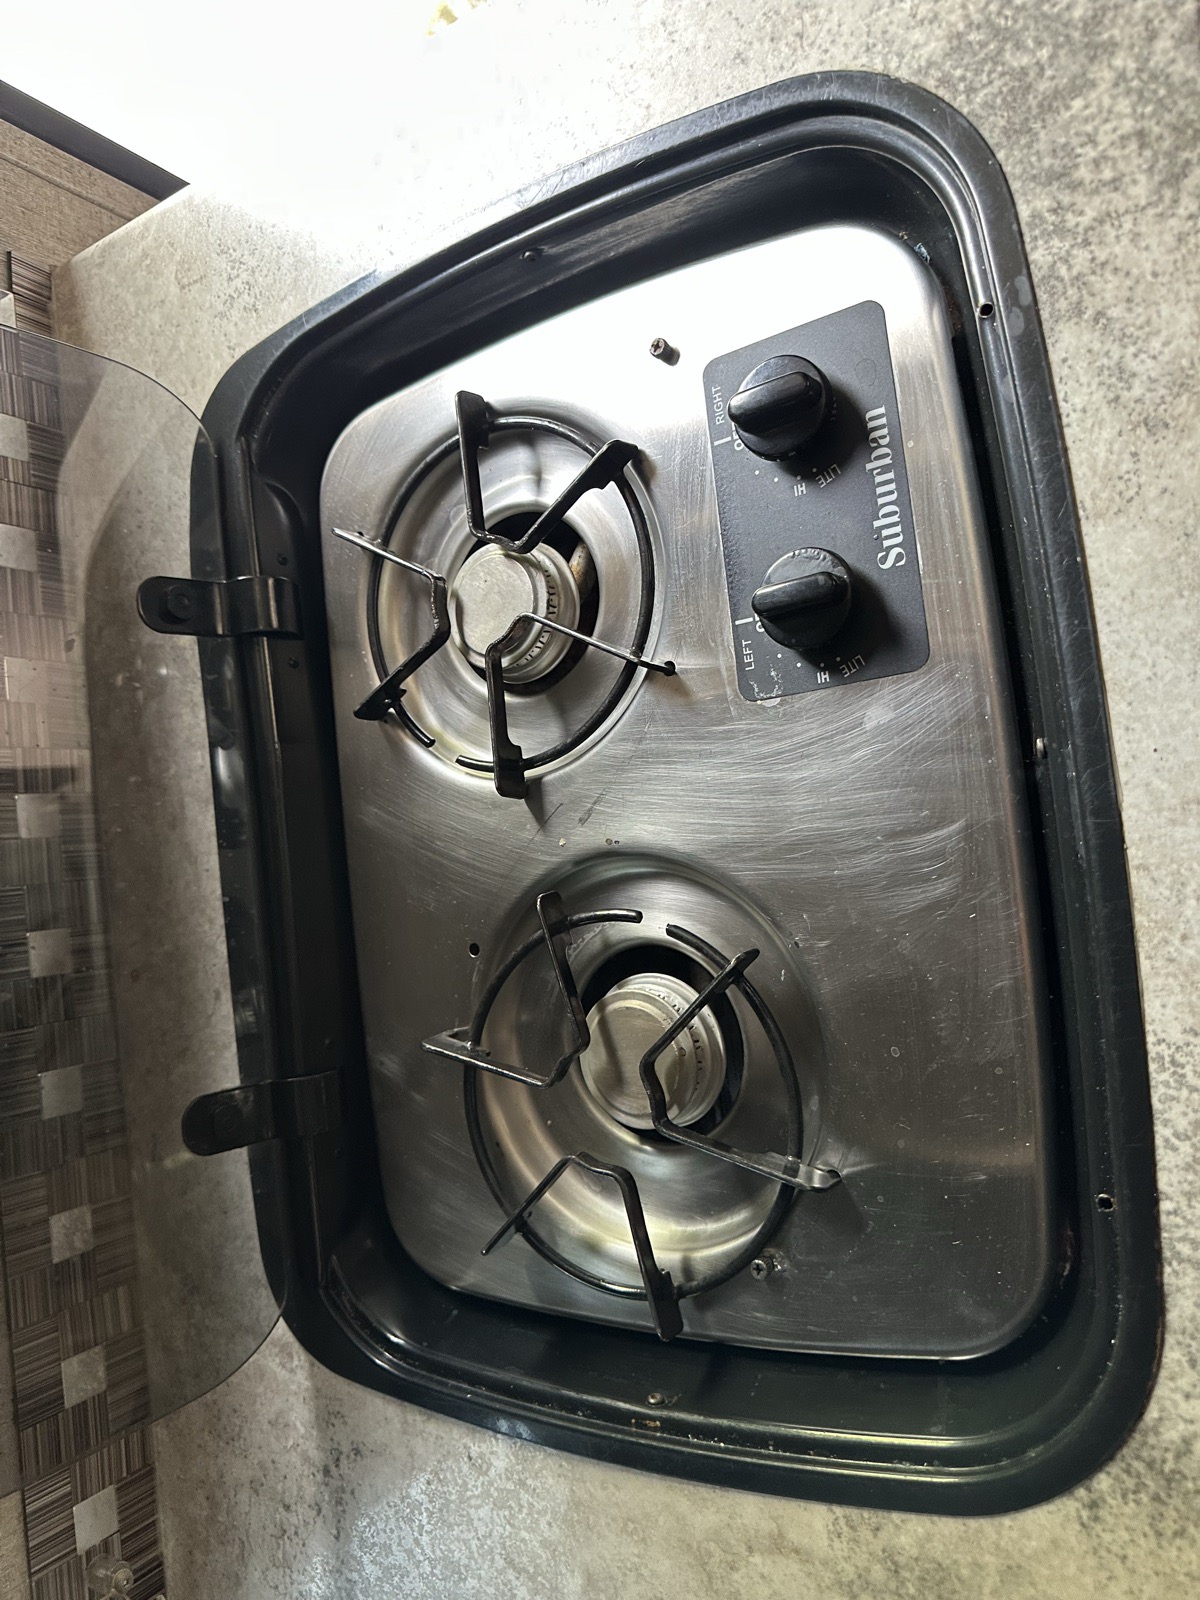
IMG_7969 Propane stove with the glass lid lifted
Three-burner propane stove. There is no electric ignition — you light it manually with the provided lighter. The stove has a glass lid that doubles as the cover when stowed.
Do
Lift the glass lid open before lighting any burner.
Turn the burner knob to open propane flow.
Use the provided lighter to ignite the flame at the burner.
Adjust flame size with the same knob. Turn fully off when done.
Let the burners cool fully before lowering the glass lid back down.
Caution
🛑 Never close the glass lid while the stove is still hot. Trapped heat can crack the glass.
Keep a window or vent cracked while cooking — propane combustion produces moisture and CO.
Confirm the propane tank valve is OPEN at the tank if the burner won't light.
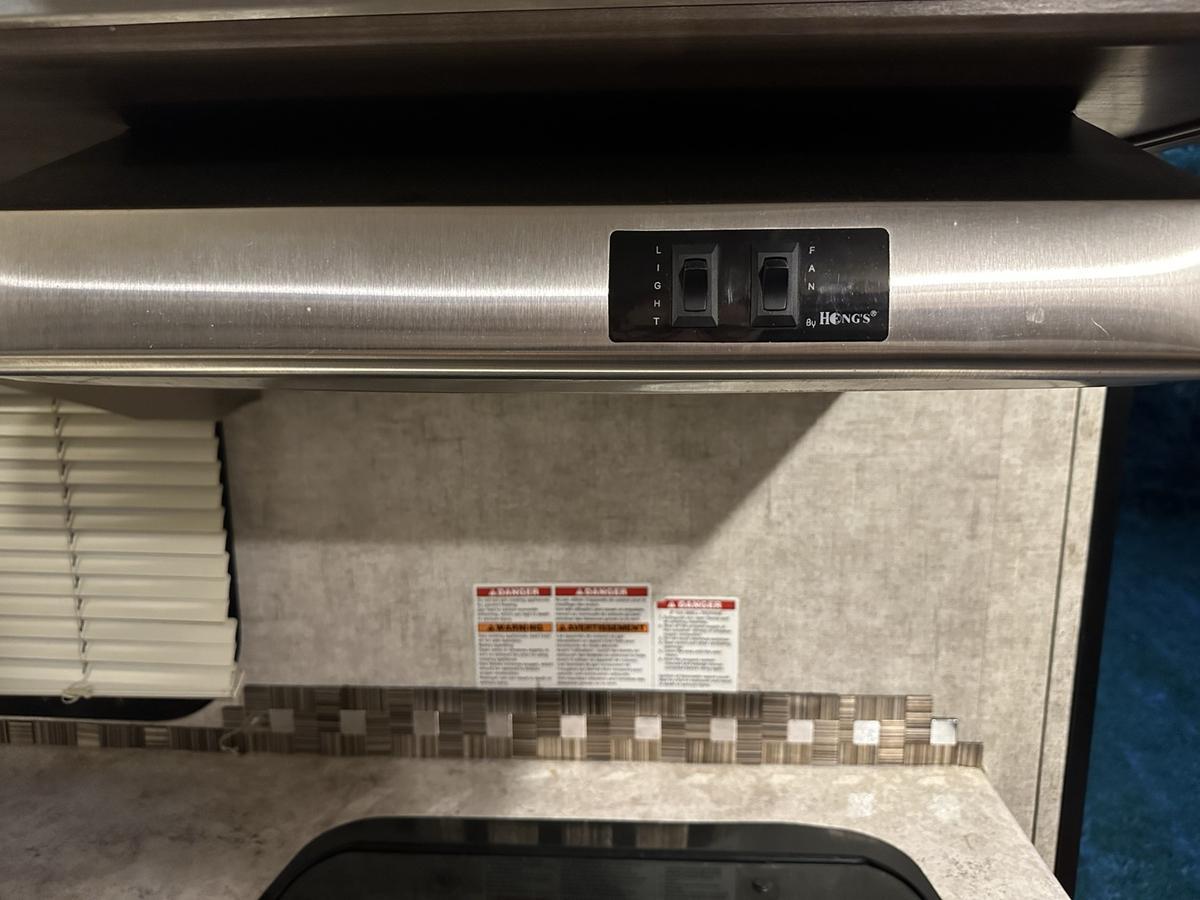
Range hood — light + exhaust fan review
IMG_7968 Microwave (above) — range hood + 12V light/fan buttons just below look: two buttons below the microwaveIMG_8057 Range hood close-up — the two 12V buttons (light + fan)
Between the microwave and the stove, the range hood has two 12V buttons: a light (over the cooktop) and an exhaust fan. The exhaust vents smoke and moisture from cooking to the outside.
Do
Turn the fan ON while cooking — especially with the propane stove (moisture + CO).
Turn the light ON for visibility over the burners; off when done.
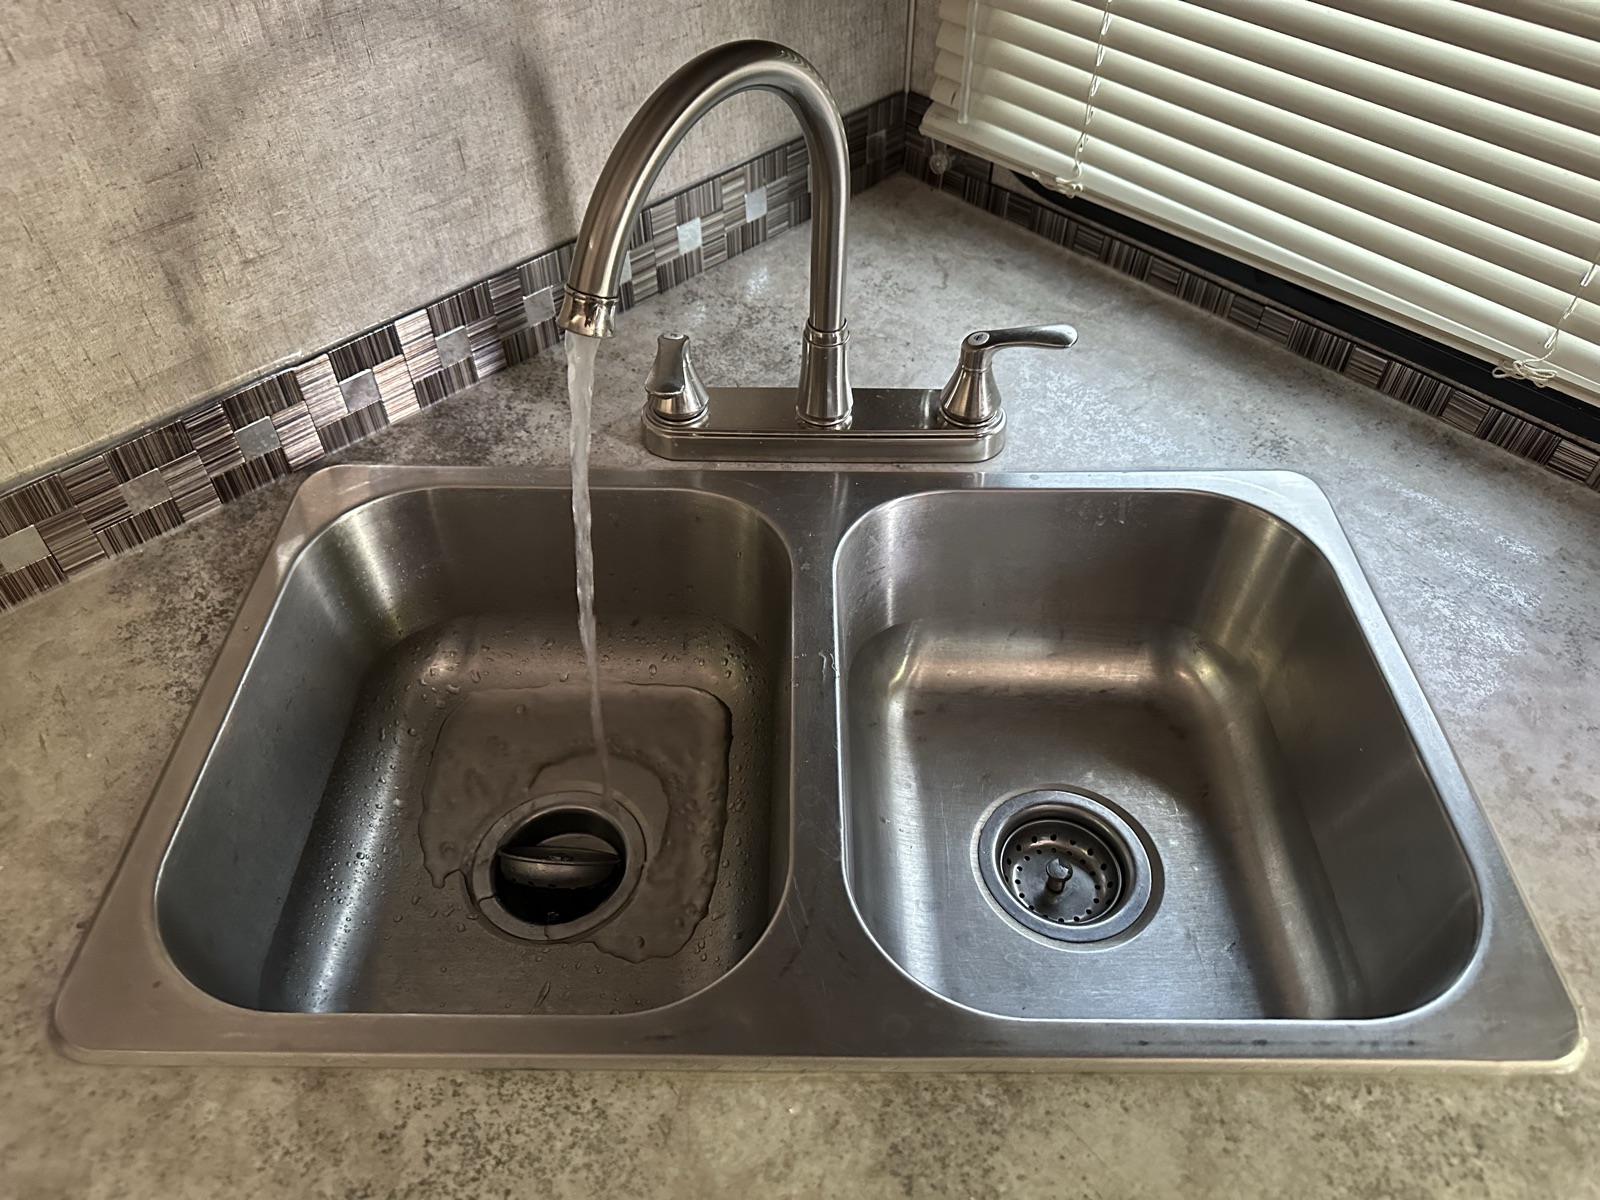
Kitchen sink draft
IMG_7970 Kitchen sink
Standard sink. Water flow depends on either:
City water connected at the outside city-water inlet, OR
The water pump turned ON, drawing from the fresh tank.
Sink wastewater goes to the grey tank.
9 — Living area
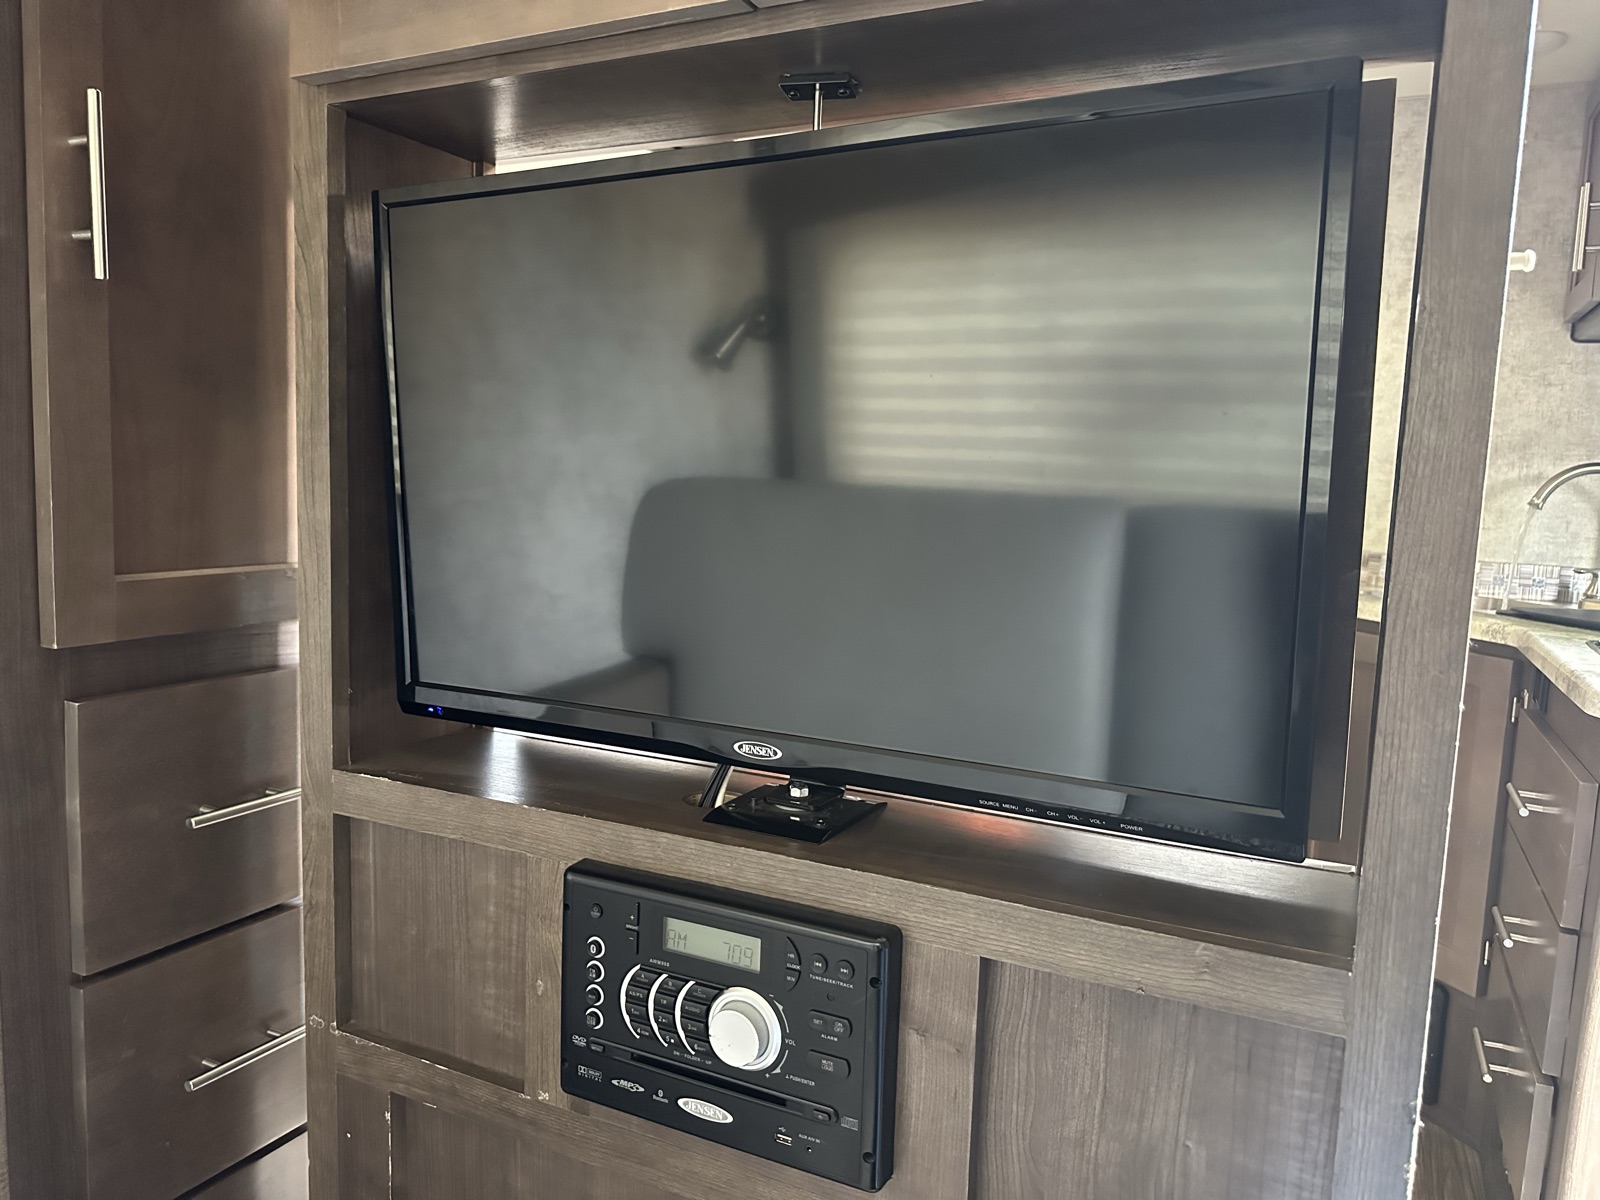
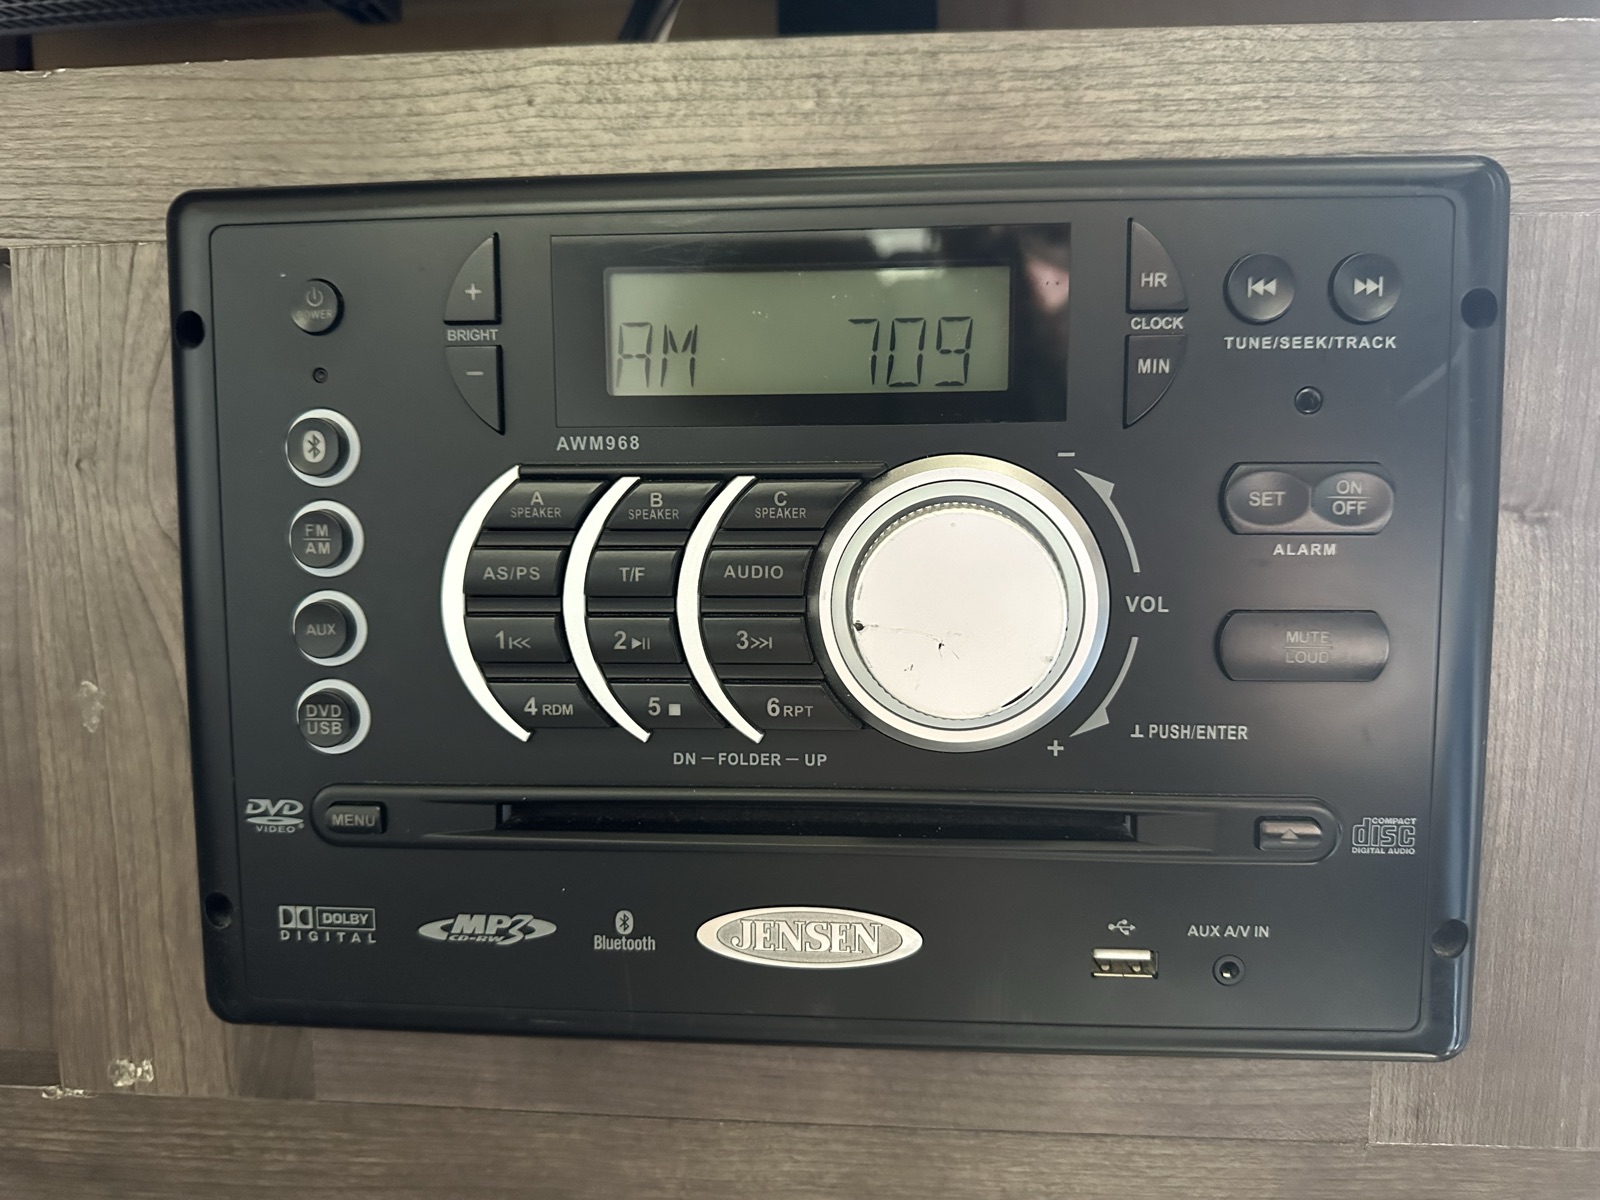
TV and sound system draft
IMG_7971 TV — rotates between couch and kitchen viewingIMG_7972 Radio / sound system close-up
The TV runs on 12V. It rotates on a mount so you can watch from either the couch or the kitchen side.
Do
Two remote controls live in the cabinet above the TV.
Put the remotes back in the same cabinet after each use.
Roof fans (×2) draft★ quick-ref
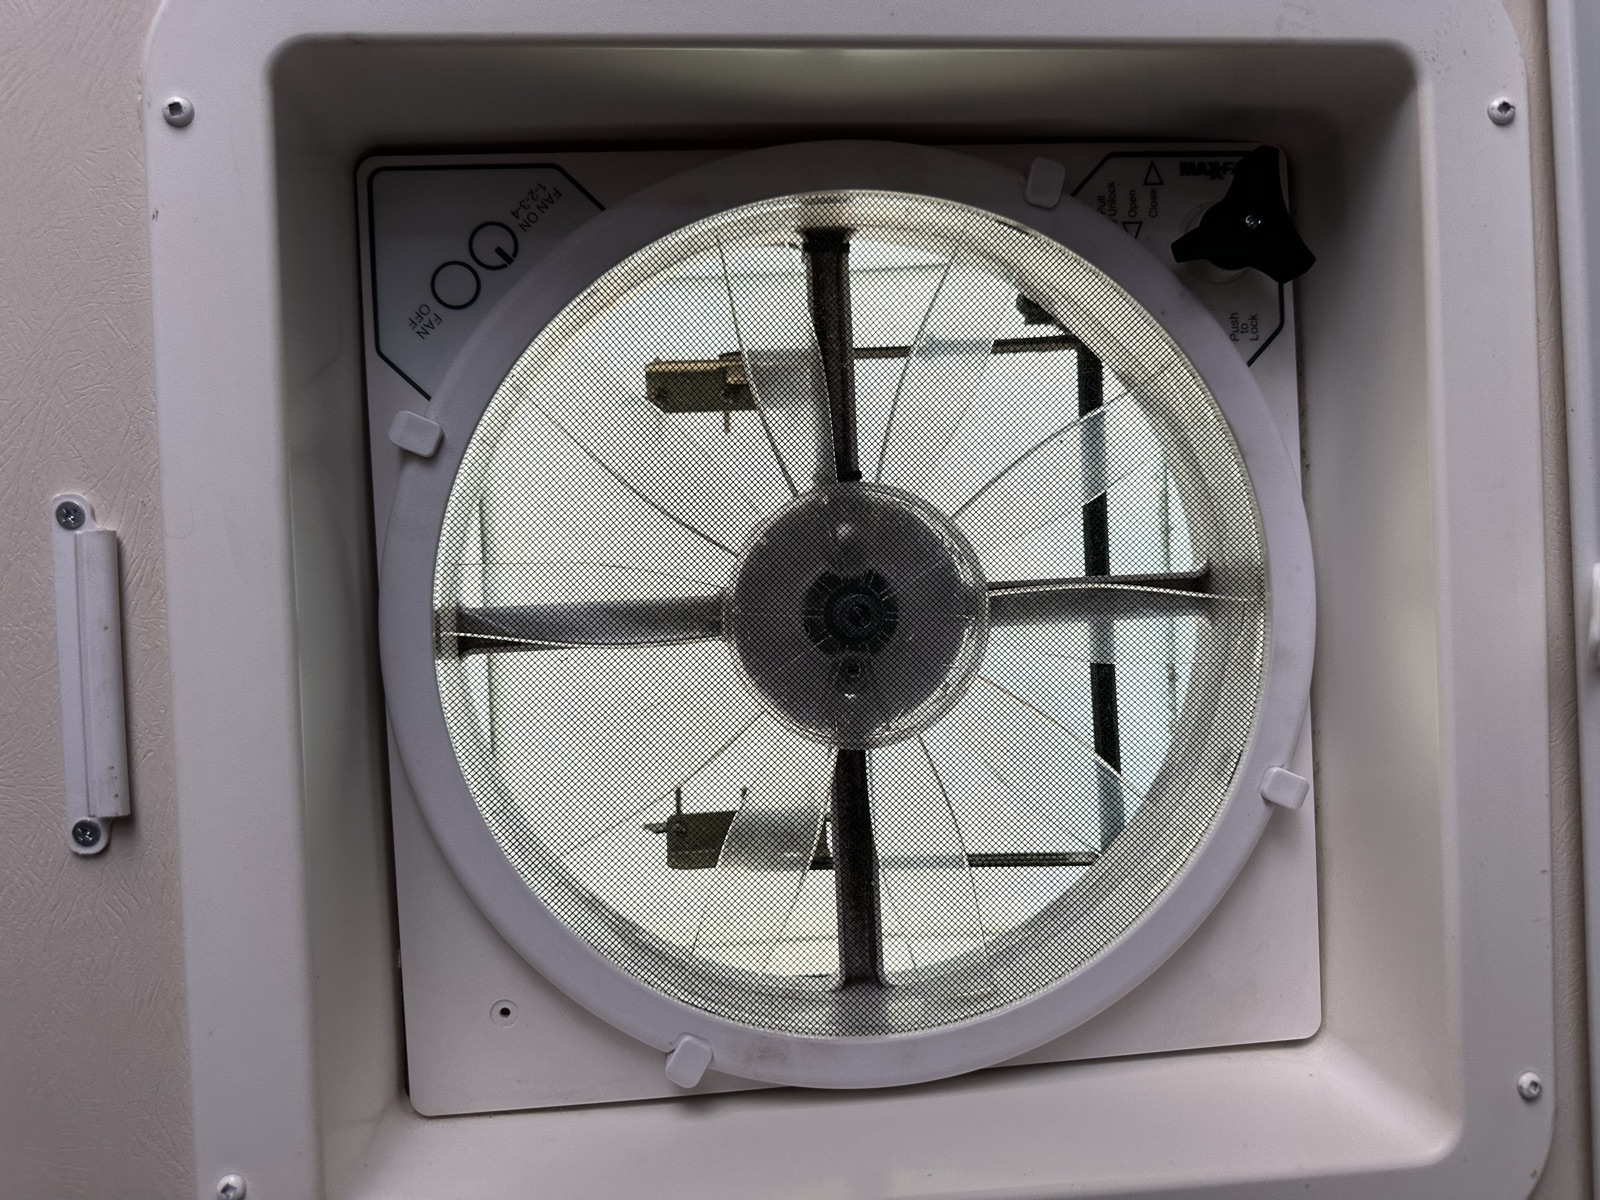
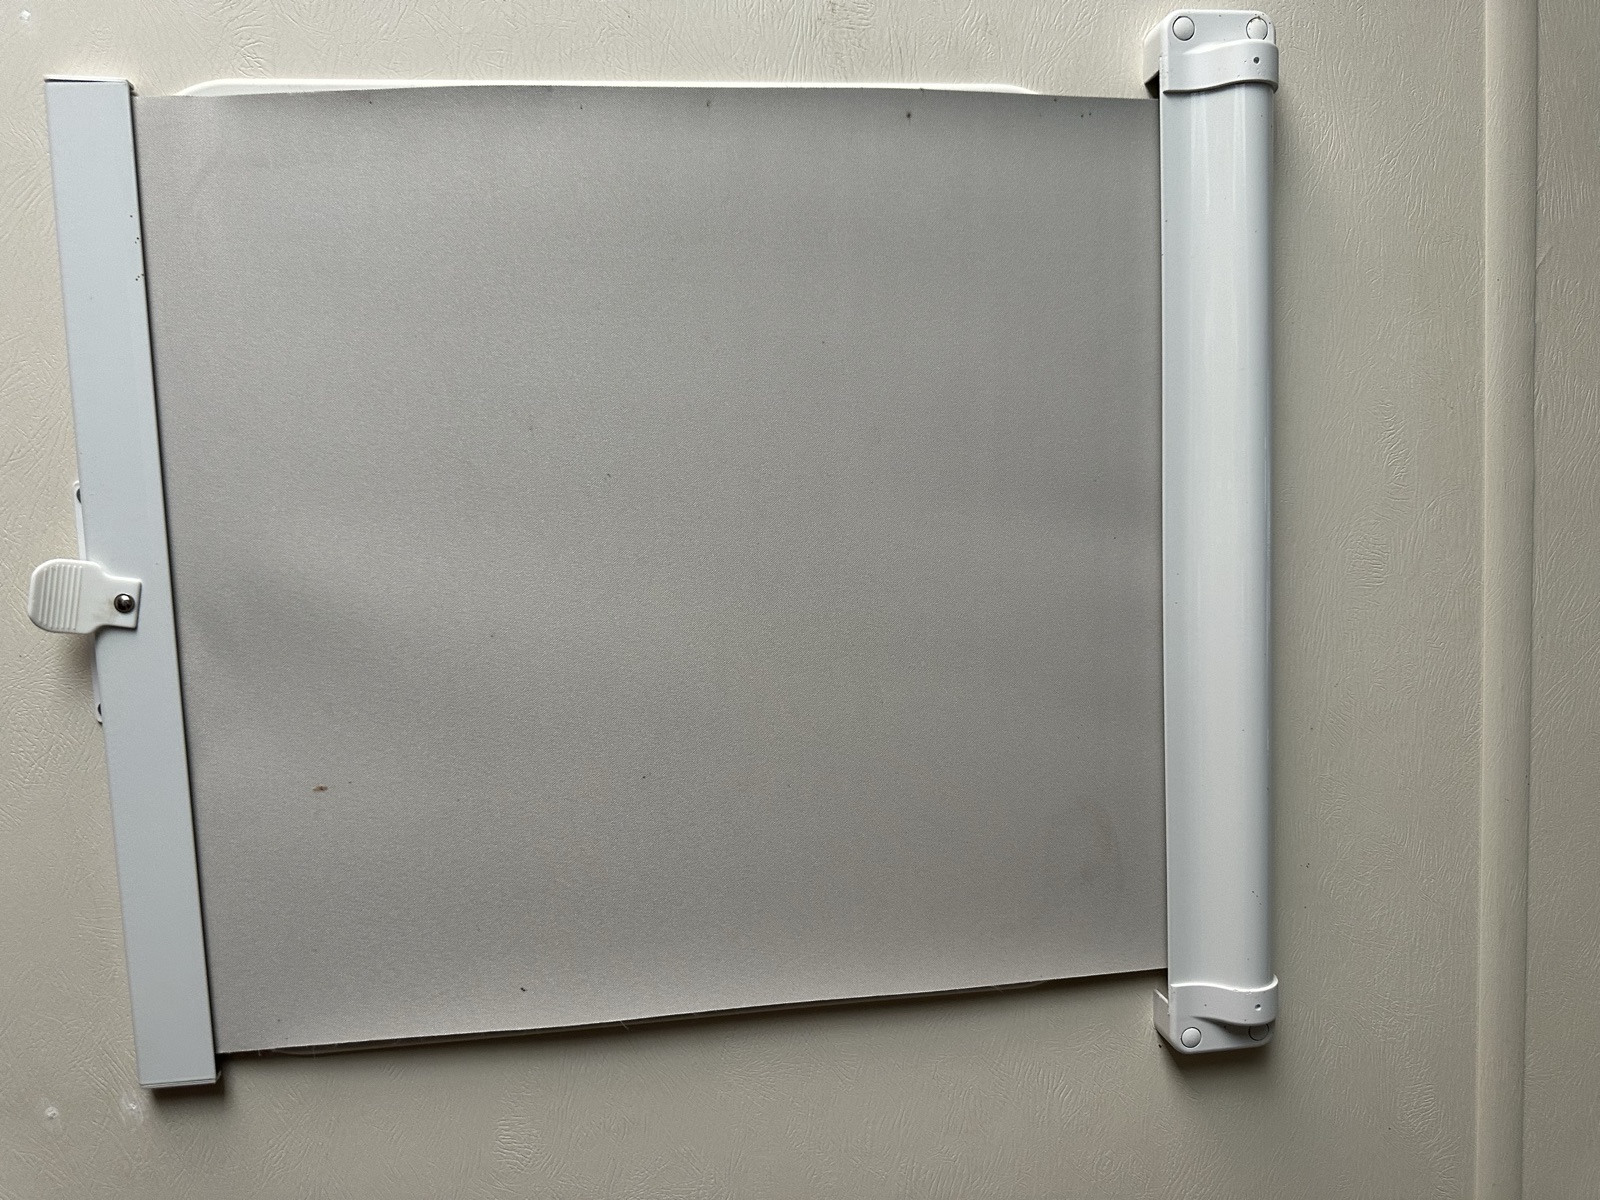
IMG_7973 Roof fan — black unlock button and rotate handleIMG_7974 Same fan + the skylight blinds
Two powerful roof fans. They make a real difference on warm days. The skylight above the kitchen table and the fans both have blinds to block light when needed.
Do
Pull the black button DOWN to unlock the vent.
Rotate the handle to open or close the vent.
Push the button back UP to lock the vent in position.
Use the on/off + speed buttons to control airflow.
Caution
Only run the fans with the vent open AND another window or door cracked — otherwise they pull a vacuum and don't move air.
While driving: OK to leave the vents partially open and locked (small gap, then push the black button up to lock) with the fan running for hot-day airflow. Fully closed in heavy rain. Side windows must always be closed before driving — only roof fans get this exception.
10 — Sleeping spaces
The RV sleeps a family of four-to-six depending on how you configure the dinette. The over-cab bunk is always ready to use. The rear bed is a rear-slide couch that converts to a queen — see the conversion steps below.
Rear couch → queen bed draft★ quick-ref
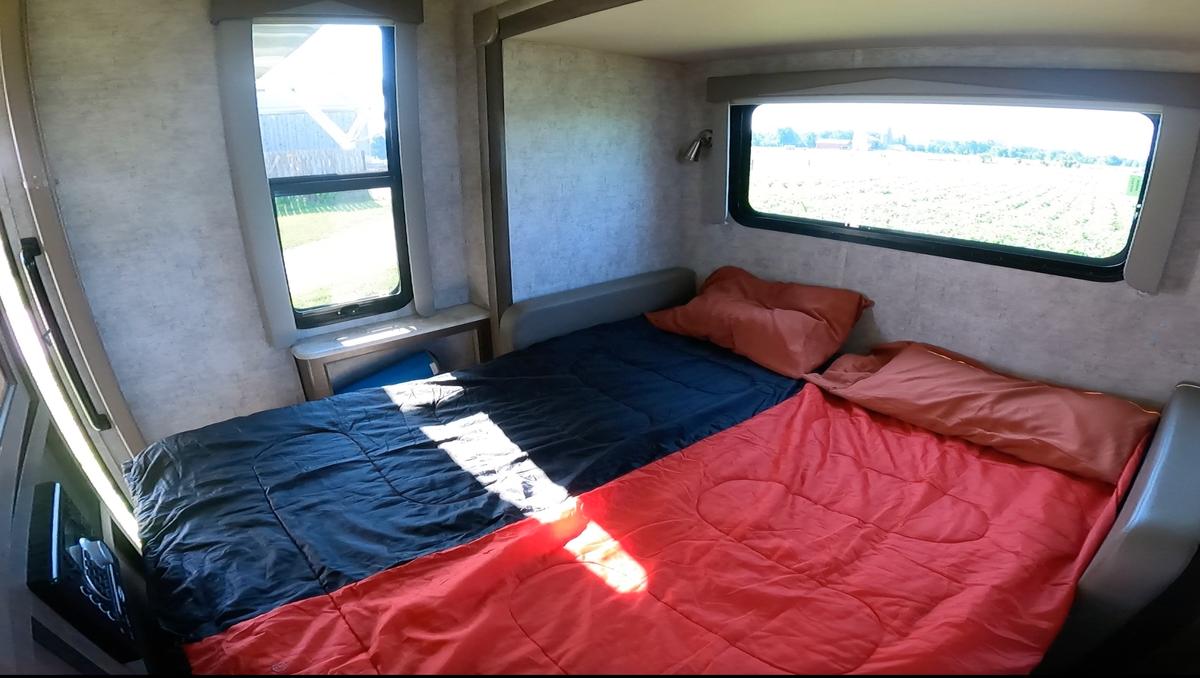
SCR-rear-queen Rear queen bed (slide extended, bed configuration) — windows on both sides, reading lights above each pillow.
The very back of the RV holds a rear couch in the back slide that converts into a queen-size bed. By default — slide extended or retracted — it's a couch. To sleep on it, you unfold it after the left/back slide is extended (see the slides control). Windows on both sides, reading lights above each pillow once it's set up.
Do
Confirm the back slide is fully extended before starting — the unfolded bed needs the extra floor area.
Unclip the back cushions from the wall and lay them on the floor — NOT covering the heating vent / floor register.
Grab the handle in the middle, below the seats, and pull the seat block up and forward.
Extend the legs and unfold the second half to the floor (the seat block is folded in two halves).
Rotate the couch back panel (the vertical part where the back cushions were clipped) down to cover the hole where the seats used to be.
We provide a small queen mattress topper — lay it on top for extra comfort.
Caution
🛑 Never use this bed while driving. It only exists when the back slide is out, and the slide must be retracted before any movement.
Linens (sheets, duvet, pillows) are an optional add-on — confirm with us at booking what's included for your trip.
Reverse the process before retracting the slide. Bed folded back into couch form, cushions clipped to the wall.
Photos still needed
Same area in couch configuration (slide out, before unfolding) — for comparison
Dinette → 2-person bed draft★ quick-ref
The dinette converts into a small two-person bed, best suited for two kids (or one adult who likes a snug fit). The table and its post come out entirely, the middle seat slides into the gap, and a dedicated filler cushion plugs the hole the middle seat left behind.
Do
Clear the table completely — no dishes, no laptops, nothing on the surface.
Lift the table OFF its post and pull the post out of the floor mount. Store both somewhere out of the way.
Slide the middle seat into the open space where the table used to be — it fills the gap between the two benches.
Plug the middle seat's now-empty hole with the dedicated filler cushion stored in the RV — it makes the bench surface continuous again.
Caution
Best for kids or a single adult. Two adults will be cramped.
Reverse the process before driving. Table + post reinstalled, middle seat back where it belongs, filler cushion stowed. Nothing loose in the cabin while moving.
Photos still needed
Dinette in seat configuration (the everyday view)
Dinette in bed configuration (table dropped, cushions flat)
Over-cab bunk draft★ quick-ref
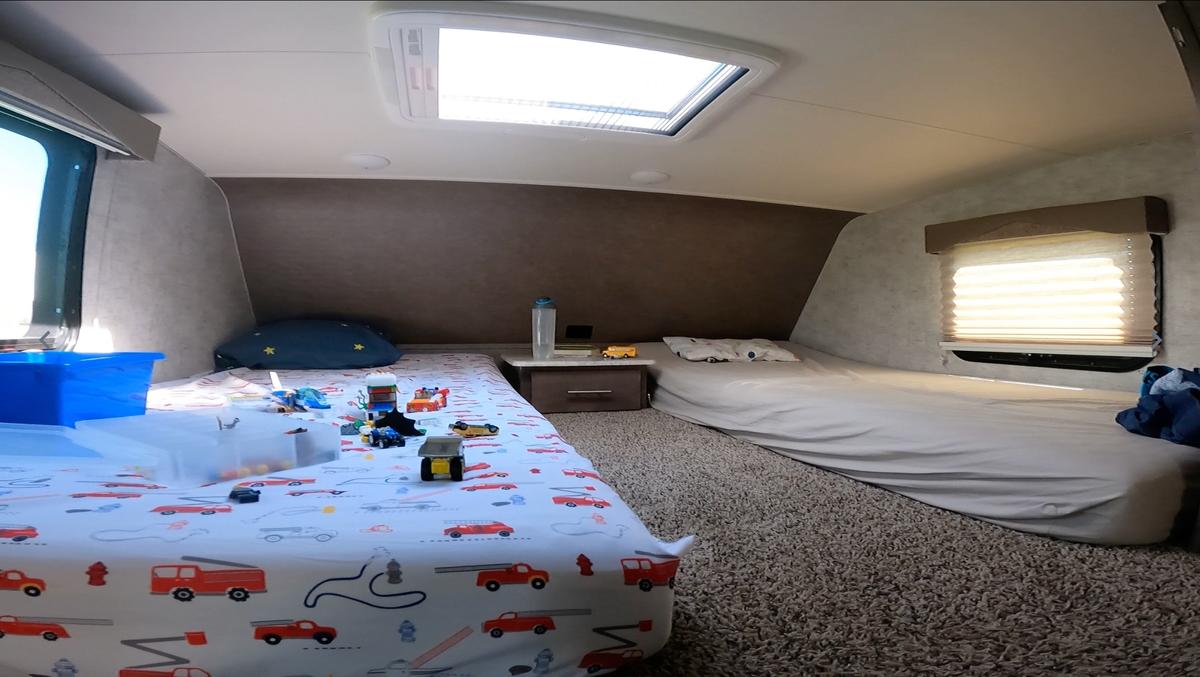
SCR-overcab-bed Over-cab bunk — skylight + side window, accessed by the ladder behind the driver's seat.
Above the driving cab is a large bunk that sleeps two adults or three kids — it spans the full width of the RV. Skylight above, a small side window with a blackout shade. Climb up via the ladder behind the driver's seat.
Do
Use the ladder — don't try to swing up from the dinette.
Caution
Headroom is limited — sit up slowly. The padded ceiling helps but it's still close.
Linens (sheets, duvet, pillows) are an optional add-on — confirm with us at booking what's included for your trip.
Never use the over-cab bunk while driving. Seatbelts in the cab are the only safe seats in motion.
11 — Bathroom
Bathroom faucet & shower draft★ quick-ref
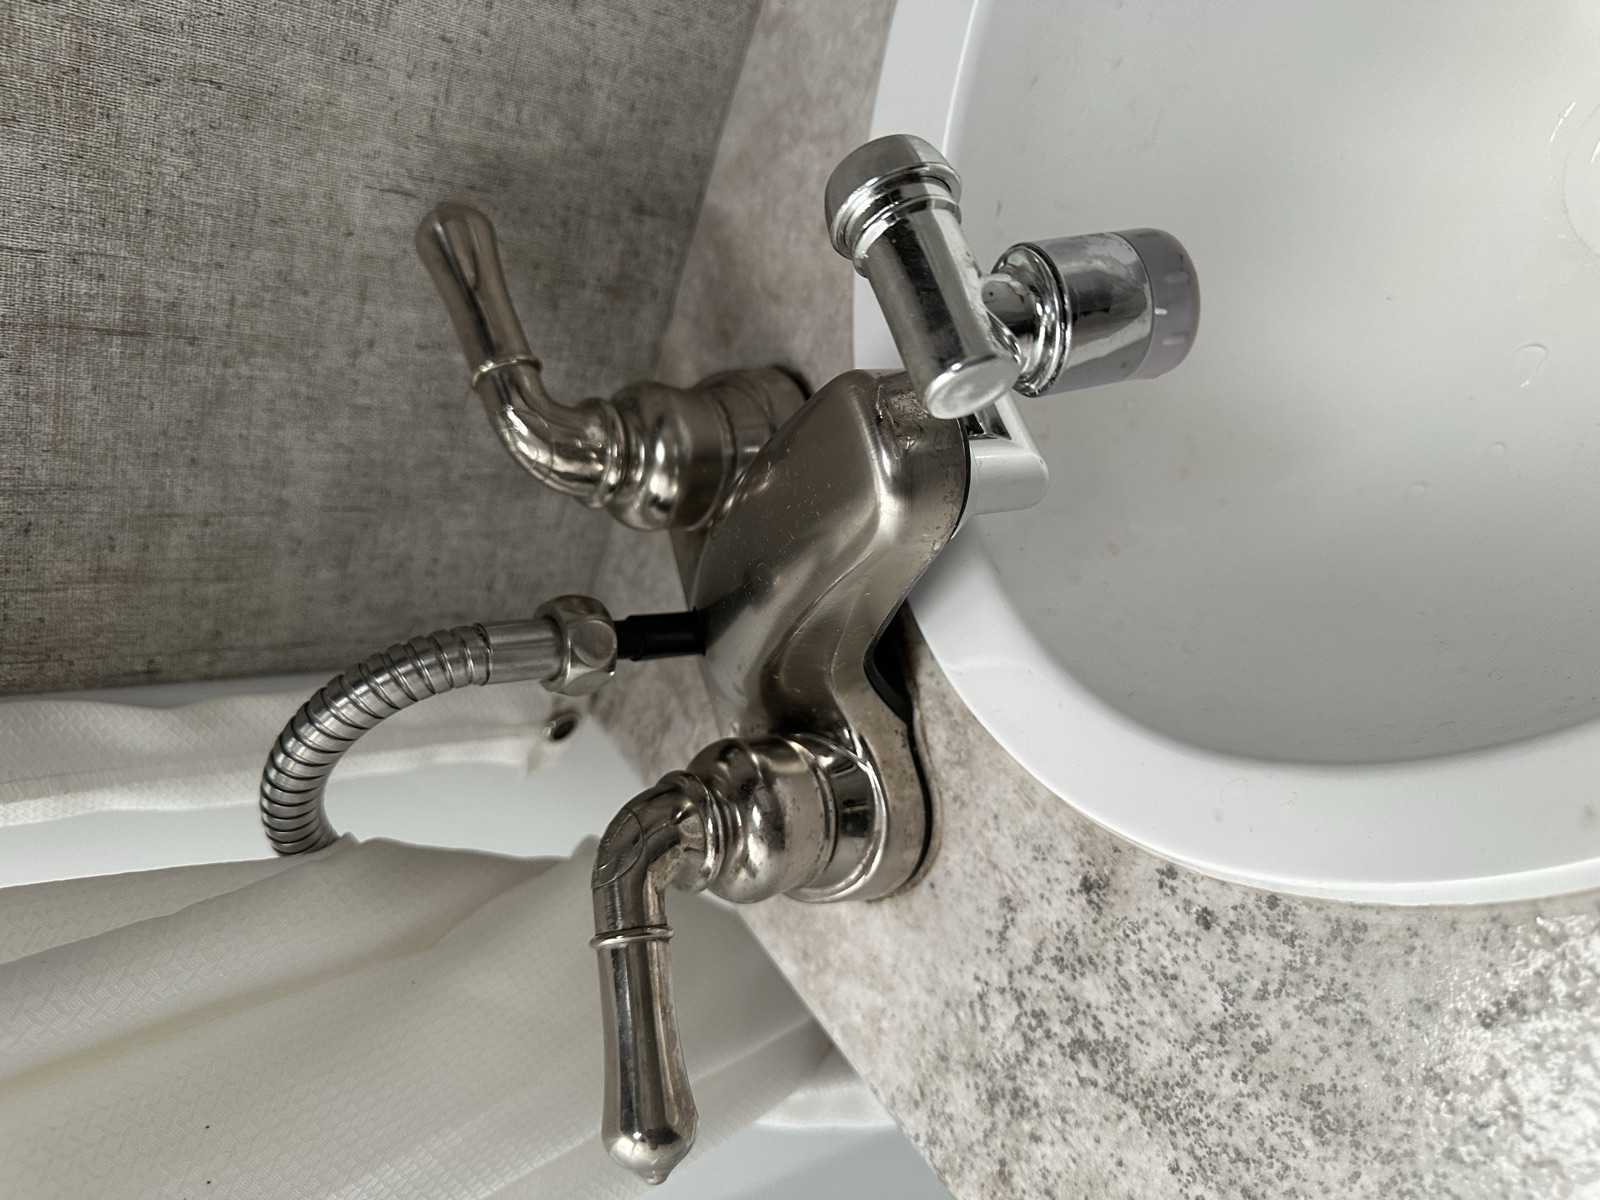
IMG_7975 Bathroom faucet — shared with the shower
One set of plumbing serves the bathroom sink AND the shower.
Do
Pull UP on the shower diverter to send water to the shower head.
The shower head has its own water-stop button — useful for soaping up without losing water.
If no water comes out of the shower: check that the shower head's stop button is OPEN.
Caution
Sink + shower wastewater goes to the grey tank. Watch the level.
Toilet draft★ quick-ref
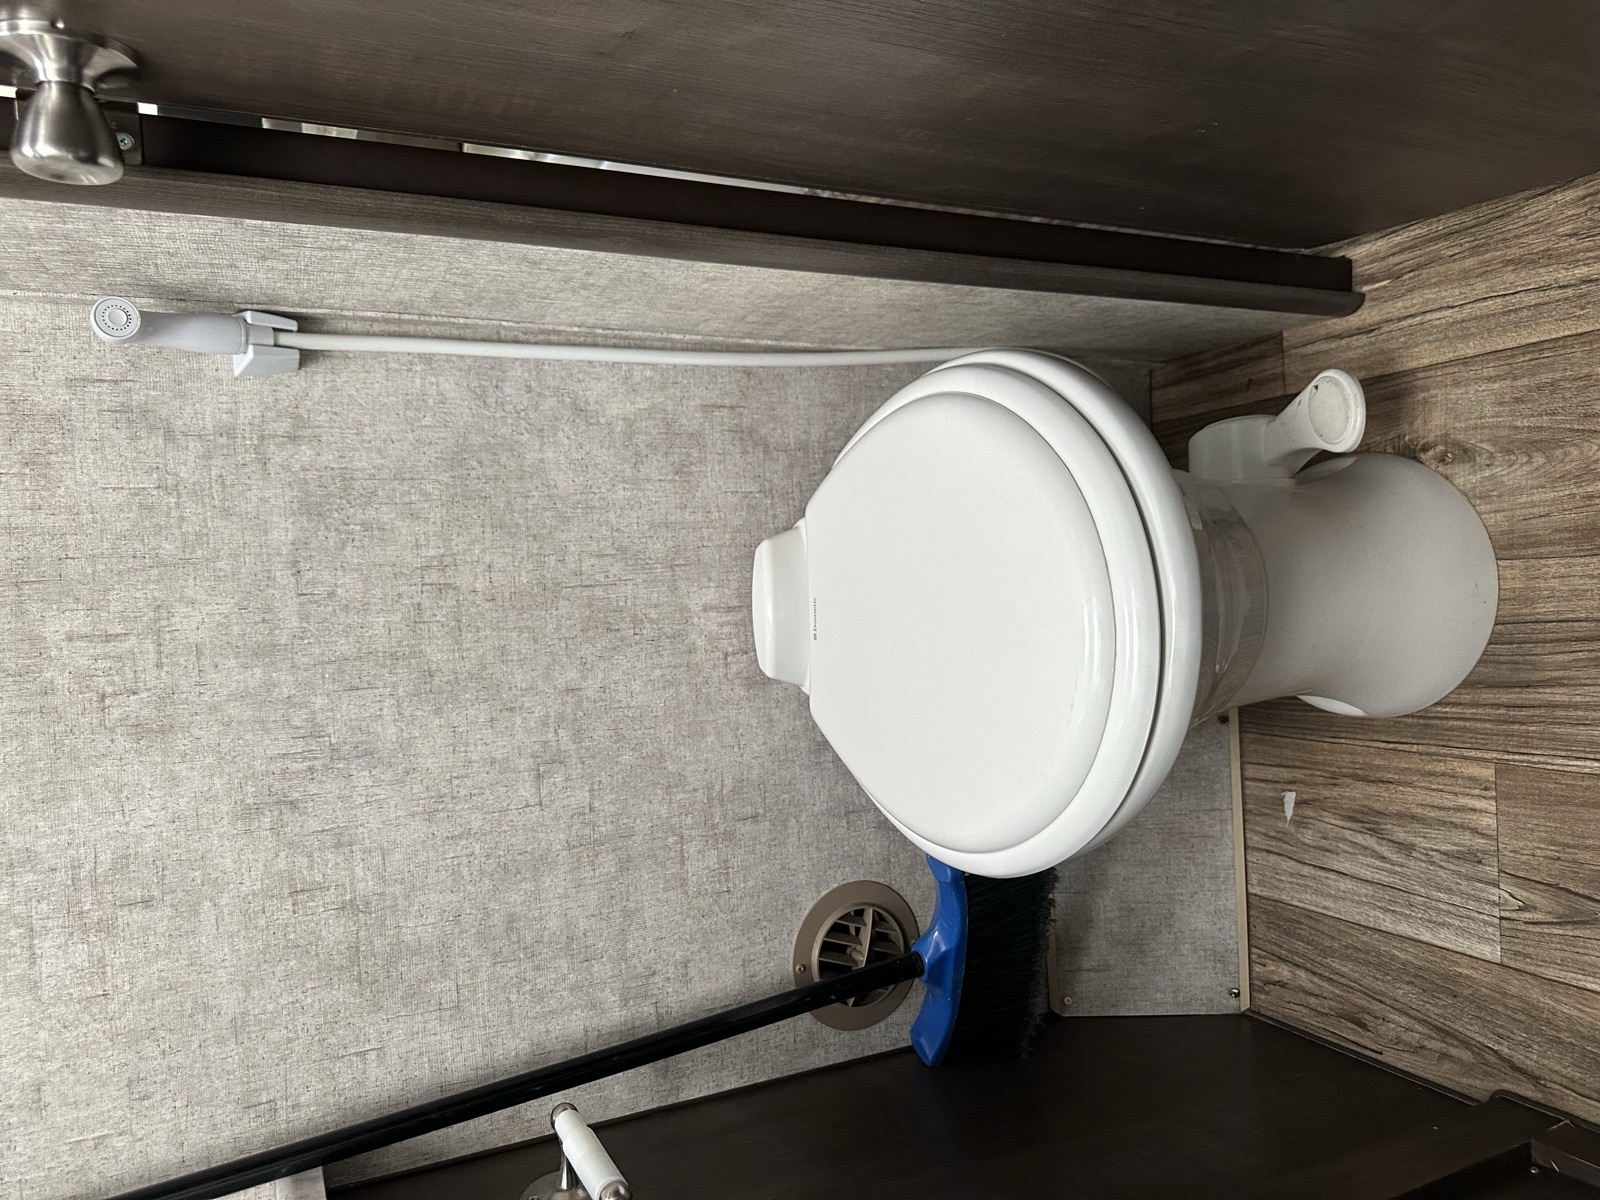
IMG_7976 RV toilet — flush pedal at bottom right
Standard RV toilet. Drains directly to the black tank.
Do
Flush: press the pedal at the bottom right of the toilet base.
Use RV-safe toilet paper only (thin, dissolves quickly).
Caution
🛑 Never put anything down the toilet that isn't body waste + RV-safe toilet paper. Wipes, paper towels, feminine products all stay in the tank forever and contribute to the poop pyramid.
12 — Safety equipment
Smoke detector review★ quick-ref
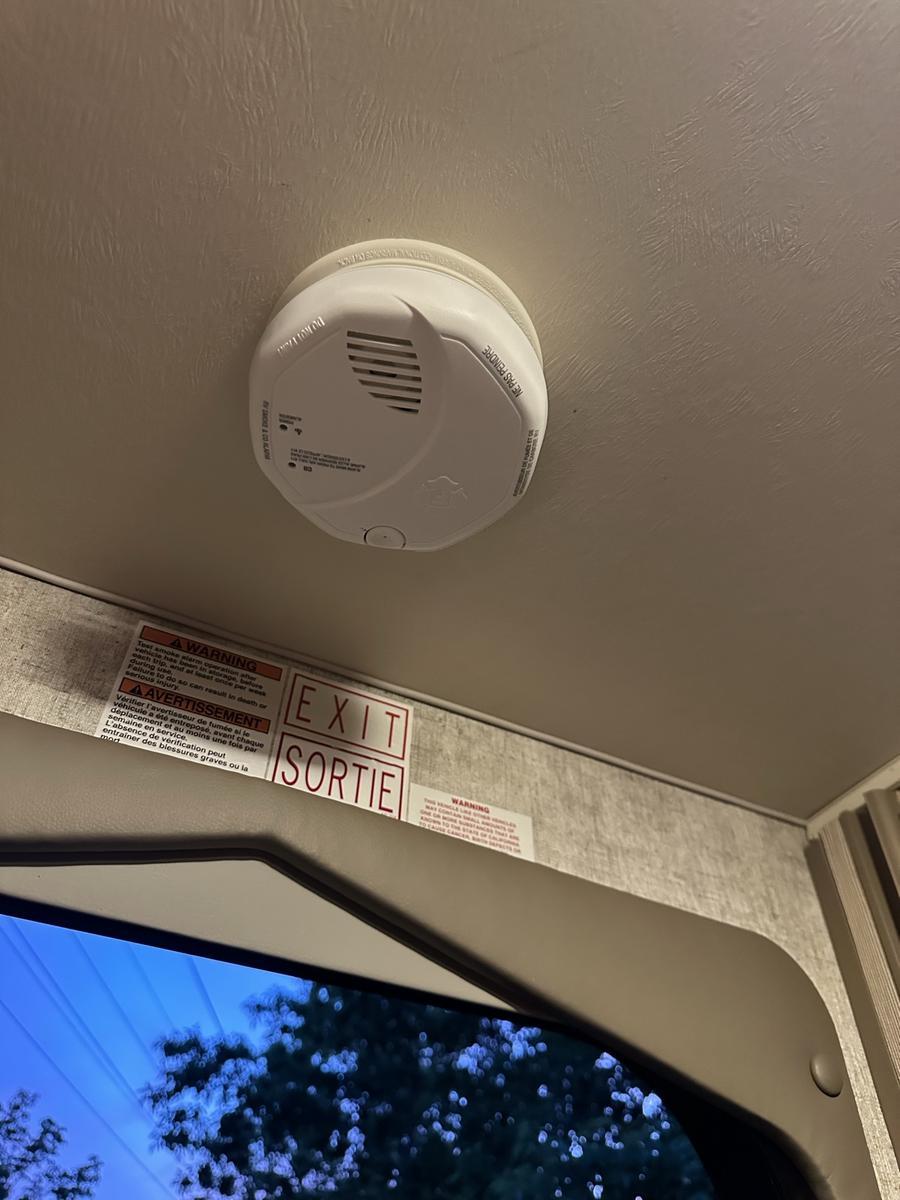
IMG_8058 Smoke detector — location
Dedicated smoke detector (separate from the CO/smoke detector on the main control panel).
Do
Test by pressing the center button briefly — a single chirp confirms it's working.
Caution
🛑 If it alarms: open windows, close the propane valve outside, get everyone out of the RV, then call us. Don't reset until ventilated.
Never remove the battery to silence a nuisance alarm — fix the cause (cooking smoke, dust) instead.
Fire extinguisher review★ quick-ref
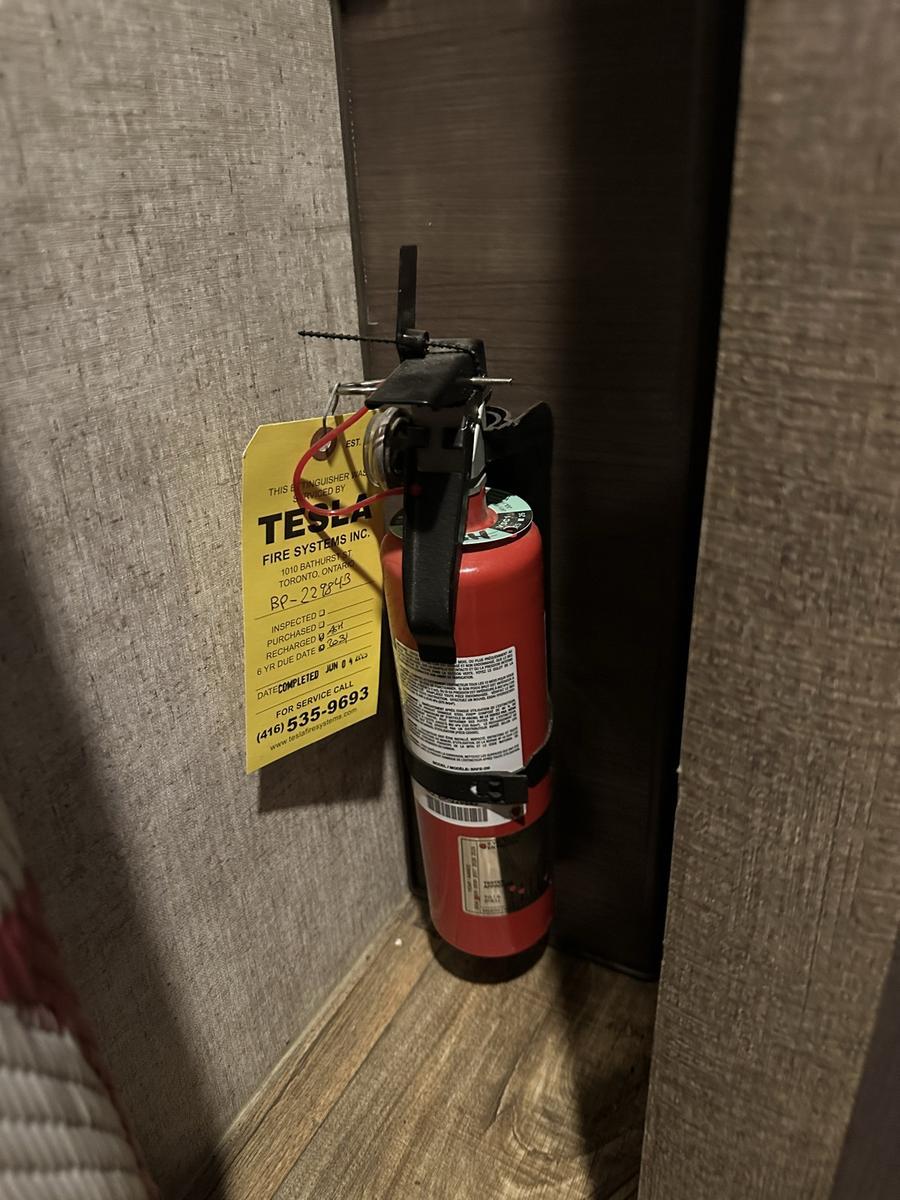
IMG_8059 Fire extinguisher — location
A small extinguisher rated for kitchen and electrical fires (Class A/B/C). Know where it is — you don't want to be looking for it while a pan is on fire.
Do
On pickup: confirm the gauge needle is in the green. If it's not, tell us before you drive off.
Caution
🛑 For a kitchen fire: turn off the propane stove burner if safe to do so, then aim the extinguisher at the base of the flames (not the top). Sweep side to side.
🛑 Grease fire: never use water — it spreads the fire. Use the extinguisher or a metal lid to smother.
After any use (even partial): tell us so we can replace it. A partially-discharged extinguisher may not fully work next time.
That Parkdale RV — Operational checklists
Step-by-step procedures for the situations you'll handle most often — arriving at a campsite, leaving, dumping the tanks, and refueling.
📱 Use these live on your phone at the campsite. Tap the green number next to each step to check it off as you go. Your progress is saved in this browser, so you can close the page and come back later without losing your spot. Each checklist also has a Reset all checks button when you're ready to start fresh.
Arriving at your campsite
From check-in to settled — in order
Pull in slow. Everyone stays seated until the RV is parked, leveled, and chocked. Then unhook anything you brought.
1. Check in and read the site
Check in. Take the site number and the car/site receipts with you.
Get out alone. Keep everyone else seated until you've parked. Walk the site once and decide:
Where are the hookups (power, water, sewer)?
Where's the flattest spot within reach of the cords/hoses?
Any branches at RV height (11'6") to avoid?
Anything to drive over: roots, holes, firepit, stumps?
Enough clear space at the back AND the left side for the slides and the awning?
2. Position, then level
Back the RV into the spot you picked. Set to Park. Engine off.
Level the RV using the wooden planks from the left storage bay:
Place 1–2 planks in front of the wheel(s) that need to go up.
Back axle is dual. Stack planks under BOTH back tires on the side you're raising, not just one.
Clear everyone from around the RV.
Have someone watch the wheels. Drive forward up the planks slowly.
Stop when the RV is level — use your phone's level app if needed. Set to Park.
⚠ Can't get level with 3 planks? Reposition the RV — don't stack higher. Stacked planks slip.
Confirm Park mode.
Place a wheel chock against the downhill side of one tire.
Everyone can come out now.
⚠ If the fridge starts buzzing or running noisy after a few hours, you're not level enough.
3. Hookups (only if the site offers them)
Power — connect cord, then flip the breaker:
Pedestal breaker: OFF.
Plug into the RV first. Then plug into the pedestal.
Pedestal breaker: ON.
⚠ Connecting a live cable to the RV is how cords get arc-burnt. Breaker stays off until both ends are seated.
Power on a 15A household outlet — use the 30A→15A adapter:
Adapter goes between the cord and the outlet.
Don't run the air conditioner. 15A can't carry it — you'll trip the breaker (or worse).
Fresh water — only the blue potable hose, never the sewer hose:
Connect to the campsite tap AND to the RV city-water inlet.
Open the tap slowly.
Listen at the RV. Constant running sound = a tap was left on inside.
Sewer — connect the hose now, but keep the valves CLOSED:
Uncap the RV sewer outlet.
Connect the sewer hose: RV end first, sewer-port end second.
Both Valterra valves stay PUSHED IN (closed) for the whole stay — yes, even though you're connected to sewer.
⚠ Do NOT leave the black valve open at a full-hookup site. Liquid drains, solids don't — they harden into a “poop pyramid” at the tank bottom that may need professional removal. Dump in place when the tank is 2/3+ full (use the “black sandwich” procedure), then close immediately. Keep grey closed too — you'll need that water to flush the hose.
4. Open everything up
Remove the bikes from the rear rack.
Lean the rear bike rack back, fully. The back slide will hit it otherwise.
Close the back-left trunk door (the big trunk with the leveling blocks and cables).
⚠ Its door swings up through the left slide's travel path. If it's open when the slide moves, the slide crushes the door — and damages itself in the process. Trunk closed BEFORE you touch the slide switch, both directions.
Walk inside. Confirm both slide paths are clear — nothing on the dinette/bed that will get pinched.
Open the left slide — hold the switch until fully extended.
⚠ Stop instantly if you see anything in the path or hear unusual resistance. Finishing through an obstacle damages the slide. Preference is to run fully open in one go; safety overrides preference.
Open the back slide — only after confirming the bike rack is leaned back.
Open the awning if there's room overhead. Release the switch at the length you want.
Set power steps to locked position.
Pop the door handle out.
Leaving your campsite
Don't drive off until everything below is done — in order
Most expensive damage on this RV happens at departure: slide hits an open trunk, awning catches a branch, hose drags in the dirt. Go in order. Don't skip the final walk-around.
Inside — close, lock, secure
Close and latch every cupboard and drawer (test by pulling).
Close and lock the front loft skylight and windows.
Pull the ladder down. Stow it flat under one of the mattresses.
Bathroom roof vent: off, closed.
Central and rear roof vents: off and closed — or, on hot days, partially open and locked with the fan running for airflow while driving (rain = fully closed).
Close every window: kitchen, dinette, and both rear windows.
Close and lock the fridge door (one click isn't enough — it must click twice).
Pack away every loose item. Anything that can roll, will.
Set the thermostat to OFF (both AC and furnace).
Retract the back slide all the way in.
⚠ Look outside before retracting. Bike rack folded back? Branches clear? Awning above retracted? And: stop instantly if you see anything in the slide's path or hear unusual resistance — finishing through an obstacle damages the slide.
Retract the left slide all the way in.
⚠ Close the back-left trunk door FIRST. That's the big trunk with the leveling blocks and cables. Its door swings up into the slide's path — if it's open when the slide retracts, the slide crushes the door, and both get damaged. Same safety rule: stop the slide instantly if anything is in the way.
Kill every light: interior, entry, exterior, awning.
Outside — disconnect and stow
Unplug the power cord at the pedestal first, then at the RV. Roll it up. Stow it.
Disconnect the fresh water hose. Rinse, drain, roll. Stow it on the clean side of the storage.
Empty and disconnect the sewer hose. Rinse inside and out. Stow it in its own compartment.
⚠ Never store the sewer hose touching the potable hose. Use a separate bag/compartment.
Reinstall the bike rack upright. Mount bikes. Lock them.
Water pump: OFF. Water heater: OFF.
Awning: fully retracted (in). Awning light: off.
Power steps: normal (auto).
Close and lock the camper door. Retract the door handle.
Confirm the steps are fully retracted (up).
Final — wheels rolling, brain awake
Everyone seated and belted inside.
Remove the wheel chock(s).
Move the truck off the leveling planks. Set to Park.
Stow the planks in the left storage bay.
Walk every outside trunk. Close. Lock. Tug.
Walk around the RV once. Look up AND down.
Windows: all closed?
Slides: all the way in?
Awning: all the way in?
Steps: up?
Doors and trunks: all locked?
Site: nothing left behind (cords, chairs, chocks, kids)?
Ask a passenger to do the same walk while you watch from the driver seat (when you can).
Now drive.
⚠ If you skip the walk-around, the next bump will tell you what you missed — usually loudly.
RV sanitary station
Empty grey + black tanks. Top up fresh.
Return the RV with both waste tanks empty or pay a $150 dump fee. Park left-side close to the hole. Gloves live in the back-left trunk. Black water is biological — gloves on the whole time.
1. Set up
Secure the RV keys in a zipped pocket or the truck cup-holder — NOT loose in a pocket near the dump hole.
⚠ True story: keys have been dropped into the sewer hole and were not recoverable. Don't be that renter.
Park with the RV left side within hose-length of the dump hole.
Open the back-left trunk. Put on the gloves.
Open the small square door on the left side of the water-management bay. Pull out the sewer hose.
Connect the RV end of the hose to the RV sewer outlet. Twist to lock.
Lead the other end into the dump hole. Weight it down if the hole is shallow.
Tug both ends. If anything pops, fix it before opening a valve.
⚠ Open the black valve with one end unsecured = raw sewage on the pavement. And on you.
2. Dump — the “black sandwich”
Open the GREY valve for 1–2 seconds. Close it.
⚠ This wets the hose so black-tank solids slide instead of stick. Skip this and you'll be poking a hose with a stick.
Open the BLACK valve. Wait until the flow stops completely (~30–60 seconds).
Open the GREY valve. This flushes the hose with grey water.
When grey stops flowing, close it. Both valves now closed.
3. Disconnect and stow
Unplug the RV end of the hose. Tilt it to drain residual into the dump hole.
Rinse the hose inside and out with fresh water (tap usually next to the hole).
Stow the hose back in its compartment. Close the small door.
Cap the RV sewer outlet with the black cap. Twist tight.
Close the water-maintenance door.
Gloves off. Back in the back-left trunk. Close it.
Wash your hands before touching the steering wheel.
4. Top up fresh water (optional)
Potable water tap is usually right next to the dump station (someone can dump while you fill — saves time).
Use the BLUE potable hose only. Never the sewer hose, even rinsed.
Open the fresh water inlet door on the right side of the RV. Connect.
Fill only what you need on the road.
⚠ 60 gal = 225 kg of dead weight. Drive with a half-full tank if your destination has water.
Gas station, propane, and generator
Refuelling, refilling, and powering on
Diesel-only truck. DEF is the second tank you'll learn to fill. Propane is for cooking, heating, the fridge, and the generator.
Diesel refill
DIESEL ONLY. The yellow pump handle. Never the green/black gasoline ones.
⚠ A gas-in-diesel mistake destroys the engine and isn't covered by insurance. Read the pump handle twice.
Fuel cap is on the driver (left) side, far back. Walk to it before pulling in — it's much further back than a car.
Pull in so the pump hose reaches the cap without stretching.
Fill. Replace cap. Close the access door.
DEF (Diesel Exhaust Fluid) refill
The dashboard will warn you when DEF is low — one tank lasts thousands of km, so this is rare.
DEF cap is blue. It sits on the front face of the RV body, left side, exactly where the RV body meets the back of the truck cab — right next to the rear driver-side cab door. See IMG_8009 in the walkthrough's left-side overview.
Buy DEF in 10 L jugs (gas stations, Canadian Tire). Some pumps dispense DEF directly.
Fill slowly using the jug's hose.
⚠ When the jug spits fluid back, STOP. Wait for pressure to drop. Then continue until truly full. Pushing through spit-back = DEF all over the side panel (and DEF stains).
Propane refill
We hand you the RV with enough propane for a typical trip. Any refills during your trip are at your own expense.
A full tank lasts a long time: ~1/8 of a tank per week for fridge + stove. The furnace burns more in cold weather.
Refill before the gauge reads empty — don't run it dry.
Find a station: most gas stations, all Canadian Tire stores.
Propane door is on the right side — the ONLY outside door without a key lock.
Before the clerk refills:
Turn off the furnace, water heater, fridge, and stove.
Close the propane valve at the tank.
The clerk handles the actual transfer.
Start the generator
Confirm the propane tank valve is OPEN. (Generator runs on propane.)
Inside, at the panel near the microwave: press and hold STOP/PRIME until the indicator light is solid.
Press and hold START until the generator engages and runs steady.
Wait ~45 seconds for stable AC output. The microwave clock will beep when power is ready.
To stop: press and hold STOP until the generator powers down completely.
⚠ Running the generator overnight burns serious propane. Check the gauge if you've been generator-only for more than a few hours.
FAQ
Short answers — click through for full detail
Driving the RV
Will it fit under that bridge?
Height is 11'6" (3.50 m). Length 30'0", width 8'6", weight 19,500 lb. Use a truck-aware navigation app — regular Google Maps will sometimes route you under low bridges.
Why does it feel like the rear is swinging wide?
Because it is. The RV body extends ~4–5 feet behind the rear wheels. When you turn, the rear swings opposite to the turn — turning left swings the rear right, and vice versa. Take wider turns than feels natural; watch your rear corners.
My iPhone says 'AirTag Found Moving With You' — what is that?
That's us. We have two AirTags installed to help recover the RV in case of theft. Never to track you, your phone, or your trip. The alert is expected — dismiss it safely.
Can I drive with a window cracked open?
No. Highway airflow can rip windows off their hinges. Close every window and roof vent before driving — it's the first step on the Leaving checklist.
Can I drive with the roof A/C on?
No. The roof A/C only runs on 30A shore power, which you obviously don't have while driving. Use the truck cab's dashboard A/C for the front seats while on the road.
For airflow in the back of the RV: the roof fans can be partially opened (and locked in that position) and turned on while driving if it's hot inside. Crack them open just a bit, lock with the black button, then turn the fan on. Side windows must always stay fully closed though; highway airflow rips them off their hinges.
Other tricks for hot days:
Run the roof A/C before leaving the campsite to pre-cool the cabin.
At rest stops, park in shade.
On arrival, hook up to 30A shore power and the roof A/C will recool the cabin.
Power & electrical
Can I run the A/C on a 15 amp outlet?
No. The roof A/C needs a 30A shore connection. On a 15A campsite outlet the breaker trips immediately. See the A/C stop.
What can I run on a 15 amp outlet?
Lights, fridge (on 120V mode), TV, charging USB/laptop, microwave briefly. Not the A/C, not the microwave + something else simultaneously. The cables stop shows which adapter to use.
What stops working when I'm not connected to shore power?
A few things on the RV are 120V-only and won't run on the house batteries — so they need a shore-power hookup at the campsite:
Standard wall outlets (the 3-prong household-style outlets) — for laptops, phone chargers, hair dryers, etc. The USB ports built into those outlets are also 120V and won't work off-grid.
Everything else works fine off-grid (boondocking):
When black or grey hits 2/3 full (just one third of capacity left), or when fresh drops to 1/3. Check from the top-right of the control panel.
What's the 'black sandwich' and why?
The dump procedure: open grey for 1–2 seconds to wet the hose → close grey, open black → open grey again to flush the hose. Wetting first lets black-tank solids slide; flushing after rinses the hose with clean grey water. Full steps in Sanitary station.
Can I leave the black valve open at a full-hookup site?
NO. That's the #1 way to wreck the tank. Liquid drains continuously while solids stay behind and harden into a cone (the "poop pyramid"). Keep both valves closed during normal use. When the black tank hits 2/3+ full, dump it in place using the “black sandwich” procedure, then close right after. See Water systems.
How long does the fresh water tank last?
60 US gal (225 L). Real-world usage varies a lot — short showers, dish washing, drinking. For 2 people with conservative use, plan ~2–3 days dry. The tank level button on the control panel gives a thirds reading.
I turned on the tap — no water?
Two cases:
At a site with city water: the campsite tap is closed, or the city water inlet isn't connected.
Off-grid: the water pump needs to be ON to draw from the fresh tank.
How long until I have hot water?
~15 minutes after switching the water heater ON. It runs on propane and the tank is small. Turn it OFF before leaving the RV.
Fuel & propane
What fuel does it take?
Diesel only. Yellow pump handle. Gasoline destroys the engine and is not covered by insurance. See Diesel + DEF refill.
What's DEF?
Diesel Exhaust Fluid — required for emissions. Blue cap on the front face of the RV body, left side, where the body meets the back of the truck cab. The dashboard warns you when it's low. One tank lasts thousands of km. Full procedure in the gas station checklist.
How long does the propane tank last?
A full tank lasts a long time — about 1/8 per week for fridge + stove. The furnace burns it faster in cold weather. The propane gauge is on the right side of the RV.
Is propane refill included?
The RV is handed over with enough propane for a typical trip. Refills during your trip are at your own expense.
Setting up at a site
What's the order of operations on arrival?
Survey the site → position the RV → level → set Park → wheel chocks → hookups → open slides + awning. Detailed steps in Arriving at your campsite.
Wheel chocks before or after leveling?
After. If you chock first, the RV can't roll up onto the leveling blocks. See Leveling then Wheel chocks.
How many leveling planks can I stack?
2–3 max. If you can't get level with that, reposition the RV on the site instead. Stacked planks slip. Remember the back axle is dual — set planks for both tires per side.
How do I know if I'm level enough?
Use your phone's level app (iPhone Compass app has one built in; Android: Measure or any level app). Subtle test: leave the fridge running for an hour. If it buzzes or sounds rough, you're not level.
Slides, awning, steps
Can I stop a slide mid-travel?
Yes — if anything is in the way or getting squished, STOP IMMEDIATELY. Safety wins over everything else. The *preference* is to run the slide fully in or fully out in one go (avoids desyncing the two motors), but a motor desync is far cheaper to fix than a crushed obstacle. See the slide stop for the full warning + desync recovery.
Why do I have to close the back-left trunk before moving the left slide?
That trunk's door swings up into the left slide's travel path. Open trunk + moving slide = crushed door + damaged slide. Trunk closed BEFORE the slide moves, both directions. See Large left storage.
Why lean the bike rack back before the back slide?
Same problem — the back slide hits the bike rack on the way out. Bikes off, rack folded back, then open the back slide.
When should I retract the awning?
At the first sign of wind or rain. Never leave the awning open unattended. A gust can rip it off — that's a multi-thousand-dollar mistake.
Steps switch UP or DOWN?
DOWN (locked): parked at a campsite — steps stay out so they don't cycle every time someone opens the door.
UP (normal): driving / on the road — steps retract when the door closes.
Inside the RV
The fridge handle won't open — is it broken?
No — there's a small latch button on the handle you must push first, then pull. If you just pull, nothing happens. See the fridge stop.
What mode should the fridge be in?
Auto. It uses 120V when shore power is connected and switches to propane when off-grid. Do not run it on 12V — it drains the batteries fast.
Utility doors key — grey keyhole (fresh water inlet, water systems bay…)
Why does the propane door have no lock?
It's the only outside door without a key lock — by design (some propane-refill stations need access from outside). Use it as a landmark to locate the propane compartment.
The CO/smoke detector is beeping. What do I do?
Open windows.
Close the propane valve outside.
Get everyone out of the RV.
Call us.
Before driving off
What's the most important pre-departure check?
The walk-around. Look UP and DOWN around the entire RV. Slides in? Awning in? Bike rack secured? Trunks locked? Windows closed? Steps up? Hose disconnected? Cord stowed? See the full Leaving your campsite checklist.
I'm in a rush — what can I skip?
Nothing. Most damage to this RV happens when someone is hurrying. Build in extra departure time before every move.
Pre-pickup quiz
Complete this before your scheduled pickup. Multiple attempts OK.